The call usually starts the same way. A homeowner in Middletown or New City has boxes stacked on the floor, kitchen counters getting buried, and that one blank wall everyone swore they'd do something with two years ago. By the time I walk in, the problem isn't really the wall anymore. It's that the house doesn't have enough usable storage where people actually live every day.
One thing folks don't realize until they start loading things up is how much weight shelves really carry. A 36-inch shelf filled with hardcover books, serving bowls, or laundry supplies can hit 80 to 120 pounds faster than you'd think. In a lot of older Hudson Valley homes, especially pre-1970s capes, ranches, and colonials, that weight is going onto walls that aren't perfectly flat, studs that don't land where the stud finder says they should, or old plaster that's got a few surprises behind it.
That's why good shelving isn't just about making something look nice on Pinterest. It's about choosing the right style, the right depth, the right hardware, and the right installation method for the room and the wall you've actually got. When homeowners ask me about shelving installation Orange County NY, I usually tell them the same thing: the best shelf is the one that fits the room, holds the load, and still looks good five winters from now.
Built-In vs. Floating Shelves: What Works Best
Built-in shelves and floating shelves solve two different problems, and a lot of homeowners mix them up. Built-ins are what I recommend when you want a wall to feel finished and intentional, like a family room media wall, office alcove, or a dining room niche. Floating shelves are better when you want the room to stay light and open, especially in kitchens, bathrooms, bedrooms, and over a desk or bar area. Both can look great, but they need to be sized and framed for the way the room is used.
When built-ins make sense
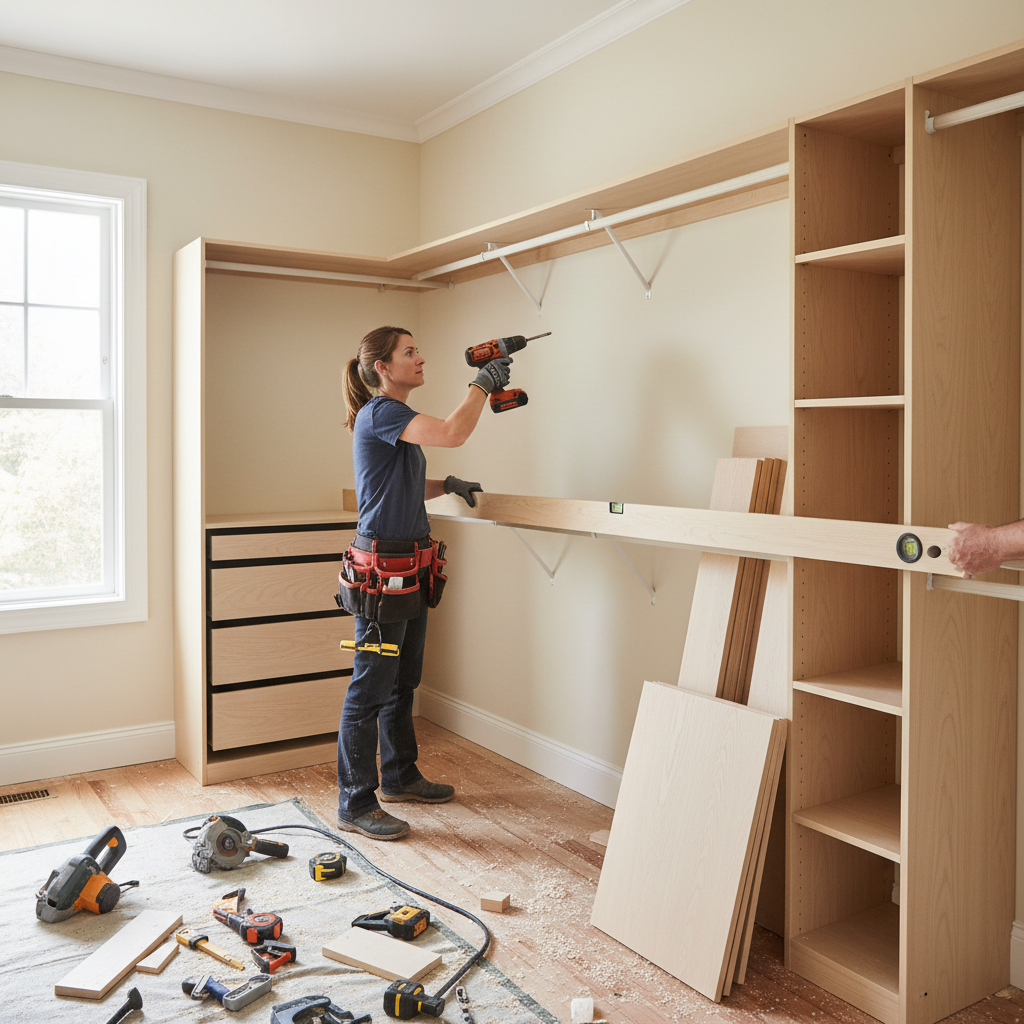
Built-ins are basically furniture that's married to the house. I usually build the boxes from 3/4-inch maple or birch plywood, then face them with 1x2 or 1x3 poplar for a cleaner finished look. Standard bookshelf depth is usually 10 to 12 inches, while pantry-style shelving often wants 14 to 16 inches. For most living rooms, I keep adjustable shelf spans to about 30 to 36 inches unless we go with thicker material or a hardwood front edge to prevent sagging. A 1x2 solid wood nosing glued with Titebond III and pinned with 18-gauge brads makes a huge difference on long shelves.
When floating shelves are the better call
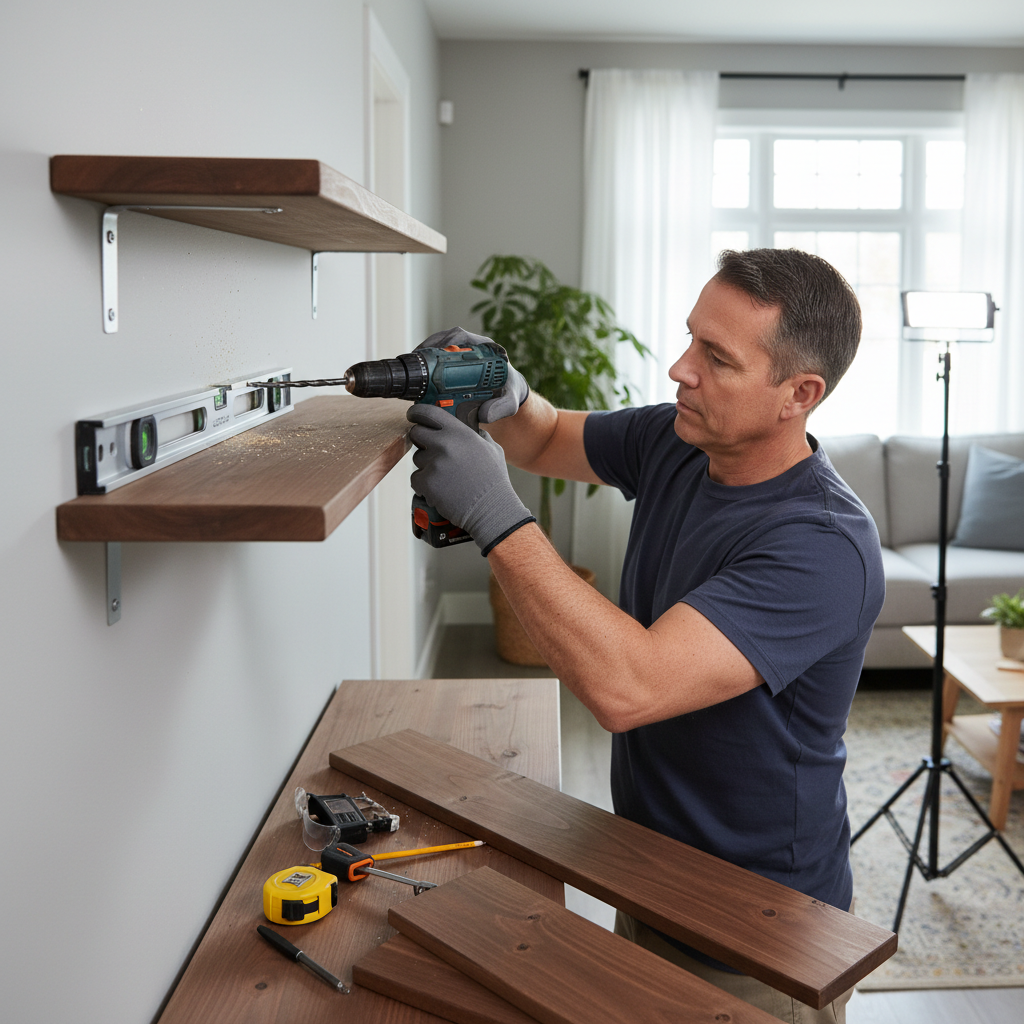
Floating shelves look simple, but the hardware is where the job is won or lost. For real load capacity, I prefer hidden steel bracket systems like Federal Brace, UltraShelf, or well-made welded rod brackets set directly into studs. A typical kitchen floating shelf is often 10 to 12 inches deep and 24 to 48 inches long. In most drywall applications, I want at least two studs, 2-1/2-inch or 3-inch structural screws like GRK RSS or Spax, and a shelf box built from hardwood or 1-1/2-inch thick stock so the bracket doesn't telegraph through the face. Drywall anchors alone are fine for a lightweight display ledge, but not for dishes, cookbooks, or anything heavy.
Material choice matters more than people think. In painted spaces, poplar trim over cabinet-grade plywood gives you a clean finish with less movement than solid boards. For stained shelves, white oak, maple, or walnut hold up well and finish nicely with Rubio Monocoat or a satin waterborne poly like Minwax Polycrylic. In bathrooms and laundry rooms, I lean toward plywood-core shelves or sealed hardwood because solid pine can twist when the summer humidity kicks up.
The other piece is spacing. For books, I like 11 to 13 inches between shelves. For folded towels, around 12 inches works well. For baskets in mudrooms or closets, 14 to 16 inches is more practical. Before I cut anything, I tape out the layout on the wall and have the homeowner live with it for a day or two. That little step saves a lot of regret.
Mock up every shelf with painter's tape first. A 12-inch-deep shelf can feel perfect in a family room and way too bulky in a hallway, and it's easier to fix with tape than with patched drywall.
The biggest mistake I see is treating floating shelves like decor-only pieces and fastening them into drywall without enough stud support. They look fine empty, then start sagging once real life gets piled on.
Best Shelf Options for Every Room
Every room asks something different from a shelf, and that's where good planning pays off. In a living room or den, built-ins around a TV, fireplace, or window seat usually give you the best mix of storage and style. I like lower cabinets at 20 to 24 inches deep for board games, electronics, and photo albums, then upper shelves at 10 to 12 inches deep for books and display pieces. That setup keeps the wall from feeling top-heavy and gives you closed storage where clutter likes to collect.
Kitchen and dining room shelving
Kitchens are where floating shelves get the most attention, but they have to be practical. For plates, mugs, and everyday bowls, I usually recommend 11 to 12 inches of depth and no more than 36 inches between strong support points unless we beef up the shelf build. White oak is a popular choice right now, but painted maple shelves hold up nicely too. Around stoves and sinks, I always use a durable topcoat because grease, steam, and cleaning products will beat up an unfinished shelf in no time.
Bathroom and laundry room shelving
Bathrooms do well with smaller, tighter shelving. Most of the time, 8 to 10 inches deep is enough over a toilet or next to a vanity. In laundry rooms, 12-inch-deep shelves over machines work great for detergents and baskets, but I make sure they're mounted high enough to clear appliance vibration and hose access. A lot of laundry rooms benefit from a shelf-and-rod combo using a 1-1/4-inch closet rod under a fixed upper shelf, especially in narrower spaces.
Bedrooms, offices, mudrooms, and garages
Bedrooms and home offices are where custom built-ins really earn their keep. Window-seat bookcases, desk shelving, and closet cubbies can make a modest room feel custom without a full renovation. In mudrooms, I like a combination of 14- to 16-inch-deep upper shelves with shiplap or beadboard backing, plus hooks mounted into a 3/4-inch backer board so they don't rip out when winter coats get tossed around. Garages are a different animal. That's where I switch to heavy-duty bracket shelving, 3/4-inch plywood, and 16-inch or 20-inch shelf depths for bins, tools, and paint cans.
A shelf should match the room's traffic, moisture, and weight demands, not just the style. The nicest shelf in the world becomes a headache if it's too shallow for pantry goods, too deep for a narrow hallway, or mounted where doors and trim collide. I always check door swings, baseboard projections, outlet locations, and heating lines before layout. That's the sort of stuff homeowners appreciate after the job's done and everything just works.
In mudrooms, leave at least 48 inches from the floor to the bottom of the upper shelf if you're putting coat hooks underneath. That gives bulky winter jackets enough clearance.
A common mistake is copying a kitchen shelf photo and using the same spacing everywhere. What looks good with a couple bowls on display usually doesn't work once you need to store cereal boxes, towels, binders, or laundry soap.
Common Mistakes to Avoid
The first mistake is bad layout. Homeowners often center shelves on a wall without paying attention to furniture, switches, vents, or door trim. Then the shelf winds up too high to use, too low over a sofa, or jammed awkwardly against casing. In most rooms, shelf placement should follow how the room is actually used, not just where the empty wall happens to be.
The second mistake is underbuilding the shelf itself. A 3/4-inch board spanning too far will sag, especially with books, pantry goods, or decorative stoneware. For longer spans, I either shorten the opening, thicken the shelf face with a hardwood edge, or use concealed steel reinforcement. Home centers sell plenty of shelf boards that look decent in the aisle but simply aren't stiff enough for a 42-inch span with real weight on them.
Another big one is trusting the wall to be straight. Older homes in Nyack, Newburgh, Spring Valley, and parts of Suffern can have bowed plaster, patched drywall, or studs that wander. If I don't scribe the shelf to the wall or shim the bracket correctly, you'll see gaps right away. On painted built-ins, those gaps stand out even more once the afternoon sun hits the wall.
Fasteners are another place people get burned. Tiny screws, bargain anchors, and shallow hardware are fine for lightweight decor ledges, but not for functional shelving. I use a long level, a stud map, and often a few test holes in discreet locations to verify what's really behind the wall. On masonry or block basement walls, I'll switch to Tapcon screws or sleeve anchors depending on the load and condition of the substrate.
The last mistake is skipping finish protection. Natural wood shelves in kitchens, bathrooms, and laundry rooms need sealing. Painted shelves need proper prep, primer, and cure time. A shelf can be perfectly built and still look rough six months later if the finish wasn't matched to the room. I tell homeowners all the time: the installation gets the shelf on the wall, but the finish is what keeps it looking like it belongs there.
Before installation day, decide what will live on the shelf and weigh the heaviest category honestly. Books, dishes, vinyl records, and detergent are shelf killers when the structure wasn't planned for them.
Use stock cabinet boxes or off-the-shelf unfinished components where it makes sense, then custom-trim them on site. You still get a built-in look without paying for every piece to be built from scratch.
Cost Breakdown: What to Expect
Shelf costs can swing a lot depending on size, material, wall condition, and whether you're doing true custom carpentry or a simpler install. For basic floating shelf installation using homeowner-supplied shelves, you're usually looking at about $200 to $450 per shelf installed when the wall is straightforward and we're hitting standard drywall over studs. If the wall needs patching, blocking, or repainting, that number moves up.
For custom floating shelves built and installed by a carpenter, most homeowners in Orange County and Rockland County end up somewhere around $450 to $1,200 per shelf depending on length, thickness, stain grade versus paint grade, and bracket system. A 36-inch paint-grade floating shelf is obviously different from a 72-inch white oak shelf with hidden steel support and a furniture-grade finish. Kitchens usually cost more because layout has to be cleaner and finishes have to hold up to steam and grease.
Built-ins are a bigger range. A simple painted built-in nook with two lower cabinets and three to five upper shelves might start around $1,800 to $3,500. A larger living room wall with custom cabinetry, adjustable shelving, crown detail, scribe work, and site finishing can run $4,500 to $9,000 or more. Once lighting, outlets, stone tops, or entertainment components get involved, the budget climbs fast.
For labor specifically, handyman and finish-carpentry rates in Orange County commonly land around $85 to $125 per hour, while Rockland often runs about $95 to $140 per hour depending on travel, finish level, and complexity. Painting, drywall repair, and electrical work are usually separate unless you're hiring one company to manage the full job. Most shelf jobs don't require a permit, but once you start opening walls, moving electrical, or doing a full built-in tied into other remodeling work, it's smart to ask.
DIY can save money, but only when the design is simple and the wall is cooperative. A homeowner-installed floating shelf project using decent hardware, shelf lumber, screws, stain, and finish might cost $100 to $300 per shelf. A DIY built-in using stock boxes, 3/4-inch plywood, poplar face frames, caulk, primer, and paint can land anywhere from $600 to $2,000 in materials. The catch is time, tools, and accuracy. When shelves are out of level by even 1/4 inch, your eye catches it every time you walk by.
Paint-grade built-ins are usually the best value. Poplar and cabinet-grade plywood finished with a product like Benjamin Moore Advance can look custom without the higher price of stain-grade hardwood.
Once a year, especially after winter, check floating shelves for movement, hairline caulk gaps, and loose fasteners. Catching a little movement early can prevent wall damage later.
📍 How This Applies to Homes in Rockland & Orange County
Shelving work in Rockland County and Orange County has its own quirks, mostly because the houses do. In towns like Nanuet, Spring Valley, Suffern, Nyack, and New City, I see plenty of older pre-1970s homes with plaster walls, uneven framing, and additions done in stages over the years. In Middletown and Newburgh, it's common to find a mix of original framing, drywall overlays, and basement or garage walls that need a completely different anchoring approach than the main living space. That's why a shelf plan that worked perfectly in one house can be totally wrong in the next one, even on the same street.
The Hudson Valley climate matters more than people expect. Harsh winters, freeze-thaw cycles, and spring moisture can cause subtle movement in walls, especially near exterior walls, chimneys, and older window openings. I've installed shelves that were dead level in January, then come back in late spring and see a tiny caulk line open up because the house settled back with humidity. That's normal to a point, but it means materials and fastening methods matter. Plywood-core shelves, proper wall blocking, and flexible finish detailing hold up better than cheap particle board or undersized anchors.
Summer humidity is another big one around here. In older homes without perfectly consistent air conditioning, solid wood shelves can expand and contract enough to show gaps, especially when they're jammed tight wall to wall without proper scribing or finish on all sides. In bathrooms, laundry rooms, and mudrooms, I lean toward sealed hardwoods, cabinet-grade plywood, and durable finishes that can handle damp air. In kitchens, I avoid cutting corners on topcoats because steam from cooking and open windows in July will find every weak spot.
For homeowners looking into shelving installation Orange County NY, the local advantage is knowing how these houses behave through the seasons. A built-in in New City might need scribe strips to hide a wavy plaster wall. A floating shelf in Nyack might need extra time just to verify stud placement. A mudroom shelf in Middletown or Newburgh has to handle wet coats, snow boots, and the kind of daily abuse that glossy showroom photos never show. Around here, the best shelving isn't just pretty on install day. It's built for February, April, and August too.
Frequently Asked Questions
Ready to Get Started?
Get Your Free Estimate Today
Serving Rockland County & Orange County, NY. Professional results, guaranteed.
Request a Free Estimate →