The closet looks fine until Monday morning hits. One shelf is bowing in the middle, shoes are piled under winter coats, and every hanger has to be turned sideways just to make the rod work. I've walked into that exact setup in bedrooms from Nanuet to Newburgh more times than I can count, and the funny part is the closet usually isn't too small — it's just built wrong for the way the family actually lives.
A modern hanger needs about 22 inches of clear depth to sit comfortably, but a lot of older closets in Rockland County and Orange County lose precious space to plaster, trim, and out-of-square framing. In pre-1970s homes, especially capes, ranches, and colonials, I regularly find closets that were framed for one rod and one shelf because that's how people stored clothes 50 or 60 years ago. Today you've got bulkier coats, more shoes, folded clothes, bins, luggage, and seasonal gear, so that old layout quits on you fast.
Good closet installation isn't about stuffing in more parts. It's about measuring the space honestly, matching the system to your wardrobe, and fastening everything so it stays level through Hudson Valley humidity swings and dry winter heat. Done right, a custom closet organization system gives you back floor space, cuts down clutter, and makes the whole bedroom feel bigger without moving a single wall.
Measure the Space and Plan the Layout
The best closet jobs start with a tape measure, not a shopping cart. Before you buy a single shelf, measure the opening width, back-wall width, side-wall depth, and ceiling height in at least three places each because older walls almost never stay perfectly square. I also measure baseboard projection, door swing, casing thickness, and the distance from the finished floor to the bottom of the existing shelf. For most reach-in closets, 24-inch depth is the sweet spot for hanging clothes, 12 to 16 inches works well for folded shelves, and anything wider than 36 inches for a shelf needs thicker material or a center support.
Map what you actually need to store
Homeowners usually guess wrong on this part. Count your long-hang items like dresses and coats, then your short-hang items like shirts and pants, then shoes, folded sweaters, bags, and bins. A practical rule I use is 60 to 64 inches high for long-hang sections, 40 to 42 inches high for double-hang sections, and shelf spacing of 10 to 12 inches for sweaters and jeans. For shoes, leave 7 to 8 inches between shelves for flats and sneakers, and 10 to 12 inches for boots or bulky footwear.
Choose the right system for the room
There are three common directions: wire systems, melamine systems, and fully custom wood systems. Wire products like ClosetMaid ShelfTrack and Rubbermaid FastTrack are budget-friendly and great for utility closets, but they don't give you that built-in furniture look. Melamine systems like Easy Track or IKEA PAX can work nicely in straight, square spaces, while a custom build with 3/4-inch prefinished birch plywood or cabinet-grade maple plywood gives you the cleanest fit in older homes where the walls lean, the floor dips, or the opening is a little funky.
Lay out the hardware before installation day
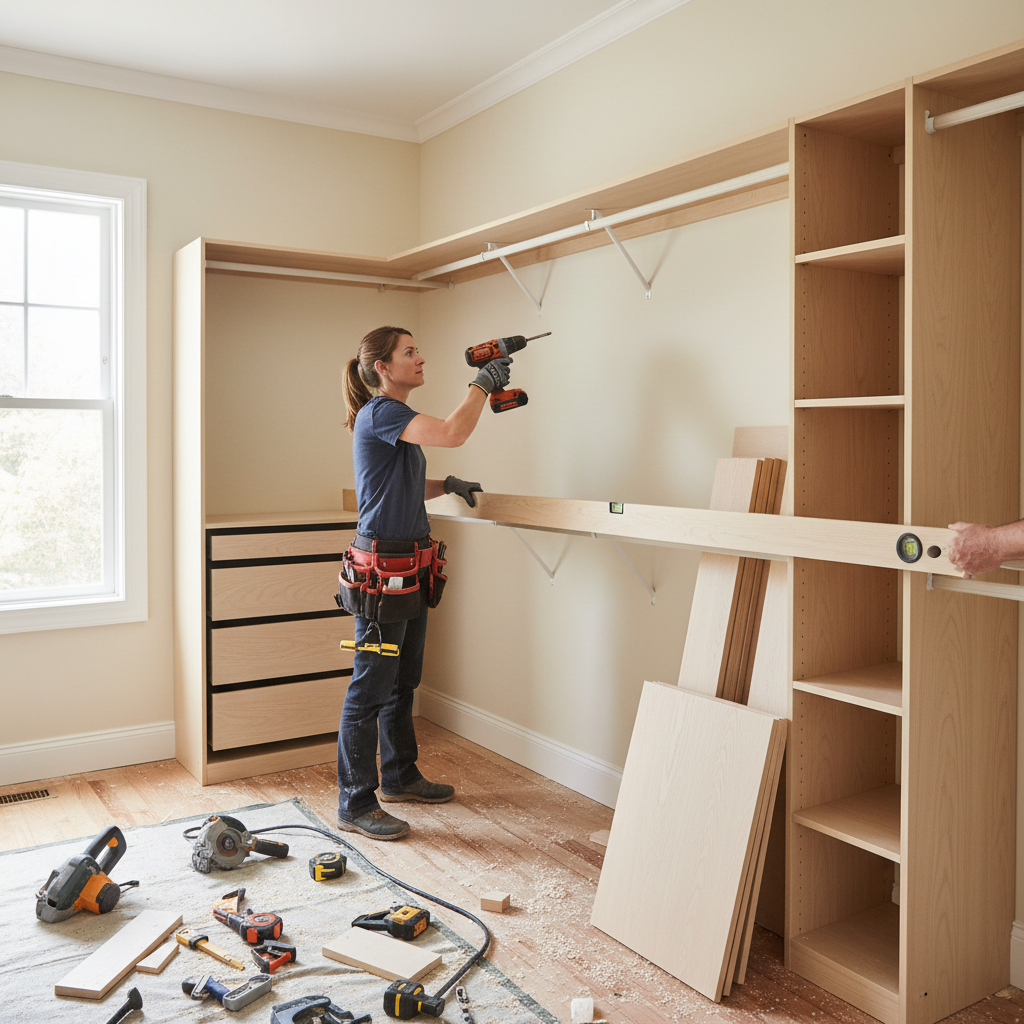
I snap a level line with a laser, mark every stud, and sketch the full layout right on painter's tape on the wall. Closet rods should generally sit about 12 inches out from the back wall in a standard 24-inch-deep closet. Vertical panels are usually spaced 24 to 36 inches apart depending on material thickness and load. Whenever I'm adding drawers, I allow at least 1 inch of clearance for the drawer box and slide tolerances, and I make sure the door opening gives enough room for the drawer front to clear trim and casing.
Lighting and access matter more than people think. A battery puck light is better than nothing, but hardwired or plug-in LED strip lighting under shelves makes a huge difference in deeper closets. I also like to leave one upper shelf at 14 to 16 inches high for luggage or comforter storage and carve out a lower zone for a hamper or seasonal bins. That's the difference between a closet that looks good on paper and one that feels easy to use every single day.
Before finalizing the layout, hang painter's tape on the wall where rods, shelves, and drawers will go. Stand in front of it with a laundry basket and you'll catch clearance problems before you drill a single hole.
Homeowners often copy a showroom layout without measuring their actual wardrobe. Too much hanging space and not enough shelves is one of the most common reasons a new closet still feels messy.
Build the Closet System Step by Step
Once the plan is solid, strip the closet back to a clean starting point. Remove the old rod, shelf, loose anchors, and any trim that's in the way. Patch major holes, then check the floor and walls for level and plumb. In older houses, I almost always find at least one side wall leaning or a floor running out by 1/4 to 1/2 inch across the opening, so I build in shims and scribe cuts instead of forcing factory panels into a crooked space.
Start with the structural pieces
For a custom install, I like to fasten a 3/4-inch ledger or a 1x4 poplar cleat into studs first, especially for long shelves and upper support rails. I use 2 1/2-inch GRK cabinet screws or Spax construction screws into studs, not just drywall anchors. Stud spacing is usually 16 inches on center, but never assume that in an older home. Once the ledger is level, I set the vertical panels, shim them plumb, and anchor them through the back or into a hanging rail depending on the system.
Install shelves and rods with real load in mind
For shelves longer than 30 to 36 inches, 3/4-inch material performs much better than thinner stock. Melamine can look sharp, but raw edges need iron-on edge banding or a finished trim strip so they don't chip. Closet rods should be steel, not the flimsy hollow stuff that comes in the cheapest kits, and any rod over 48 inches should get a center support bracket. I usually place the top rod in a double-hang section around 80 to 84 inches from the floor and the lower rod around 40 to 42 inches, which gives decent space for shirts, slacks, and kids' clothes.
Add drawers, shelves, and specialty storage where they earn their keep
Drawers are worth the money in a primary bedroom closet because they hold folded items better than baskets and they keep dust off. Full-extension slides like Blum Tandem or Accuride 3832 make a noticeable difference compared to bargain hardware. I build most drawer boxes 14 to 16 inches deep in reach-ins and 18 inches deep in walk-ins, depending on clearance. For shoe shelves, a slight 10-degree tilt works well for visibility, but flat shelves are better for boots and mixed family storage.
Once everything is square, I finish the job like built-in cabinetry, not garage shelving. That means scribing filler strips to uneven walls, adding face trim where needed, covering fastener heads, and caulking small gaps for a cleaner look. A final pass with a vacuum, touch-up paint, and bumpers on doors or drawers keeps the installation feeling finished. That's the part a lot of kit installs miss, and it's usually why custom closets feel more solid and look like they belong in the house.
Use a laser level across the full closet opening before you install the first panel. In older homes, trusting the ceiling or floor instead of the laser is how you end up with a rod that's visibly off.
One of the biggest mistakes is relying on drywall anchors for loaded shelves and rods. Winter coats, denim, and storage bins get heavy fast, so you want screws in studs or a properly supported hanging rail.
Common Mistakes to Avoid
The biggest mistake I see is homeowners building for a photo instead of their own routine. A closet with wide open hanging space may look clean online, but in real life most families need a mix of double-hang, folded shelving, and a few deeper upper shelves. I usually tell people to dedicate at least 25 to 35 percent of the closet to shelves or drawers unless they wear suits and dresses every day.
Ignoring the room's actual dimensions
A lot of closets in Rockland and Orange County look square until you put a level on them. Factory panels cut to exact catalog sizes can leave ugly gaps against plaster walls or pinch at the base where old trim kicks out. That's why I measure top, middle, and bottom, and why I often scribe fillers rather than force everything tight. Not accounting for baseboards and door casing is another classic problem that throws off the entire install by an inch or two.
Using the wrong material for the load
Thin particleboard shelves spanning 40 inches might hold T-shirts for a while, but they sag under jeans, bags, and storage bins. Wire shelving is fine in laundry rooms or pantries, but it can leave marks on sweaters and doesn't always maximize space in a bedroom closet. For anything meant to feel permanent, I lean toward 3/4-inch melamine with edge banding, or better yet cabinet-grade plywood with a durable painted or prefinished surface.
Forgetting access, clearances, and the future
Drawers need room to open, rods need hanger clearance, and shelves near the top should still be reachable without a circus act. I like to keep the most-used rod and shelf zones between about 36 and 72 inches off the floor. Another thing people forget is family growth — kids get taller, wardrobes change, and what works for one person may not work two years from now. Adjustable shelf pin holes or a rail-based system gives you flexibility without a full rebuild later.
The last mistake is treating finish work like an afterthought. Exposed cut edges, chipped melamine, sloppy caulk lines, and loose trim are what make a new closet look cheap. Clean cuts with a fine-tooth blade, painter's tape at finished faces, and careful edge treatment make a huge difference. You don't need a fancy system as much as you need a layout and installation that respect the house.
In older closets, leave room for filler strips on at least one side. That extra 1 to 2 inches can save a kit installation and make the final result look custom instead of forced.
Spend money on stronger panels, good rods, and quality slides first. You can skip fancy valet rods and belt racks now and add those accessories later without redoing the structure.
Cost Breakdown: What to Expect
Closet cost really comes down to size, material, and how custom the fit needs to be. For a basic DIY reach-in using wire shelving or a simple kit, most homeowners land somewhere around 250 to 900 dollars in materials. A better-looking melamine setup with a few drawers can run 900 to 2,000 dollars DIY, while a true custom build in plywood with trim, drawers, and paint can easily land between 1,500 and 3,500 dollars in materials before you factor in your time and tools.
Material price ranges you can expect
A standard shelf-and-rod kit may be the cheapest way in, but quality varies a lot. White wire shelving is often the lowest-cost option. White melamine panels and shelves generally cost more but give a cleaner furniture look, and 3/4-inch cabinet-grade birch or maple plywood is usually the premium material choice. Depending on supplier and finish, expect roughly 55 to 75 dollars for a sheet of melamine and 85 to 140 dollars or more for cabinet-grade plywood. Add edge banding, rods, brackets, drawer slides, screws, fillers, and paint, and the extras add up fast.
Professional installation costs in Rockland and Orange County
Around Rockland County, skilled handyman and finish carpentry labor commonly falls in the 85 to 125 dollar per hour range, with some custom closet specialists charging more for design-heavy work. In Orange County, I typically see solid carpentry labor around 75 to 115 dollars per hour depending on travel, complexity, and finish level. For a straightforward reach-in closet installation Rockland County NY homeowners often spend about 1,200 to 3,500 dollars professionally installed. A larger walk-in with drawers, custom shelving, trim work, and painting can range from 3,500 to 9,000 dollars or more.
What pushes the price up
The budget climbs when walls are badly out of square, plaster needs repair, electrical has to be moved for lighting, or you want full-extension drawers, shaker-style fronts, crown detail, or premium finishes. Demolition and patching may add 150 to 600 dollars. Painting can add 250 to 900 dollars depending on prep and scope. Hardware upgrades like Blum slides, soft-close hinges, steel oval rods, and better pulls are absolutely worth it, but they do show up on the final number.
The cheapest bid isn't always the best value on closets. A rushed install with weak anchors, thin shelves, and no scribing can look tired in a year. I'd rather see a homeowner build a smaller, sturdier system with fewer accessories than pay for a big layout that sags, chips, or pulls away from the wall after two Hudson Valley seasons.
Keep the existing closet footprint and reuse a good-quality door if you can. Moving walls, changing doors, or relocating switches is where a simple closet job turns expensive fast.
Don't overload long upper shelves with dense storage bins. Spread heavy items across multiple supports and check rod brackets and screws once a year to catch movement before it damages the system.
📍 How This Applies to Homes in Rockland & Orange County
Closet work in the Hudson Valley has its own personality, and that's especially true in older houses. In pre-1970s homes around Nyack, Suffern, New City, and parts of Newburgh, I run into plaster walls, uneven framing, shallow closet depths, and floors that drift just enough to make off-the-shelf systems tricky. That's why closet installation Rockland County NY jobs often need more scribing, shimming, and custom filler work than homeowners expect from a kit they saw online.
Our climate matters too. Harsh winters, dry forced-air heat, spring moisture, and sticky summer humidity all affect wood movement, fastener hold, and how closets feel against exterior walls. In Nanuet, Spring Valley, Middletown, and older sections of Newburgh, I've opened up closets on outside walls and found cold spots, light condensation, or musty corners where insulation and airflow weren't great. In those cases, I like to leave a little breathing room, avoid trapping dampness behind tightly packed bins, and use materials and finishes that hold up better than bare particleboard.
Freeze-thaw cycles don't hit a closet the way they hit a deck or walkway, but they do show up indirectly through small framing shifts, seasonal cracks, and movement in older trim and plaster. That's one reason I don't force tight pre-made components into a crooked opening. A custom-fit install with properly fastened cleats, good screws into studs, and trim that can be adjusted to the room will hold up better through the seasons than a system that's already under stress on day one.
Local families also use closets differently than a one-size-fits-all catalog assumes. Around here, you've got bulky winter coats, boots, sports gear, extra bedding, and a real need for seasonal swap space. I build a lot of systems with higher top shelves for comforters, dedicated boot storage, and stronger rods because Hudson Valley closets work hard. Whether it's a smaller bedroom closet in Spring Valley or a larger walk-in in New City or Middletown, the layout has to match the house, the weather, and the way the homeowner actually lives.
Frequently Asked Questions
Ready to Get Started?
Get Your Free Estimate Today
Serving Rockland County & Orange County, NY. Professional results, guaranteed.
Request a Free Estimate →