The door swings open, the paint color looks great, and then your eye goes straight to the trim. One corner is spread open, another is packed with caulk, and the casing sits proud of the jamb on one side and buried on the other. I've walked into plenty of homes in Nanuet, New City, and Middletown where the homeowner spent good money on floors and paint, but the room still felt unfinished because the trim work gave everything away.
Around Rockland County and Orange County, a lot of the houses we work in aren't perfectly square anymore, especially the pre-1970s ones. In my day-to-day work, I'd say eight out of ten older openings are off enough that you can't just measure, cut, and hope for the best. Between settled framing, old plaster, replacement windows, and years of seasonal movement, trim carpentry in the Hudson Valley is less about speed and more about knowing where the house is going to fight you.
That's why good trim work matters so much. Door casing and window trim don't just dress up an opening; they hide transitions, straighten the eye, and make the whole room feel intentional. When it's installed right, nobody comments on it because it simply looks like it belongs there. When it's done wrong, everybody notices, even if they can't put their finger on why.
Why Good Trim Carpentry Starts Before the First Cut
Start with the opening, not the trim
The biggest difference between average trim work and professional trim work happens before the saw even turns on. I check the jamb reveal first, and on most interior doors I want a consistent 3/16-inch reveal between the jamb edge and the casing. If that reveal runs fat at the top and tight on the hinge side, the trim isn't the real problem; the jamb or the wall plane is. A 6-foot level, a small torpedo level, and a combination square will tell you more in three minutes than a whole pile of trial cuts.
Choose a profile that fits the house
For most homes in Rockland County, 2 1/4-inch colonial or ranch-style casing is the safe choice, while 3 1/4-inch casing looks better in older colonials, capes, and center-hall homes with taller baseboards. Material matters too. Primed finger-jointed pine is a solid middle-ground product for painted trim, MDF works in dry rooms where the walls are reasonably straight, and poplar is my go-to when the customer wants a smoother paint finish or a tougher board that takes crisp cuts. For stain-grade work, I usually steer people toward oak, maple, or clear pine depending on the rest of the house.
Get the wall and jamb in the same plane
This is where a lot of DIY installs go sideways. If the drywall or old plaster bulges past the jamb, the casing rocks and the miter opens up no matter how accurate the cut is. I'll use drywall shims, cedar shims, or even a careful pass with a block plane to bring things into line. On older homes, I also check whether I need jamb extensions so the finished trim sits flat instead of bridging a gap.
Window trim needs proportions, not guesswork
With windows, I usually start by setting the stool first. A stool should typically overhang the wall return by about 3/4 inch and extend past each side casing by roughly 1/2 to 1 inch, depending on the profile. Then the apron goes under it, with side casings running down clean and even. Those little proportions are what make a basic vinyl replacement window look built-in instead of dropped into a hole.
Dry-fit everything before fastening
I always dry-fit the head casing and both legs before I nail anything. That lets me check the miters, verify the reveal, and see whether the wall is pushing one piece out. It's a simple step, but it saves a ton of patching later, especially on painted trim where every flaw shows once the sunlight hits it.
Mark your reveal with a combination square all the way around the jamb before installation. A visible pencil line keeps the casing honest and speeds up nailing.
Homeowners often buy trim before measuring the existing baseboard and door casing widths. Mixing a 2 1/4-inch casing with a chunky 5 1/4-inch baseboard without a transition block can look awkward fast.
How Pros Install Door Casing and Window Trim
Door casing installation sequence
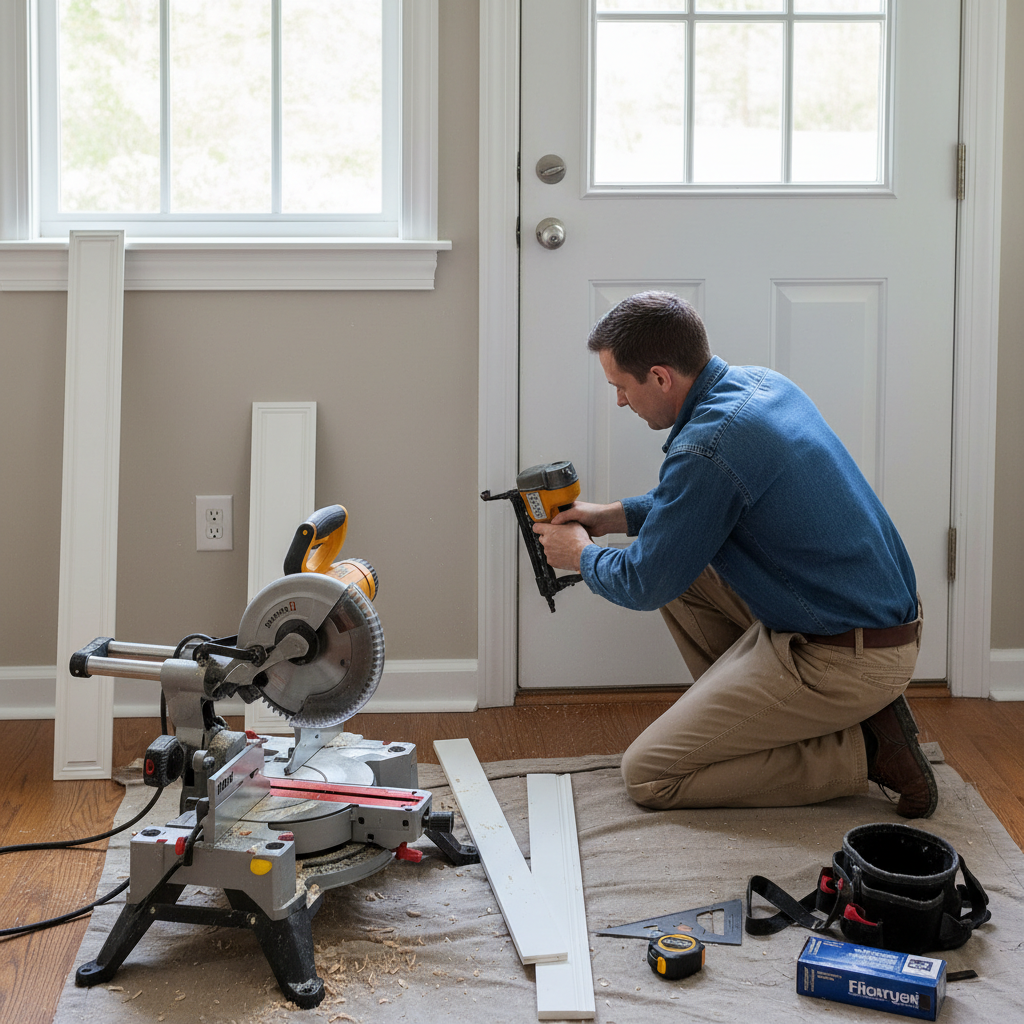
For a standard interior door, I measure each leg to the long point of the miter, not the short point. Most modern casing gets 45-degree miters, and I cut the head piece last after checking both legs in place. Once the fit looks good, I tack the casing near the miter first, then work my way down, keeping the 3/16-inch reveal line visible. For fastening, an 18-gauge brad nailer with 2-inch nails works well into the jamb area, and a 15-gauge finish nailer with 2 1/2-inch nails is better when I need to grab framing through plaster and drywall.
Make the miters stay closed
A tight miter at install doesn't mean much unless it stays tight through winter and summer. I like to put a small amount of Titebond wood glue on paint-grade miters before final pinning. Then I shoot one fastener high and one low on each side of the joint so the pieces don't creep apart. On wavy walls, I'll sometimes leave the outside edge a hair proud and then pull it in evenly so the inside miter stays sharp.
Window trim starts with the stool and apron
On a traditional interior window, the stool goes in first, level and supported, with the horns extending past the side casing. I test the fit against the window jamb, scribe where needed, and keep the front edge consistent. After that, the apron gets centered under the stool, then the side casing goes on, then the head casing last. This order matters because it keeps the reveals consistent and avoids that chopped-up look you see when every piece seems to fight the next one.
Caulk, fill, and sand with restraint
A pro-looking finish doesn't come from dumping more caulk on bad carpentry. I use paintable acrylic latex caulk like DAP Alex Flex or Sherwin-Williams PowerHouse in thin beads where trim meets wall, and only where the gap needs it. Nail holes get filled with a lightweight spackle or stainable wood filler depending on the material, then sanded smooth with 180-grit or 220-grit paper. Heavy caulk lines and overfilled holes are dead giveaways that the trim wasn't fit properly.
Finish work is what people actually see
Before paint, I run my hand over every joint because your fingers catch what your eyes miss. Primer is important on cut ends, especially with finger-jointed pine and MDF, and I like a durable trim enamel such as Benjamin Moore Advance or Sherwin-Williams Emerald Urethane for painted work. Two light coats always look better than one heavy one, and letting the trim acclimate inside the home for a day or two helps prevent movement after install.
When a wall bows outward, fasten the casing near the miter first and work down gradually. That keeps the top joint tight while you persuade the rest of the board into place.
Cutting both side casings to the same length without checking floor level is a classic mistake. In older homes, one side can easily need an extra 1/8 inch to keep the head casing level.
Common Mistakes to Avoid
The first mistake I see all the time is trusting the opening to be square. In newer construction you can sometimes get away with that. In older homes around Suffern, Nyack, and Newburgh, not a chance. When the jamb is out of square or the wall kicks out, copying one measurement to every piece just gives you four bad cuts instead of one.
Another common problem is forcing a perfect miter onto imperfect material. Trim can come with a slight bow, walls can have a hump, and plaster can flare at the corners. If you don't account for that, the miter might look closed at the saw table and open up as soon as you pin it to the wall. Sometimes the right move is recutting half a degree, sometimes it's shimming behind the casing, and sometimes it's changing the nailing sequence.
I also see homeowners use the wrong trim for the room. MDF is fine in a dry bedroom or hallway, but it swells badly when it keeps catching moisture. Near a bathroom window, kitchen sink area, or entry where wet boots and humid air are common, primed pine, poplar, or PVC-compatible trim products are the smarter choice. Saving a few bucks on the board can cost more once corners puff up and paint starts cracking.
Then there's over-caulking. Caulk is for finishing small gaps, not rebuilding a bad install. When the bead gets wide enough to notice from across the room, that's the trim telling on itself. The cleaner fix is usually to re-seat the casing, plane the back, add a jamb extension, or re-cut the joint.
Last one: skipping prep and finish details. Not priming end grain, not letting trim acclimate, and not sealing raw cuts near windows are the kinds of shortcuts that show up a season later. Around here, with winter heat drying things out and summer humidity swelling everything back up, those shortcuts don't stay hidden long.
In older plaster homes, keep a block plane, painter's shims, and a contour gauge on hand. Those three tools solve a lot of fit problems without turning the job into a wall repair project.
Use a consistent trim profile throughout the main living areas. Ordering one casing style in longer runs usually costs less than mixing multiple sizes and special-order profiles.
Cost Breakdown: What to Expect
Material cost depends on profile, species, and whether you're doing paint-grade or stain-grade work. For a standard interior door, basic primed finger-jointed pine casing might run about 35 dollars to 70 dollars in material, while poplar or wider upgraded profiles can land in the 75 dollar to 140 dollar range. A typical interior window trim package with stool, apron, and casing usually falls around 45 dollars to 120 dollars for paint-grade, and 140 dollars to 250 dollars or more for nicer stain-grade stock.
DIY costs climb fast once tools are part of the picture. A decent 10-inch or 12-inch miter saw can run 300 dollars to 600 dollars, an 18-gauge brad nailer and compressor setup might add 200 dollars to 400 dollars, and a 15-gauge finish nailer can add another 150 dollars to 300 dollars. Then you've got caulk, filler, sandpaper, wood glue, primer, and paint. For one or two openings, the tool investment alone can outweigh the labor savings unless you plan on doing a lot more trim work.
For professional installation in Rockland County, finish carpentry labor commonly runs about 95 dollars to 140 dollars per hour depending on the trim type, wall condition, and whether painting is included. In Orange County, I usually see labor land a little lower, around 85 dollars to 125 dollars per hour. On a per-opening basis, a straightforward paint-grade door casing install may cost roughly 225 dollars to 450 dollars in labor, while a trimmed-out interior window with stool and apron can run 275 dollars to 550 dollars. Older homes with plaster repairs, jamb extensions, or badly out-of-square openings can push those numbers higher.
Full installed pricing is where homeowners usually want clarity. In this area, a basic paint-grade door casing job often ends up around 300 dollars to 600 dollars total per opening. A standard interior window trim install is often 350 dollars to 750 dollars total. Custom stain-grade work, oversized casings, matching historic trim, or whole-house packages change the math, but those ranges are realistic for Rockland and Orange County homes.
What affects price most is not the trim itself; it's the condition of the opening. A nice square opening in a newer home goes quickly. A pre-1970s opening with plaster cracks, uneven jamb depth, and settled walls can easily double the fitting time. That's why the cheapest estimate isn't always the cheapest job once callbacks, patching, and repainting start piling up.
Bundle multiple doors and windows into one trim visit. Contractors can buy longer stock more efficiently and spread setup time across the whole job, which usually lowers the per-opening cost.
Keep interior humidity reasonably stable and touch up failed caulk lines early. Small seasonal gaps around trim are much cheaper to maintain than letting moisture get into raw joints near windows.
📍 How This Applies to Homes in Rockland & Orange County
Trim carpentry in Rockland County and Orange County has its own personality because the houses and the weather both have a say in the job. The Hudson Valley climate puts trim through a full workout every year. Harsh winters dry materials out, freeze-thaw cycles shift older framing just enough to open a miter, spring moisture creeps into window areas, and summer humidity swells paint-grade trim that wasn't acclimated or sealed properly.
In pre-1970s homes around Nyack, New City, and parts of Newburgh, I see settled openings and plaster walls more than perfectly square ones. That means door casing and window trim often need scribing, shimming, and jamb extensions just to sit flat and look straight. A lot of homeowners think the trim is the problem when really the wall plane or the old jamb is what's throwing everything off.
Towns like Nanuet, Spring Valley, and Suffern have plenty of homes where one room was updated years ago and the next room still has original millwork. Matching that look takes more than grabbing stock casing off the shelf. Sometimes the right answer is using a wider 3 1/4-inch or 3 1/2-inch profile to bridge uneven plaster better, or building up a window stool so it looks proportionate to older baseboards and taller ceilings.
Over in Middletown and throughout Orange County, you run into a mix of newer developments and older farmhouses or capes, and the trim approach changes with the house. In the newer homes, the job is usually about speed, clean reveals, and consistent lines. In the older homes, it's about reading the opening, respecting the character of the house, and using materials that can handle seasonal movement without cracking apart by the second winter.
Frequently Asked Questions
Ready to Get Started?
Get Your Free Estimate Today
Serving Rockland County & Orange County, NY. Professional results, guaranteed.
Request a Free Estimate →