By late February, the garage tells on the whole house. The door shudders halfway up, the floor by the threshold has a salt-white crack running across it, and every rake, hockey stick, and half-empty paint can seems to topple out the minute you pull in. I've seen that exact scene from Middletown to New City more times than I can count, especially after a rough winter.
Most homeowners don't realize the garage door is usually the biggest moving part on the property, and a typical family door can cycle 1,500 times a year or more. Around the Hudson Valley, that wear gets worse fast because we're not just dealing with use. We're dealing with road salt, freeze-thaw swings, spring moisture creeping up through concrete, and summer humidity that loves to rust hardware and swell old framing.
The good news is most garage problems start small and stay affordable when you catch them early. A noisy roller today can turn into a bent track next season. A hairline slab crack can become a trip hazard after one bad winter. And bad storage usually means you're wasting half the garage without realizing it. This guide breaks down the way I handle garage repair Orange County NY homeowners actually need: doors that work right, floors that hold up, and storage that makes the space useful again.
Garage Door Repairs and Tune-Ups
Start With the Door, Not the Opener
In a lot of homes, especially single-family places with attached garages, the opener gets blamed for everything. Truth is, the opener is often fine. The real problem is a door that's heavy, out of balance, or dragging in the track. Most single doors around here are 9 feet by 7 feet, and most two-car doors are 16 by 7. When one of those doors is even a little off, the motor strains, the chain or belt chatters, and the whole system starts wearing out before its time.
Check the Rollers, Tracks, and Hardware
The first thing I look at is the hardware. Worn 10-ball plastic rollers get noisy and sloppy fast; I usually upgrade homeowners to sealed nylon rollers because they're quieter and hold up better in our climate. I also check hinge bolts, track brackets, and lag screws into the framing. On older garages, I've found 1/4-inch lags barely hanging on in dry, split wood. Refastening with proper 5/16-inch by 1-1/2-inch lag screws and squaring the track can make a crooked, grinding door run like new. Tracks should be plumb on the vertical sections and pitched slightly down toward the back on the horizontal runs, with enough clearance that the rollers aren't pinched.
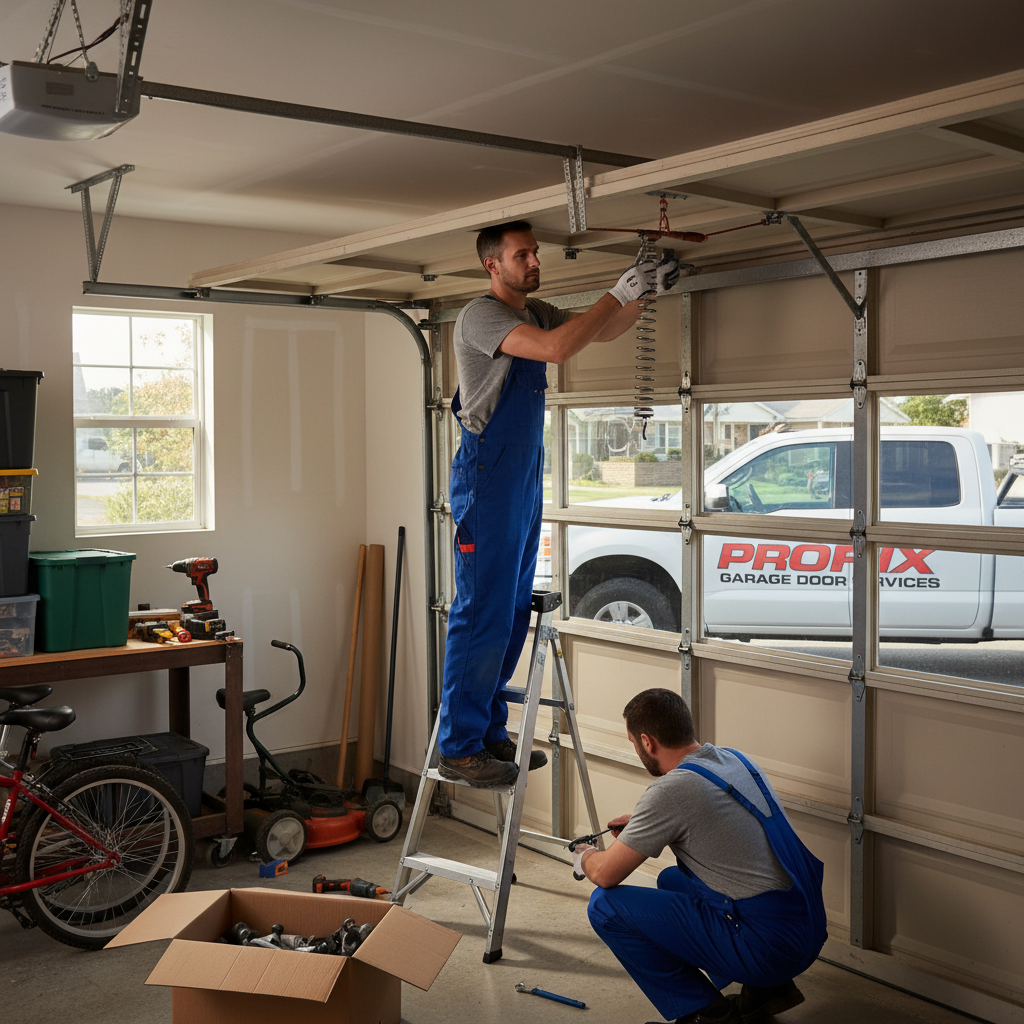
Springs, Cables, and Door Balance
This is where experience matters. I've walked into plenty of garages in Monroe and Newburgh where the opener wasn't the issue at all; the door was so out of balance the motor never had a chance. With the opener disconnected, the door should lift smoothly and stay around waist height without drifting hard up or dropping down. If it slams, the torsion springs are wrong, worn out, or one spring has already broken. Standard torsion springs may last 10,000 cycles, but I often recommend 20,000-cycle oil-tempered replacements for families that use the garage as their main entry. Frayed lift cables, bent bottom brackets, and loose drums should be handled by a pro because that's stored energy, and it can hurt you in a split second.
Seals, Safety Eyes, and Smart Maintenance
A lot of garage comfort comes down to sealing. Replacing a cracked bottom astragal, brittle vinyl stop molding, or worn jamb seal keeps out water, mice, and cold air. I like to check the gap under the closed door with the garage lights off; daylight at the corners usually means the seal is shot or the floor has settled. On the opener side, I test the photo eyes, auto-reverse, and force settings every visit. A good annual tune-up also includes white lithium grease on hinges, a light garage-door spray lube on rollers and bearings, and no grease packed into the tracks. Tracks should be clean, not slippery.
Do a balance test twice a year by pulling the opener release and lifting the door by hand. If it won't stay halfway open, stop using the opener until the springs are checked.
Homeowners often spray heavy grease all over the tracks. That usually attracts grit and makes the rollers skid instead of roll.
Garage Floor Repair and Protection
Figure Out Whether the Crack Is Cosmetic or a Real Problem
Garage slabs take a beating in this part of New York. Road salt gets tracked in, snowmelt sits by the door, and freeze-thaw does the rest. Hairline shrinkage cracks are common and usually not a panic. What gets my attention is a crack wider than 1/8 inch, any vertical displacement where one side sits higher than the other, or spalling near the front edge where the concrete is starting to chip apart. I also look for rust stains, dark moisture spots, and efflorescence, which tells me water is moving through the slab.
Proper Prep Makes or Breaks the Repair
This is where a lot of DIY jobs go sideways. You can't just sweep a garage floor and pour coating over it. For crack repair, I usually chase the crack first with a 4-1/2-inch angle grinder and a V-groove diamond blade, vacuum it clean, and fill it with a product like Sikaflex Self-Leveling Sealant or a two-part polyurea crack filler depending on movement and depth. If the surface is oily, it gets degreased first. Before any coating, I like to run a simple moisture test by taping down a 24-inch by 24-inch clear plastic sheet for about 24 hours. Condensation under that plastic means you need to deal with moisture before you think about paint or epoxy.
Epoxy vs. Polyaspartic in a Real Garage
For a typical two-car garage in the 400 to 500 square foot range, homeowners usually ask whether to use epoxy or polyaspartic. A store-bought kit like Rust-Oleum EpoxyShield can work in a light-duty space if prep is excellent and the slab is dry. For garages that see plow boots, snowblower tires, hot-tire pickup, and salt, I lean toward a pro-installed polyaspartic or polyurea basecoat system with broadcast flakes and a UV-stable topcoat. It cures faster, holds color better, and handles temperature swings better than bargain coatings. I also add anti-slip aggregate near the apron and entry door so the floor isn't slick in wet weather.
Fix Drainage and Protection at the Same Time
A coating won't save a bad slab. If water sits inside the door line, I check the pitch. Ideally, you want the floor moving toward the opening at roughly 1/8 inch per foot, not trapping meltwater at the back wall. In some garages, a trench drain or just a better threshold seal makes a big difference. I also tell homeowners to keep salt bags, fertilizer, and wet cardboard off the concrete. Those things trap moisture and accelerate surface breakdown faster than most people realize.
Before coating a garage floor, grind a small test area and drip a little water on it. If the water beads instead of soaking in, the slab may still have sealer or contamination that needs to be removed.
Putting epoxy over damp concrete is one of the most expensive garage mistakes I see. It looks fine for a few weeks, then starts peeling in sheets.
Storage Solutions That Actually Work
Start With a Real Layout
A good storage setup isn't about stuffing more into the garage. It's about keeping a usable parking lane, a safe walkway, and quick access to the stuff you use every week. I usually sketch the space first and keep at least a 30- to 36-inch walking path from the house door to the overhead door. In a standard two-car garage, wall depth disappears fast, so deep shelves belong on the back wall, not both side walls where they chew up door clearance and mirror space.
Use the Wall Studs, Not Just the Drywall
The best storage systems are anchored correctly. In most garages, studs are 16 inches on center, and that's what I build around. Slatwall systems like Gladiator or Rubbermaid FastTrack work well for rakes, ladders, extension cords, and folding chairs because they keep gear off the floor and easy to reshuffle. For heavier shelving, I prefer 18- to 24-inch-deep steel units anchored at the top so they can't tip. If we're hanging cabinets, I use a ledger or French cleat system and hit framing every time. Drywall anchors alone don't belong on heavy garage storage.
Overhead Racks Need Clearance and Common Sense
Overhead storage is great when it's installed right. In an 8-foot garage, you have to be careful because the door tracks, opener, and vehicle height already eat up a lot of ceiling. I like to maintain at least 18 inches of clearance below the opener path and enough room so an SUV hatch can open without hitting anything. A typical 4-foot by 8-foot rack can carry 300 to 600 pounds depending on the brand and framing, but I never load one to the brochure maximum unless I know exactly how the joists are running and what's above. Snow tires, bins of holiday decorations, and coolers are fine. Engine blocks, leftover pavers, and boxes of old paperwork are how ceilings get stressed.
Build for Daily Life, Not Just Looks
The smartest upgrades are usually simple: a boot tray near the entry door, a narrow shelf for car chemicals, a charging shelf for tools, and labeled bins that actually match the season. For families, I like dedicated cubbies or hooks at kid height so bikes, sports gear, and backpacks stop taking over the floor. When the garage works, people maintain it. When everything's piled in corners, small leaks, pests, and floor damage go unnoticed until the repair bill gets bigger.
Mount frequently used hooks between 48 and 60 inches off the floor. That's the sweet spot for easy grab-and-go storage without bumping car doors.
One of the biggest storage mistakes is installing overhead racks right where the garage door travels. The door may clear when open, but the top panel can still clip stored bins during movement.
Common Mistakes to Avoid
Treating Symptoms Instead of Causes
A noisy door isn't always fixed with lubricant, and a peeling floor isn't always fixed with another coat. I see a lot of homeowners patching over the visible issue without addressing why it started. A door that jerks may have worn rollers, loose hinges, bad spring tension, or framing movement at the header. A cracked floor near the opening may be less about the crack itself and more about meltwater sitting there all winter.
Taking on High-Tension Repairs Without the Right Tools
Replacing a bottom seal is a homeowner job. Adjusting torsion springs is not, at least not for most people. Same goes for lift cables, bottom brackets, and major track resets. It only takes one slip on a winding bar or one rusted fastener letting go at the wrong time. I've been called in after DIY attempts where the repair doubled in cost because hardware got bent or the opener arm got ripped out of the top section.
Skipping Surface Prep and Moisture Checks
On floors, this is the number-one error. Paint and cheap epoxy kits fail because the slab wasn't degreased, etched, or ground properly, or because the coating went down when the concrete temperature was too low. Most coating products want specific conditions, often 55 degrees and rising, with dry concrete and no active moisture vapor. Around here, that matters a lot in early spring and late fall.
Overloading Storage and Blocking Safety Features
Storage errors cause their own set of headaches. Homeowners mount shelves with the wrong fasteners, hang cabinets from drywall only, or pack overhead racks with far more weight than the joists should carry. I also see safety sensors blocked by bins, brooms, or snow shovels all the time. When the photo eyes are misaligned or obstructed, the door won't close properly, and people start forcing the issue instead of fixing the cause.
Put garage door service on the same calendar as gutter cleaning or furnace filter changes. A 30-minute tune-up once a year catches most problems before they become emergency calls.
Spend money on prep and hardware first. Good rollers, correct anchoring, and proper concrete prep give you a better return than cosmetic upgrades that fail in one season.
Cost Breakdown: What to Expect
Typical Labor Rates in Rockland and Orange County
For handyman-level garage work in Orange County, I usually tell homeowners to expect roughly $95 to $140 per hour depending on travel, complexity, and whether it's a small service call or part of a bigger job. In Rockland County, rates often run a bit higher, more in the $110 to $160 per hour range. Specialized overhead door companies may quote by the job instead of the hour, especially for spring work, opener replacement, and complete door service.
Door Repair and Opener Costs
A basic garage door tune-up usually runs about $149 to $249 professionally and maybe $20 to $40 in DIY materials if all you're doing is cleaning and lubrication. Roller replacement often lands around $180 to $350 for a standard set, while new lift cables usually run $180 to $325. Torsion spring replacement is commonly $275 to $550 depending on door size, spring cycle rating, and whether you're replacing one spring or a matched pair. A new bottom seal and retainer repair may cost $75 to $225. For opener replacement, a solid belt-drive unit from LiftMaster or Chamberlain installed is often in the $550 to $950 range, with battery backup and smart features pushing higher.
Floor Repair and Coating Costs
DIY crack repair on a garage floor might cost $75 to $225 in sealants, blades, and cleaning supplies if the damage is minor. Professional crack repair and spot resurfacing usually starts around $300 and can reach $900 or more depending on how much prep and patching is needed. For coatings, a DIY epoxy kit may run $250 to $600 for a two-car garage once you add cleaners, etcher, patch materials, and tools. A professionally installed epoxy system is often $1,800 to $3,000, while a polyaspartic or polyurea flake system for a 400 to 500 square foot garage generally falls between $2,200 and $4,200 depending on prep, moisture issues, and whether the front edge needs rebuilding.
Storage Upgrade Costs
Wall hooks and rail systems are the budget-friendly starting point. A homeowner can spend $150 to $500 on a decent DIY setup, while a professionally installed slatwall or custom rail system often runs $800 to $2,500. Overhead racks usually cost $200 to $400 each for materials only and about $450 to $900 installed, depending on rack size and framing conditions. Steel shelving, cabinets, and workbenches vary a lot, but a practical full-garage storage refresh for most families winds up somewhere between $1,200 and $4,000. The trick is buying for the way you actually use the space, not just filling it with products.
Bundle jobs when you can. Having the door tuned up, seals replaced, and storage anchored in one visit usually costs less than three separate service calls.
Keep the garage floor clean of salt and grit in winter, and lubricate door hardware every six months. Those two habits alone can stretch the life of both the slab and the door system.
📍 How This Applies to Homes in Rockland & Orange County
Garage issues show up a little differently here than they do in milder parts of the country. In Rockland County and Orange County, the Hudson Valley climate gives us harsh winters, freeze-thaw cycles, spring moisture, and sticky summer humidity, and all of that lands right on the garage first. The door hardware gets blasted with cold, wet air. The slab takes road salt and snowmelt. Then by July and August, the humidity starts working on the tracks, springs, and anything stored against an outside wall.
In older pre-1970s homes, which you still see plenty of in places like Nyack, Spring Valley, Newburgh, and parts of Middletown, garages often have quirks that newer builds don't. Low headroom, narrow openings, uneven slabs, patched concrete, and aging wood framing around the door are all common. I've seen plenty of 8-by-7 doors in older detached garages where the issue wasn't the door at all, but the framing had shifted just enough over the years that the track geometry was never quite right.
Spring moisture is a real factor in towns like Nanuet, Suffern, and New City, where garages can stay damp longer than homeowners expect after snow season ends. That dampness matters for floor coatings, bottom seals, and anything stored in cardboard boxes on the slab. Then in summer, especially near the river and in shaded neighborhoods around Nyack and Newburgh, the humidity can speed up rust on hinges, cables, and exposed fasteners if the garage doesn't get decent airflow.
For local homeowners, the best garage repairs are the ones designed for our weather and housing stock, not generic one-size-fits-all fixes. That means higher-cycle springs for families using the garage as the main entry, moisture-aware floor prep before coatings, and storage systems anchored for real loads in older framing. Whether I'm working in a tight one-car garage in Spring Valley or a wider two-car setup outside Middletown, the goal is the same: make it safer, drier, and easier to live with through every Hudson Valley season.
Frequently Asked Questions
Ready to Get Started?
Get Your Free Estimate Today
Serving Rockland County & Orange County, NY. Professional results, guaranteed.
Request a Free Estimate →