Water Damage Repair Hudson Valley: How to Identify, Stop, and Fix It Fast
From a ceiling stain in New City to a wet basement in Middletown, here's the practical game plan homeowners need before a small leak turns into a big repair.
The stain usually shows up at the worst time: Sunday evening, right after a hard rain or the first deep freeze of winter breaks. I've walked into homes in Nanuet and Newburgh where the ceiling looked fine from across the room, but up close you could see the yellow ring, the soft drywall tape, and that faint musty smell that tells you the problem didn't start today. By the time most homeowners notice water damage, it's already traveled well past the original leak.
Around here, water has a way of finding the weak spots. In the Hudson Valley, we deal with roof ice dams, old copper and galvanized lines in pre-1970s homes, basement seepage after spring storms, and heavy summer humidity that keeps everything wet longer than people expect. A pinhole leak in a pressurized supply line can waste hundreds of gallons in a day, and I've seen a $20 valve turn into a $6,000 repair because it kept dripping behind a finished wall for two weeks.
Good water damage repair isn't just about drying what you can see and slapping on a coat of paint. You've got to identify the source, stop it completely, dry the structure to safe moisture levels, and only then rebuild. That's the part homeowners in Rockland and Orange County get burned on all the time. The surface looks dry, but the sill plate, insulation, subfloor, or backside of the drywall is still wet. This guide will walk you through how to catch it early, what to do in the first few hours, what you can handle yourself, and when it's time to bring in a pro for water damage repair Hudson Valley homes really need.
How to Identify Water Damage Early
Start with the clues water leaves behind
The obvious signs are ceiling stains, bubbling paint, swollen baseboards, warped flooring, and drywall that feels soft when you press it with two fingers. But some of the worst damage is hidden. In bathrooms and kitchens, I look for caulk joints pulling away, loose toilet bases, darkened grout lines, and cabinet toe kicks that are puffed out by even 1/8 inch. In basements, check the bottom 24 inches of foundation walls for efflorescence, peeling paint, or that chalky white residue that says moisture has been moving through the masonry.
Check the high-risk areas first
In most homes, I inspect in a set order: under sinks, around dishwasher supply lines, behind refrigerators with ice makers, around washing machine hoses, near water heaters, under roof valleys in the attic, around chimney flashing, and along exterior walls below second-floor bathrooms. Use a bright flashlight and a cheap moisture meter like the Klein ET140 or General Tools MMD4E. Dry interior drywall often reads under 12% moisture content. When I'm seeing 15% to 17% or higher in a finished wall, I know we're not dealing with an old stain anymore.
Figure out what kind of water you're dealing with
Not all water damage is equal. Clean water from a supply line is one thing. Gray water from a washing machine overflow or dishwasher backup is another. Black water from sewage, drain backups, or floodwater is a health issue and changes the whole repair plan. Once water has sat for 24 to 48 hours, even a clean leak can turn into a contamination problem, especially in insulation, carpet pad, and porous trim. That's why timing matters so much.
Document before you tear into it
Take wide shots, close-ups, and pictures of the source if you can find it. Measure the wet area and write it down. For insurance, I tell homeowners to photograph the damaged flooring, drywall, furniture, and any visible reading on the moisture meter. It sounds simple, but good documentation can make the difference between a smoother claim and a back-and-forth headache. Then mark the wet perimeter lightly with painter's tape so you can see whether the moisture is spreading.
Pull off one piece of baseboard in the wettest area before assuming the wall is fine. I can't tell you how many times the face of the drywall looked decent, but the backside and insulation were soaked.
Homeowners often judge damage by the stain alone. Water usually travels along framing, pipes, or the back of drywall, so the visible spot is rarely the full repair area.
How to Stop Active Water Intrusion
Shut off the source before anything else
The first move is always stopping the water. For a plumbing leak, shut off the nearest fixture valve first, then the house main if needed. Every homeowner should know where the main shutoff is and have a curb key or at least a clear path to it. For a roof leak, a tarp with 2x4 furring strips can buy you time, but only if it's installed safely and extends at least 3 to 4 feet past the damaged section. For gutters dumping near the foundation, add a temporary downspout extension so water discharges 6 to 10 feet away from the house.
Make the area safe
Water and electricity don't play nice. If water is near outlets, recessed lights, or the breaker panel, shut off power to that area before touching anything. Move rugs, furniture, and boxes out right away. Put aluminum foil or wood blocks under furniture legs so finish doesn't wick up more moisture. In a finished basement or lower level, use a wet/dry vac for standing water under 1/4 inch deep. Once you're deeper than that, or the water keeps returning, it's time for a sump pump or extraction equipment.
Use temporary repairs the right way
For burst or split plumbing lines, a SharkBite cap or push-to-connect coupling can be a good temporary fix on copper, CPVC, or PEX when the pipe is clean and cut square. For a failed washing machine hose, replace it with a braided stainless steel hose, not another cheap rubber one. Around tubs and showers, scraping out failed caulk and sealing with GE Silicone 2 Kitchen & Bath or LATICRETE Latasil can stop splash-related leaks, but only after the area is dry. Don't caulk over an active leak and call it repaired. That's just trapping the problem.
Start drying immediately
Once the leak is stopped, air movement and dehumidification matter. Open up the area, run air movers so they skim across wet surfaces, and use a dehumidifier sized for the space. In a typical 600 to 800 square foot basement, one LGR dehumidifier and two to three air movers is a solid starting point. The goal isn't just making the room feel dry. You want to pull moisture out of framing, subfloor, and insulation before mold gets a foothold.
Keep a couple of braided supply lines, a SharkBite cap in the common pipe sizes in your home, and a wet/dry vac filter on hand. Those three things can save a lot of damage in the first hour.
A lot of homeowners start patching drywall before the source is actually fixed. I see it after roof leaks and shower leaks all the time, and the stain comes right back through the new paint.
How to Dry and Repair Damaged Materials
Open up wet assemblies so they can actually dry
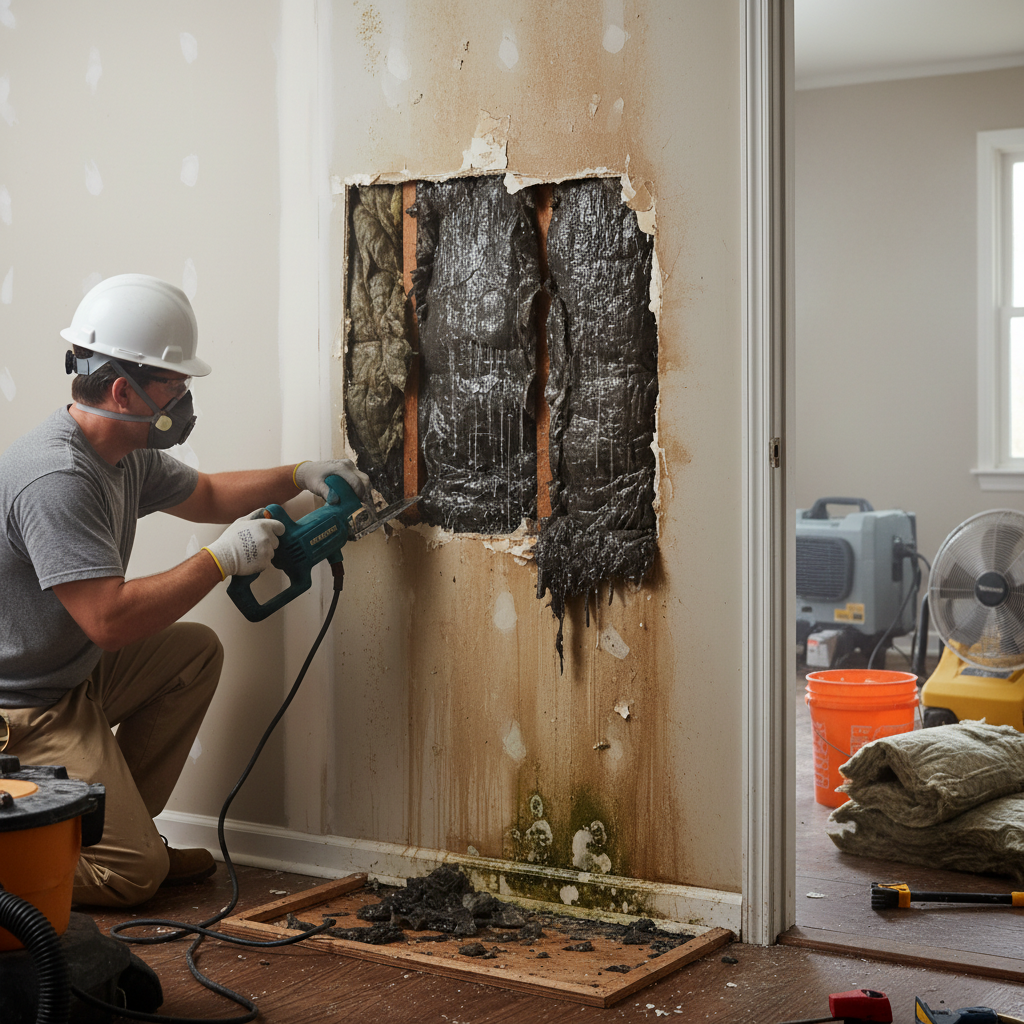
Drying a room with wet materials still sealed inside the walls doesn't work. For soaked drywall, I usually remove material at least 12 inches above the highest visible water line, and sometimes more if the moisture meter says it traveled farther. Wet fiberglass insulation gets replaced, not dried in place. Baseboards and door casing often have to come off so air can reach the wall cavity. On hardwood floors, cupping tells you moisture is trapped underneath, and you need to check the subfloor before deciding whether boards can be saved.
Dry to a target, not to the touch
This is where DIY jobs go sideways. A wall can feel dry on the surface and still read 18% internally. Framing should come down close to normal equilibrium for the home before you close the wall. As a rule of thumb, I like to see most interior wood framing under 15% moisture content, and ideally within a few points of unaffected framing nearby. Subfloors under vinyl plank or tile need the same attention. Rush this step and you'll get mold odor, nail pops, soft floors, or paint failure later.
Clean, sanitize, and seal as needed
After demolition and drying, I treat suspect framing with an antimicrobial such as Concrobium Mold Control or Benefect Decon 30 when conditions call for it. For stained framing or sheathing, an odor-blocking primer like Zinsser B-I-N or KILZ Restoration can help lock down residual discoloration after the area is dry. In bathrooms, kitchens, and basements, I also look for reasons the damage started in the first place: no exhaust fan, bad flashing, failed grout, uninsulated pipes, or poor exterior grading.
Rebuild with materials that make sense for the space
For standard repairs, 1/2-inch drywall is fine on most walls, but ceilings often sag after a leak and need careful fastening back to sound framing or full replacement. In moisture-prone areas, I prefer mold-resistant drywall or cement board where appropriate, paired with fiberglass mesh tape and setting-type joint compound like USG Durabond 45 for the first coat. Then I finish with a lightweight topping compound, prime the full repair area, and paint corner to corner when possible. Spot-painting a water-damaged ceiling almost never blends as cleanly as homeowners hope.
Know when the damage is beyond handyman territory
When water has affected structural beams, electrical wiring, HVAC equipment, finished basements with multiple rooms, or anything involving black water, you want a licensed mitigation or specialty contractor involved. Same goes for widespread mold, sagging plaster ceilings, or subfloor rot around toilets and tubs. There's a difference between patching a stain and restoring a building assembly the right way.
Before hanging new drywall, snap a few photos of the opened wall cavity after it's dry. It gives you a record of pipe runs, wiring, and repair quality for future work or insurance questions.
When replacing bathroom or laundry shutoff valves during a repair, spend the extra money on quarter-turn ball valves. They fail less often and shut off fast in an emergency.
Common Mistakes to Avoid
The biggest mistake I see is treating the symptom instead of the source. A fresh coat of ceiling paint, some caulk around the tub, or a new piece of trim doesn't mean the leak is solved. Water travels along joists, pipe runs, and framing, so the stain in one room may start two rooms away. I always tell homeowners to trace the path uphill and upstream before spending a dime on finish work.
The second mistake is waiting too long to open things up. People worry about making a mess, so they leave wet drywall, insulation, or flooring in place for days. That's when the smell starts, the paper face of drywall becomes mold food, and cabinet bottoms begin to delaminate. In many cases, a clean, controlled 12-inch or 16-inch cut in drywall on day one saves a much larger repair on day five.
Another common issue is underestimating how long materials stay wet in the Hudson Valley. Basements especially can feel dry because the standing water is gone, but concrete walls, sill plates, and carpet pad can hold moisture for quite a while. One box fan in the corner isn't enough. You need real air movement, dehumidification, and meter checks, especially during humid summer weather.
Last one: homeowners skip the root-cause correction. They repair the ceiling but ignore the loose step flashing. They replace the baseboard but not the gutter extension. They patch the wall but leave an uninsulated pipe in an exterior cavity that froze once and will freeze again. Good repairs hold up because the failure point gets corrected, not hidden.
Any time you have repeated water damage in the same spot, spend the money on diagnosis before cosmetics. A plumber with a pressure test or a roofer with a proper inspection can save you from repeating the whole repair.
Remove furniture, rugs, and loose contents immediately and start drying the same day. Fast action often turns a full replacement job into a smaller patch and paint job.
Cost Breakdown: What to Expect
Water damage costs vary a lot based on source, contamination level, and how long the area stayed wet. For small, clean-water repairs, homeowners doing basic DIY drying might spend $150 to $500 on supplies: contractor bags, plastic, a shop vac filter, a moisture meter, fans, antimicrobial cleaner, and primer. Add dehumidifier rental and you're usually in the $50 to $90 per day range. DIY works best for minor leaks caught fast, not for hidden wall damage, sewage, or large soaked areas.
For professional help in Rockland County, skilled handyman or general repair labor commonly runs about $95 to $135 per hour, with some higher in towns like Nyack, New City, and parts of Clarkstown because overhead is steeper. In Orange County, I typically see experienced handyman labor around $85 to $125 per hour in places like Middletown and Newburgh. Licensed plumbers often charge $150 to $225 for a standard service call, and emergency after-hours rates can jump well beyond that. Water mitigation companies may price drying by equipment and days on site, or by affected square footage.
For actual repair ranges, a simple ceiling stain repair and repaint might run $250 to $600 if the leak was already fixed and the drywall is still sound. A drywall patch with insulation replacement in one wall section is often $400 to $900. Ceiling drywall replacement can run $500 to $1,500 depending on size and height. Replacing damaged baseboard in one room may be $250 to $700. Flooring is where numbers climb fast: laminate or LVP replacement often lands around $6 to $15 per square foot installed, hardwood repairs can be much higher, and subfloor replacement commonly adds $4 to $8 per square foot. Bathroom or kitchen cabinet damage can push the job up another $300 to several thousand depending on matching and scope.
Once mold remediation, black water cleanup, or structural repair gets involved, costs move into a different category. A wet finished basement with demolition, drying, insulation, drywall, trim, and flooring can easily run into the thousands. My advice is to separate the job into three buckets when budgeting: source repair, dry-out and demolition, and rebuild. That gives you a more honest number and helps you compare quotes without getting fooled by a low price that leaves out critical steps.
Ask for itemized pricing that separates leak repair, drying, demolition, and rebuild. It's the easiest way to compare bids and decide what you can safely handle yourself.
Replace old rubber washing machine hoses every 5 years, add water alarms under sinks and by the water heater, and keep gutters clear. Those small steps cost far less than one major cleanup.
📍 How This Applies to Homes in Rockland & Orange County
Water damage hits Hudson Valley homes a little differently than it does in newer, flatter, warmer parts of the country. In Rockland and Orange County, we get harsh winters, freeze-thaw cycles, spring moisture, and sticky summer humidity that slow drying and expose every weak point in the building envelope. I've seen plenty of older pre-1970s homes in Nanuet, Spring Valley, Suffern, and New City with original copper, galvanized drain lines, older flashing details, and basements that were never truly waterproofed by modern standards.
In river towns and older neighborhoods like Nyack and parts of Newburgh, you've got homes with aging masonry, stone foundations, settled grading, and rooflines that have seen a lot of seasons. A little ice dam at the eave can push water behind plaster or drywall. Then spring arrives, the ground stays saturated, and basement walls start weeping just enough to ruin paneling, trim, or stored boxes. Homeowners are often surprised how much damage comes from repeated minor moisture, not one dramatic flood.
Summer brings its own problems. In Middletown and other parts of Orange County, finished basements and lower levels can stay damp even after the original leak is fixed because the humidity hangs around. That's when I see carpet pad, lower drywall, and framing stay above safe moisture levels longer than expected. A repair that might dry in a couple of days during a cold, dry stretch can take much longer in July or August unless you're running proper dehumidification.
The local takeaway is simple: around here, you can't just patch the stain and move on. Hudson Valley homes need leak repairs, drainage corrections, insulation upgrades on vulnerable pipes, and a drying plan that accounts for our climate. Whether it's a split pipe in Suffern after a cold snap or a seepage issue in a New City basement after spring rain, the houses that stay ahead of water damage are the ones where homeowners act fast and fix the root cause, not just the finish materials.
Frequently Asked Questions
Ready to Get Started?
Get Your Free Estimate Today
Serving Rockland County & Orange County, NY. Professional results, guaranteed.
Request a Free Estimate →