Late on a Friday in New City, I was wrapping up a ceiling repair when the homeowner stood back, looked at the freshly painted room, and said it still felt unfinished. She was right. The walls were smooth, the color was spot-on, but that hard line where the wall met the ceiling made the whole space feel a little flat. We added crown the next week, and the room went from decent to polished without changing a single piece of furniture.
Around Rockland and Orange County, especially in older colonials, ranches, and capes, I see the same thing all the time. Good rooms with solid bones just need that transition detail to tie everything together. I’d also say 7 out of 10 pre-1970s rooms I measure have at least one corner that’s out of square by more than 1/8 inch. That’s exactly why crown molding installation Orange County NY homeowners try as a quick weekend project can turn frustrating fast when the first inside corner refuses to close.
The good news is crown molding isn’t some mysterious finish carpentry trick. It comes down to planning, understanding your molding profile, making accurate test cuts, and knowing how to deal with real-life walls that bow and ceilings that dip. I’m going to walk you through the same process I use on jobs from Nyack to Middletown, so you can either tackle it the right way or know what you’re paying for when you bring in a pro.
Choosing the Right Crown Molding
Match the crown size to your ceiling height
The biggest mistake I see before a saw even comes out is choosing a profile that’s either too small to matter or so oversized it crowds the room. In most 8-foot rooms, a 3 5/8-inch to 4 5/8-inch crown looks balanced. In a 9-foot room, 5 1/4-inch to 6 5/8-inch usually feels right. Once you get into 10-foot ceilings, a built-up crown with a base cap and flat stock often looks better than a single skinny piece trying to do too much.
Pick the right material for the room
For paint-grade jobs, MDF is affordable and smooth, but I only like it in dry, climate-controlled spaces like bedrooms and formal living rooms. In kitchens, bathrooms, or older homes that move with the seasons, finger-jointed pine or poplar is the safer bet because it handles minor moisture swings better and holds fasteners more reliably. Polyurethane crown is light and useful for awkward ceilings, but it still needs careful fastening and clean seams if you want it to look custom instead of plastic.
Know the spring angle before you cut anything
Crown molding usually comes in 38/52 or 45/45 spring angles, and that matters because it changes how the piece sits on the saw. I always check the manufacturer’s label or hold two short scrap pieces in position and verify the angle before cutting full lengths. A lot of homeowners assume every corner gets a standard 45-degree miter, but crown doesn’t work that way. The cut depends on the corner type, the spring angle, and whether you’re cutting nested or flat with compound settings.
Measure the room and order enough material
Measure the full perimeter and add at least 10 percent for waste. In older homes with a bunch of jogs, chimney chases, or out-of-square corners, I bump that to 15 percent because you’ll burn through extra material dialing in your fits. I also like to bring the crown into the house for 48 hours before installation, especially in winter, so it can acclimate. Cold material from a garage in January can shift just enough after installation to open a joint you swore looked perfect the day before.
Buy one extra 8-foot length strictly for test cuts. It’s cheap insurance, and it saves your good stock when you’re dialing in inside and outside corners.
Homeowners often choose crown by what looks nice on the shelf instead of what fits the room scale. A 2 5/8-inch profile usually disappears on an 8-foot ceiling once the room is furnished.
Step-by-Step Crown Molding Installation
Mark your layout lines first
Before I install anything, I find the ceiling and wall projection of the crown and snap light reference lines. A common 4 5/8-inch crown often lands around 3 1/4 inches on the wall and ceiling, but always verify your exact profile. Use a tape, a level, and a chalk line so the molding follows a consistent reveal even when the ceiling waves a little. I also locate studs and ceiling joists with a Zircon stud finder and mark them lightly in pencil so I’m not firing nails blind into drywall.
Make test cuts and set up the saw the same way every time
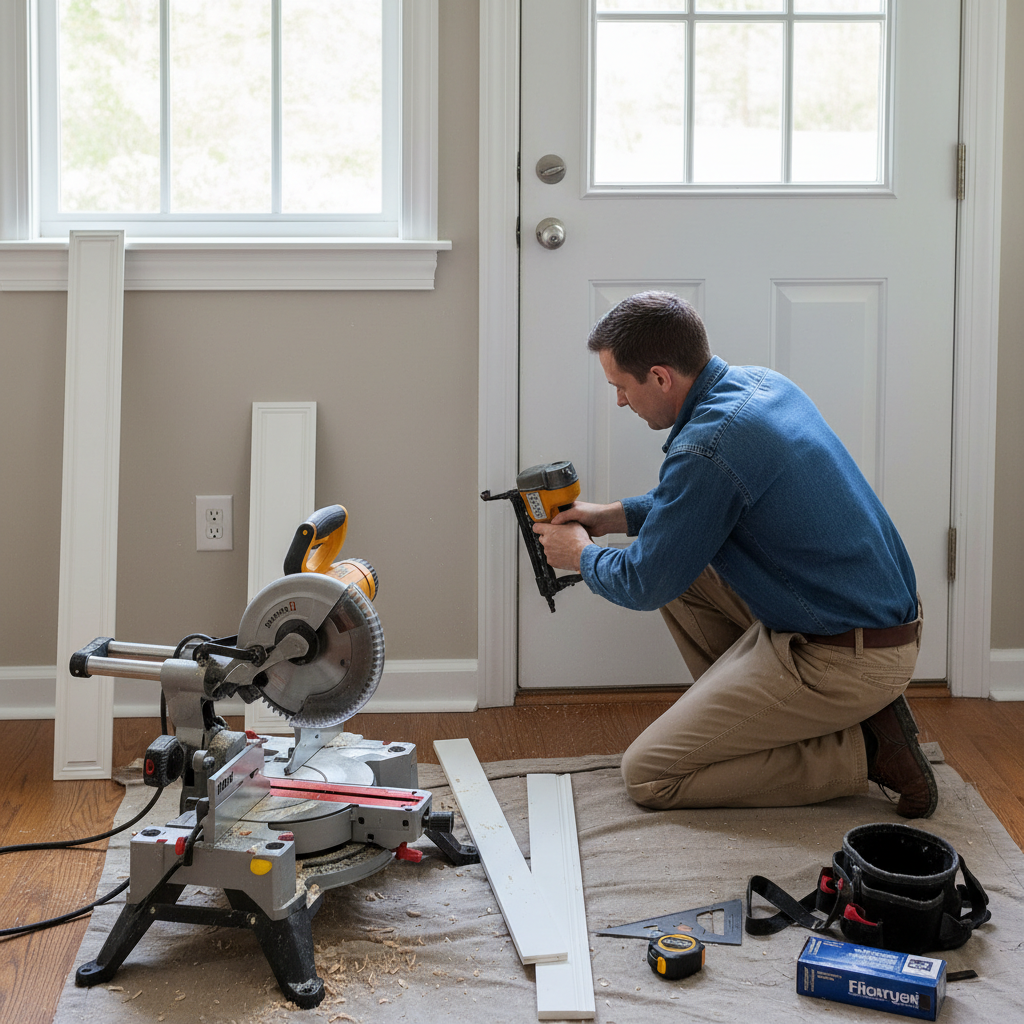
A 10-inch or 12-inch compound miter saw works well, but it has to be square and fitted with a sharp 80-tooth finish blade. For most jobs, I cut crown nested against the saw fence, upside down and backward, because that’s how the piece actually sits between the wall and ceiling. The trick is consistency. I keep the same edge against the fence every time, label scrap pieces left inside, right inside, left outside, and right outside, and dry-fit those scraps in the corner before I touch the full-length stock.
Install the longest straight run first
I like to start on the longest, most visible wall because that sets the tone for the whole room. Hold the crown to your layout lines and tack it with 2-inch or 2 1/2-inch 15-gauge finish nails into framing whenever possible. On smaller returns, I’ll use 18-gauge brads plus a small amount of Loctite Power Grab or PL Premium Max. For long walls that need more than one piece, make a scarf joint over a stud using opposing 45-degree cuts so the seam overlaps cleanly and has something solid behind it.
Cope inside corners whenever you can
On painted crown, a coped inside corner almost always holds up better than two miters pushed together. I cut one piece square into the corner, then cut the mating piece with a 45-degree miter and use a coping saw or oscillating tool to remove the waste behind the profile. Once you clean that edge with a file, the profile fits over the face of the first piece and hides tiny movement much better. Outside corners still get mitered, but I always cut them a hair long and sneak up on the fit rather than trusting the wall to be exactly 90 degrees.
Fill, caulk, and paint for the finished look
After everything is secured, fill nail holes with a lightweight filler like DAP DryDex or MH Ready Patch. Use a paintable acrylic-urethane caulk like DAP Alex Flex along the wall and ceiling lines, but don’t overdo it or you’ll blur the detail in the profile. For raw wood or finger-jointed stock, prime bare spots with Zinsser BIN or Cover Stain, then topcoat with a durable trim paint such as Benjamin Moore Advance or Sherwin-Williams Emerald Urethane. Most of the time, what separates an average crown job from a sharp one isn’t the cuts alone, it’s the patience in the final prep.
When you’re working alone, tack temporary support blocks along the wall just below your layout line. They’ll hold the crown in position while you align the ends and shoot your first nails.
A lot of DIYers try to force an inside corner closed with nails. That usually twists the molding, opens the next joint, and leaves a wavy line across the wall.
Common Mistakes to Avoid
The most common problem is treating crown like flat trim. Crown sits at an angle, so the orientation on the saw matters just as much as the miter setting. Flip one board the wrong way, and you can waste an expensive length in about five seconds. I tell homeowners to label every piece and every test cut, because once the offcuts pile up on the floor, they all start looking the same.
Another big issue is ignoring room movement and surface conditions. In Rockland and Orange County, plenty of older houses have plaster that isn’t dead straight, and ceilings often dip near outside walls. If you skip layout lines and just follow the ceiling, the reveal on the wall will rise and fall enough that your eye catches it from across the room. That’s also why I don’t recommend nailing crown into drywall only. Without framing, it may hold at first, but seasonal movement will eventually open seams or let a corner sag.
I also see homeowners install crown straight from a cold garage, especially in winter. Then the heat kicks on, the material dries out, and the joints shrink. MDF can swell if it takes on moisture before installation, and wood can move if it hasn’t acclimated. Give the material time inside the house, and keep indoor conditions as normal as possible before, during, and after the install.
The last mistake is trying to fix every bad fit with caulk. Caulk is for finishing hairline gaps, not hiding poor cuts. When I see a corner packed with a half tube of caulk, I already know the profile is off. A cleaner way is to recut the piece, use a coped joint on paint-grade installs, and only use caulk where the wall or ceiling needs a final touch-up.
In older plaster homes, I often install wood backing or use strategic blocking above cabinets and built-ins so the crown has solid fastening points instead of relying on brittle lath and plaster.
Use finger-jointed pine instead of clear hardwood for paint-grade rooms. It usually cuts cleaner than cheap MDF on longer runs and costs a lot less than poplar or oak.
Cost Breakdown: What to Expect
Material cost depends first on the profile and second on the material. In our area, paint-grade MDF crown generally runs about $1.75 to $3.50 per linear foot for common profiles. Finger-jointed pine usually lands around $2.50 to $4.50 per linear foot, poplar around $4.50 to $8, and stain-grade hardwood or specialty polyurethane profiles can jump to $8 to $18 or more per linear foot. Add primer, caulk, filler, nails, and blades, and even a basic room has more supply cost than most homeowners expect.
For DIY, the real budget swing is tools. If you already own a good compound miter saw and compressor, you’re ahead. If not, expect roughly $60 to $90 per day for saw rental, $35 to $60 for a finish nailer rental, $15 to $25 for a coping saw, $12 to $20 for finish nails, $5 to $8 per tube for quality caulk, and $25 to $70 for primer depending on product size. On a standard 12-by-14 room with about 52 linear feet of crown, a careful DIYer might spend $250 to $700 in materials and consumables, or more if new tools are part of the equation.
Professional installation in Rockland County typically runs higher than in parts of Orange County because labor, travel, and overhead are a little steeper. For finish carpentry, I commonly see labor rates around $85 to $125 per hour in Rockland and $75 to $115 per hour in Orange County, depending on the crew, the house condition, and whether painting is included. Installed pricing often works out to about $9 to $16 per linear foot for straightforward paint-grade crown in a newer, square room, and $16 to $28 or more per linear foot in older homes with plaster repairs, high ceilings, or lots of tricky corners.
For a real-world example, a simple bedroom might come in around $700 to $1,200 professionally installed and caulked, while a larger living room with multiple outside corners, ceiling repairs, and finish painting can easily hit $1,500 to $3,000. Built-up crown, indirect lighting details, or stain-grade wood push that higher. What moves the price most isn’t just room size. It’s corner count, ceiling height, surface condition, and how much time it takes to make the work look like it belongs in the house instead of being added as an afterthought.
Have crown installed before a full room repaint whenever possible. Bundling trim work and painting usually saves money compared with bringing painters back later for a separate visit.
Keep indoor humidity steady, especially in winter. A house that swings from very dry heat to muggy summer air will show joint movement faster, even on a good installation.
📍 How This Applies to Homes in Rockland & Orange County
Crown molding behaves a little differently in Hudson Valley homes than it does in brand-new construction farther south. In places like Nanuet, Spring Valley, Suffern, Nyack, and New City, a lot of the homes I work in were built before the 1970s. That means plaster walls, out-of-square corners, patched ceilings, and framing that has settled over time. On paper, a room might look simple. In real life, one corner is 88 degrees, another is 93, and that changes how every piece has to be cut and fitted.
The climate matters too. Harsh winters and freeze-thaw cycles put steady stress on older homes, especially around exterior wall lines and ceiling corners. By the time spring moisture rolls in, tiny seasonal gaps can show up where trim meets plaster. Then summer humidity hits, and wood moves again. That’s why I always tell homeowners in Rockland and Orange counties not to judge crown molding only by how it looks on installation day. The real test is whether the joints stay tight through January heat and August humidity.
Over in Middletown and Newburgh, I see a lot of ranches, split-levels, and colonials where crown can make a huge visual difference, especially in rooms with plain drywall ceilings and builder-grade trim. But those homes still need proper acclimation and flexible finishing products. A good acrylic-urethane caulk and a solid fastening plan matter more here than people think, because spring moisture and summer humidity will find every weak seam. MDF can still work in dry rooms, but for houses with known moisture swings, I usually steer clients toward finger-jointed pine or poplar.
The other local factor is style. In older Hudson Valley homes, crown looks best when it matches the character of the house instead of fighting it. A modest 3 5/8-inch or 4 5/8-inch profile often suits a Cape in Suffern or a ranch in Newburgh better than a giant ornate profile meant for a formal estate. In a Nyack Victorian or an older New City colonial, though, stepping up to a larger profile or a built-up assembly can look exactly right. The goal is simple: make it feel like the crown was always supposed to be there.
Frequently Asked Questions
Ready to Get Started?
Get Your Free Estimate Today
Serving Rockland County & Orange County, NY. Professional results, guaranteed.
Request a Free Estimate →