Every January, I get the same kind of call from homeowners around Orange County and Rockland: one room feels freezing, the window trim looks a little stained, and somebody just noticed a thin line where the old caulk has cracked loose. It doesn’t look like much at first. Then you put your hand near the gap on a windy day and feel that cold air coming straight in. A week later, the bathroom corner is darkening, the sill paint is bubbling, or the heating bill lands in the mailbox and nobody’s happy.
Most people think of caulk as cosmetic, but it’s really one of the cheapest forms of protection in the house. The U.S. Department of Energy has long estimated that air leaks can account for roughly 25% to 30% of heating and cooling energy use in a typical home. Around the Hudson Valley, where older windows, shifting trim, and freeze-thaw cycles are part of life, I’d argue neglected caulk causes even more trouble than homeowners realize. I’ve seen a gap smaller than 1/8 inch around a window in Newburgh turn into rotten trim by spring.
The good news is this is a repair that pays you back fast when it’s done correctly. The bad news is bad caulking work usually fails fast too. Smearing a tube of cheap caulk over dirty, damp, or moving joints might look fine for a month, but it won’t hold through a Hudson Valley winter. In this guide, I’ll walk you through where to caulk, what products to use, what to leave alone, and how homeowners in Orange County, NY can avoid the usual mistakes.
Why Caulking Matters More Than Most Homeowners Think
Small gaps cause big problems
Caulk has two main jobs: stop unwanted air movement and keep water out of places it doesn’t belong. That sounds simple, but those two things are behind a lot of the repair calls I see. A gap around a window casing, plumbing pipe, or exterior trim board can let conditioned air leak out all year. On the water side, even a hairline crack can funnel rain behind trim, around window flanges, or into wall cavities where you won’t see damage until the wood gets soft or paint starts peeling.
Air leaks aren’t always obvious
Homeowners usually notice the symptoms before they notice the failed caulk. A second-floor bedroom that’s always colder, a musty smell in a bathroom, or an ant problem near the kitchen sink can all trace back to failed seals. One easy test is to hold a smoke pencil or even an incense stick near suspected gaps on a windy day. Around window stool joints, baseboard corners, attic hatch trim, and where the siding meets trim boards, the smoke will tell you fast whether air is moving.
Water damage starts quietly
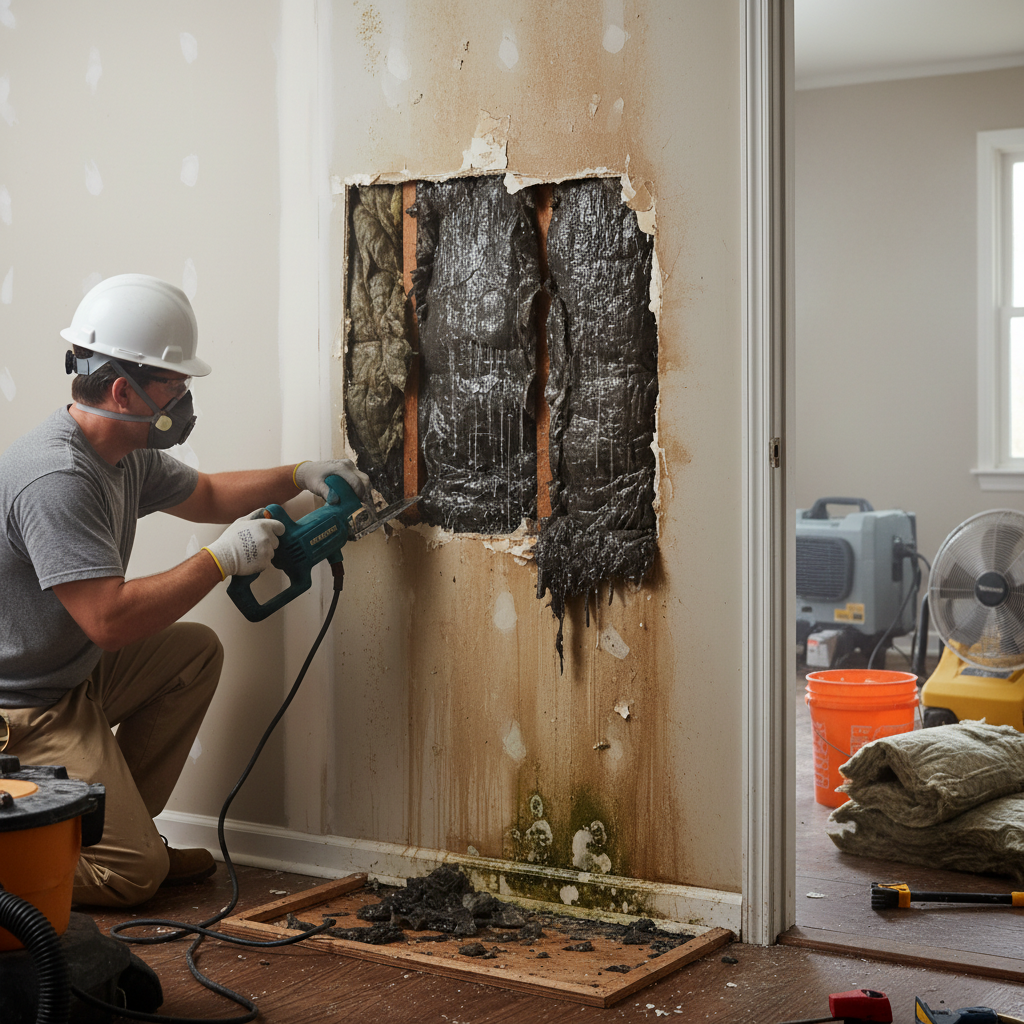
Water intrusion is the bigger concern because it can stay hidden for a long time. I’ve pulled apart exterior casing in Nyack and found blackened sheathing from a failed top joint that looked harmless from the ground. Caulk isn’t a substitute for proper flashing, but it is part of the system. On most homes, the trouble spots are the vertical trim-to-siding joints, around penetrations like hose bibs and light fixtures, and at window and door trim where movement has opened a crack of 1/16 to 1/4 inch.
Caulk isn’t magic, and that matters
Here’s the contractor truth: caulk is maintenance, not a permanent cure-all. It works best when the joint is properly sized, clean, dry, and stable. If a gap is widening because framing is shifting, the window was installed poorly, or there’s existing rot, the right fix may involve backer rod, flashing repair, or replacing damaged material first. Good caulking buys protection, but it has to be part of a sound assembly.
Before you buy a single tube, walk the house with a flashlight and a roll of blue painter’s tape. Mark every failed joint you see so you can batch the work and use the right product in the right place.
A lot of homeowners caulk over soft wood, peeling paint, or active leaks. Caulk won’t bond well to failing material, and it definitely won’t fix hidden rot behind the trim.
How to Choose the Right Caulk for Each Job
Match the caulk to the location
Not all caulk is the same, and using the wrong one is one of the main reasons jobs fail early. For interior painted trim and small air-sealing jobs, a high-quality acrylic latex or siliconized acrylic works well. Products like DAP Dynaflex 230 are good for paintable interior and some exterior trim joints. For bigger movement joints on exterior siding and trim, I like Sashco Big Stretch because it stays flexible. For wet areas like tubs, showers, and sink edges, 100% silicone such as GE Advanced Silicone 2 Kitchen & Bath is the better choice because it handles moisture far better than painter’s caulk.
Know what paintable really means
Homeowners get tripped up here all the time. Pure silicone performs great in wet areas, but most of it is not paintable. If you need the joint painted, especially on window trim, baseboards, or exterior casing, use a paintable elastomeric or siliconized acrylic product instead. On some exterior jobs, especially around certain siding and trim materials, a hybrid sealant like Lexel or OSI Quad Max can be worth the extra money because the adhesion is stronger and the flexibility is better in temperature swings.
Size the joint correctly
The bead size matters more than people think. For many interior trim joints, a 1/8-inch to 3/16-inch bead is enough. For exterior joints, 3/16 inch to 1/4 inch is common. If the gap is wider than 1/4 inch, don’t just pump in a giant blob of caulk. Use foam backer rod first so the sealant bridges the joint instead of filling a deep void. As a rule, the depth of the sealant should be about half the width of the joint, with many good-performing joints landing around 1/8 inch to 3/8 inch deep.
Application tools make a difference
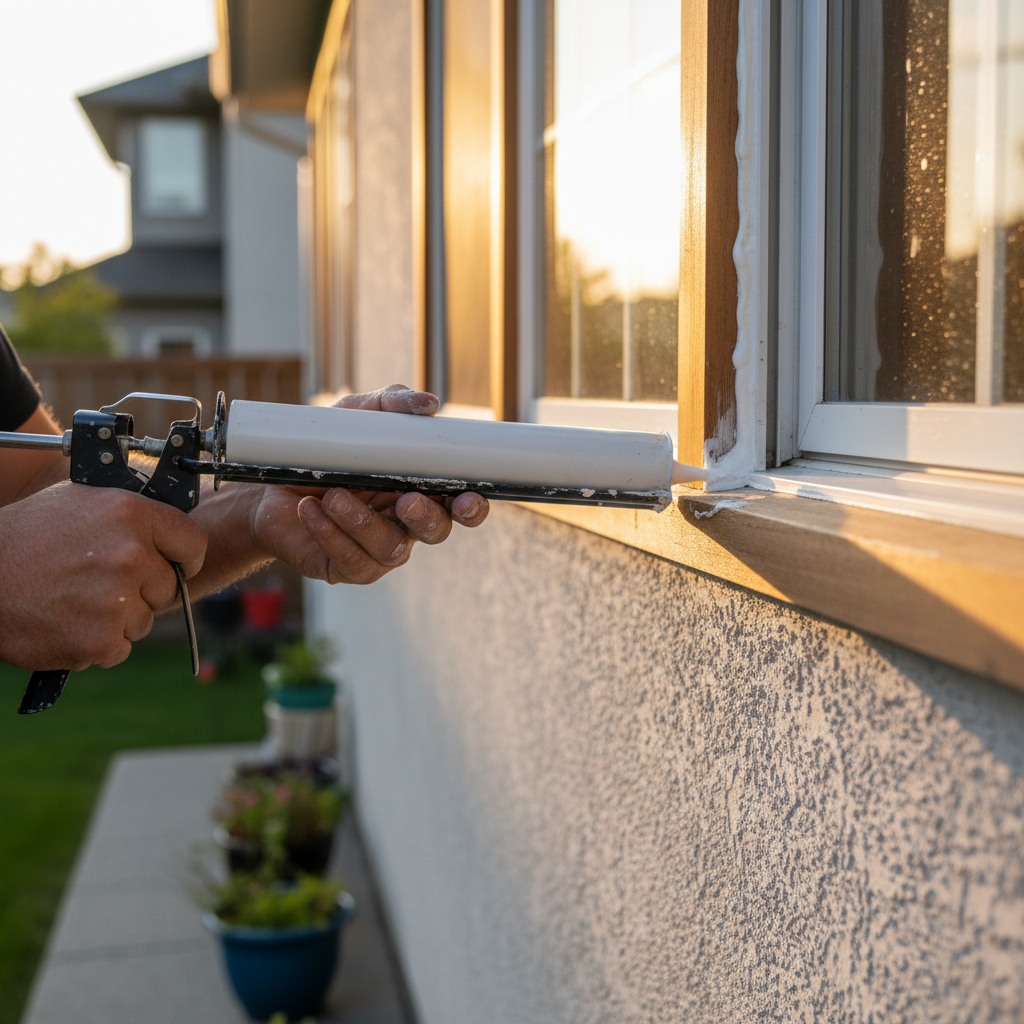
A decent dripless gun is worth it. I like a smooth-rod or dripless caulk gun in the $15 to $30 range because it gives better control than the bargain-bin models. Cut the nozzle at a 45-degree angle, start with a small opening, and puncture the inner seal cleanly. When I’m working trim joints, I usually push the bead instead of dragging it. That keeps the sealant pressed into the joint. Then tool it right away with a damp finger, a caulk tool, or for silicone, a tool lightly misted with denatured alcohol if the manufacturer allows it.
Check the label for temperature and cure time
In our area, that label matters. Some products want application temperatures above 40 degrees Fahrenheit, while others can tolerate colder conditions. Cure times also vary a lot. Acrylic latex may skin over quickly but need a day or more before paint. Silicone may be water-resistant fast but still need 24 hours or longer before full exposure. Read the tube. It’s boring advice, but it saves a lot of callback work.
Buy one extra tube from the same lot when possible. Color and sheen can vary slightly from batch to batch, and having a matching backup saves a second trip.
Using cheap painter’s caulk outside is a classic failure. It may look neat on day one, but sun, moisture, and winter movement usually split it open much faster than a proper exterior-grade sealant.
Where to Caulk Inside and Outside Your Home
Inside the house
Start indoors where the biggest comfort gains usually are. Caulk along window and door casing where the trim meets the wall, at baseboard-to-wall joints in drafty rooms, and around pipe penetrations under sinks. In older homes, I also seal where crown molding meets cracked plaster and where built-ins meet exterior walls. Around tubs, showers, and backsplashes, remove all failed caulk first and recaulk the change-of-plane joints, not the grout lines. For most tub and shower joints, a clean 1/8-inch to 3/16-inch bead of mildew-resistant 100% silicone is the sweet spot.
Around windows and doors outside
Exterior windows and doors need a little more judgment. Caulk the vertical side casings and the top trim joints where appropriate, but don’t trap water where it’s supposed to drain. On many window setups, you do not want to block weep paths at the bottom. Caulk the trim-to-siding joints, miter joints that have opened up, and penetrations where cable lines or conduit enter. If I find a gap bigger than 1/4 inch around a casing, I pack it with backer rod first and then apply the finish bead so it can flex instead of sinking.
Siding, trim, and exterior penetrations
Good exterior caulking targets transitions: where corner boards meet siding, where fascia joints open, where utility penetrations pass through the wall, and where dissimilar materials meet. On fiber cement, engineered wood, or older wood trim, use a product approved by the manufacturer when possible. Around hose bibs, dryer vents, and exterior light fixtures, I often pull the fixture or trim ring if needed, seal the wall penetration, and then finish the visible perimeter. That’s better than just smearing caulk around the outside edge and hoping for the best.
Places you should not caulk shut
This is the part that saves people from expensive mistakes. Don’t caulk soffit vents, attic vent screens, siding drainage gaps, or window weep holes. Don’t seal the bottom edge of every exterior trim detail without understanding how that assembly sheds water. Houses need to manage water, not trap it. I’ve seen more than one leak get worse because someone enthusiastically sealed every visible crack and accidentally blocked drainage.
Prep is half the job
Before new caulk goes in, the old material has to come out cleanly. I use a sharp 5-in-1 tool, utility knife, caulk remover, and sometimes a nylon brush. Then I wipe the joint based on the product requirements, let it dry fully, and only then apply the new bead. On bathrooms, I’ll often let the area dry overnight after removal. On exterior trim, I avoid caulking just before rain or when morning dew is still hanging around. Good prep is what separates a repair that lasts one season from one that lasts several years.
Fill the bathtub with water before caulking the tub-to-tile joint. That puts the tub in its loaded position, so the silicone is less likely to tear when the tub flexes during use.
Homeowners often caulk the bottom of window trim or seal over weep holes because they think every opening is a leak. On many windows, those openings are there to let trapped water escape.
Common Mistakes to Avoid
The first mistake is caulking over old, loose, dirty, or moldy material. New caulk sticks to the surface beneath it, not to wishful thinking. In kitchens and baths, soap film and moisture ruin adhesion. Outside, chalky paint, dust, and damp wood do the same thing. If the old bead is peeling, hardened, or black with mildew, cut it out completely before you start.
The second mistake is using the wrong product in the wrong place. Acrylic latex around a shower surround won’t last like 100% silicone. Paintable trim sealant on a constantly wet sink splash joint is asking for premature failure. On the flip side, pure silicone on a joint that needs paint creates a headache later. Matching the product to the location is half the battle.
Another big one is making the bead too large or too thin. A huge sloppy bead looks amateurish and often fails because it skins over without bonding well. A bead that’s too thin won’t bridge the joint once the house moves through a cold snap and a humid summer. Cut the nozzle small, run a steady bead, and tool it immediately. It should contact both sides of the joint without becoming a smeared mess across the surrounding surfaces.
The last mistake I see all the time is ignoring the weather and cure time. Exterior caulking done on wet siding, in direct blazing sun, or right before a hard rain usually disappoints. Same indoors: homeowners caulk a shower at night and use it the next morning, then wonder why the joint failed. Give the product the dry time it asks for. That patience is cheaper than doing the same job twice.
When in doubt, do a bond test in an out-of-sight area first. A 6-inch sample bead will tell you a lot about adhesion, toolability, and final appearance before you commit to the whole project.
Don’t buy five different bargain tubes for five different areas. Two or three quality products matched to the job usually perform better and waste less material than a pile of cheap caulk that fails early.
Cost Breakdown: What to Expect
For DIY work, caulking is one of the more affordable maintenance tasks in the house. A basic acrylic or siliconized acrylic tube usually runs about $4 to $8. Quality exterior elastomeric or hybrid sealants are commonly $8 to $14 per tube, and premium 100% silicone for kitchens and baths is often $7 to $12. A decent dripless caulk gun is $15 to $30, backer rod is roughly $6 to $15 per pack depending on size, and a few prep tools like a scraper, razor blades, and cleaner can add another $15 to $40.
Professional pricing in Rockland County and Orange County, NY usually comes down to access, prep, and how much failed material has to be removed. Handyman and small contractor labor rates commonly fall around $85 to $125 per hour in much of Rockland and about $75 to $110 per hour in much of Orange County, with detailed finish work, ladder work, or specialty sealants pushing higher. A simple bathtub recaulking job might run $175 to $325. Recaulking several standard interior windows and doors may land around $250 to $600 depending on count and condition. Exterior second-story work or extensive trim prep can move the cost up fast.
For whole-area examples, figure roughly $15 to $35 per linear foot for detailed exterior removal, prep, and premium recaulk on problem trim areas, though straightforward jobs can come in lower and difficult access can go higher. Recaulking a few exterior windows from a ladder might be $300 to $800. A more thorough exterior sealing visit covering windows, doors, trim joints, and penetrations on one side of the house could land between $700 and $1,800. Whole-house caulking on a larger older home can exceed that, especially when rotten material or repainting gets folded into the work.
What really affects price is prep. Fresh caulk over sound joints is relatively quick. Removing layers of old silicone, scraping failing paint, drying out damp areas, or repairing wood before caulking takes time. From a contractor’s point of view, that extra prep is where the value is. It’s also what keeps the job from failing six months later.
Bundle caulking with other small exterior maintenance like screen repair, weatherstripping, or trim touch-ups. Most contractors can price a grouped visit more efficiently than a single tiny callback.
Inspect exterior caulk every spring and every fall, especially on south- and west-facing walls. Catching one split joint early is far cheaper than replacing water-damaged trim later.
📍 How This Applies to Homes in Rockland & Orange County
Caulking matters a little more in the Hudson Valley than it does in milder climates. Between harsh winters, freeze-thaw cycles, spring moisture, and sticky summer humidity, our homes expand, contract, and get tested year-round. A bead that might last longer in a gentler climate can split early here, especially on sunny exposures and older trim details. That’s why I tell homeowners in Orange County and Rockland not to think of caulk as a one-and-done job. It’s seasonal maintenance.
This is especially true in older pre-1970s homes, and we’ve got plenty of them. In places like Nyack, Suffern, New City, and parts of Newburgh and Middletown, I work on a lot of houses with original wood trim, older plaster walls, and windows that have seen decades of movement. Those homes usually have more irregular gaps than newer construction. The joints may not be perfectly square, and the materials move differently from one season to the next, so product choice and prep matter a lot more than they do on a brand-new build.
I also see different trouble spots depending on the town and the setting. In Nanuet, Spring Valley, and New City, a lot of homeowners deal with drafty window trim, garage entry doors, and bathroom caulk failures from everyday wear. In river towns like Nyack, moisture and older exterior details can make window and trim maintenance a recurring issue. In Middletown and Newburgh, where you’ve got a mix of older housing stock and newer developments, I often find exterior penetrations, builder-grade caulk failure, and siding-to-trim gaps that open up after a few tough winters.
Spring is a smart time to inspect after snow, ice, and freeze-thaw movement have done their damage. Late summer into early fall is often the best window for exterior caulking because surfaces are drier and temperatures are steadier. Around here, that timing can make a real difference in how well the sealant cures and how long it holds. For Hudson Valley homes, the best approach is simple: inspect regularly, use the right product, and don’t wait until a small crack turns into a stained ceiling or rotten trim board.
Frequently Asked Questions
Ready to Get Started?
Get Your Free Estimate Today
Serving Rockland County & Orange County, NY. Professional results, guaranteed.
Request a Free Estimate →