Winter Home Prep Hudson Valley NY: How to Protect Your Home From Cold and Ice
A local contractor's practical checklist for keeping drafts, frozen pipes, ice dams, and winter leaks from turning into expensive headaches.
The first real cold snap always tells on a house. One night it's 28 degrees, the wind picks up off the river, and by morning there's a brown water stain on the ceiling, a frozen hose bib in the back, and a front door that suddenly feels like it's got a fan blowing under it. I've walked into plenty of homes in Rockland and Orange County after that first freeze, and the story's usually the same: the house gave a few warnings in October, but nobody thought they'd turn into a January repair bill.
Around here, winter damage usually isn't caused by one big dramatic event. It's the little stuff stacking up. A gutter pitched the wrong way. A 1/4-inch gap at the basement sill. Attic insulation that's there, but air sealing never got done underneath it. In older Hudson Valley homes, I'd say seven out of ten winter emergency calls I see trace back to maintenance that would've taken a weekend and a few hundred bucks in the fall instead of a few thousand in the dead of winter.
That's why winter home prep in Hudson Valley NY isn't about doing flashy upgrades. It's about tightening the house where it leaks heat, moving water away before it freezes, and protecting the parts of the home that get punished by cold, ice, and freeze-thaw cycles. Done right, your house stays warmer, your heating system works less, and you avoid the kind of mid-January problems nobody wants to deal with when it's 17 degrees and getting dark at 4:45.
Seal Out Drafts and Stop Heat Loss
Start by finding the leaks, not guessing
The best first step is a draft hunt on a cold, windy day. I like using a simple smoke pencil, an incense stick, or even the back of my hand around common leak points: attic hatches, window trim, basement rim joists, exterior door jambs, plumbing penetrations under sinks, and where wiring comes through top plates in the attic. Any gap wider than about 1/8 inch is worth sealing. For homeowners who want a more exact read, an infrared thermometer or a small thermal camera attachment for a phone will show cold spots fast, especially around cantilevered floors and older double-hung windows.
Use the right sealant in the right place
For exterior joints that move with weather, I usually reach for a high-quality elastomeric caulk like Big Stretch or OSI Quad Max. Around interior trim and small stationary cracks, a paintable acrylic latex caulk works fine. For deeper gaps, push in foam backer rod first so you're not wasting tubes of caulk filling empty space. Around basement penetrations and rim joists, a minimal-expansion foam like Loctite Tite Foam Window and Door is safer than the aggressive stuff that can bow trim or window frames. A lot of homeowners buy one can of foam and use it everywhere, but the wrong foam in the wrong place can make a mess and still leave the air leak active.
Weatherstrip doors like you mean it
The front and side doors are usually where people feel winter first. Replace flattened weatherstripping with EPDM or silicone-based compression weatherstrip, not the cheap felt that barely survives a season. The reveal should compress just enough that you feel resistance when the door latches, but not so much that you have to slam it. At the bottom, install an aluminum-and-rubber door sweep and keep roughly 1/8 inch clearance from the threshold so it seals without dragging. On older homes with uneven jambs, an adjustable threshold can make a bigger difference than anything else you do at the door.
The attic is usually the real problem
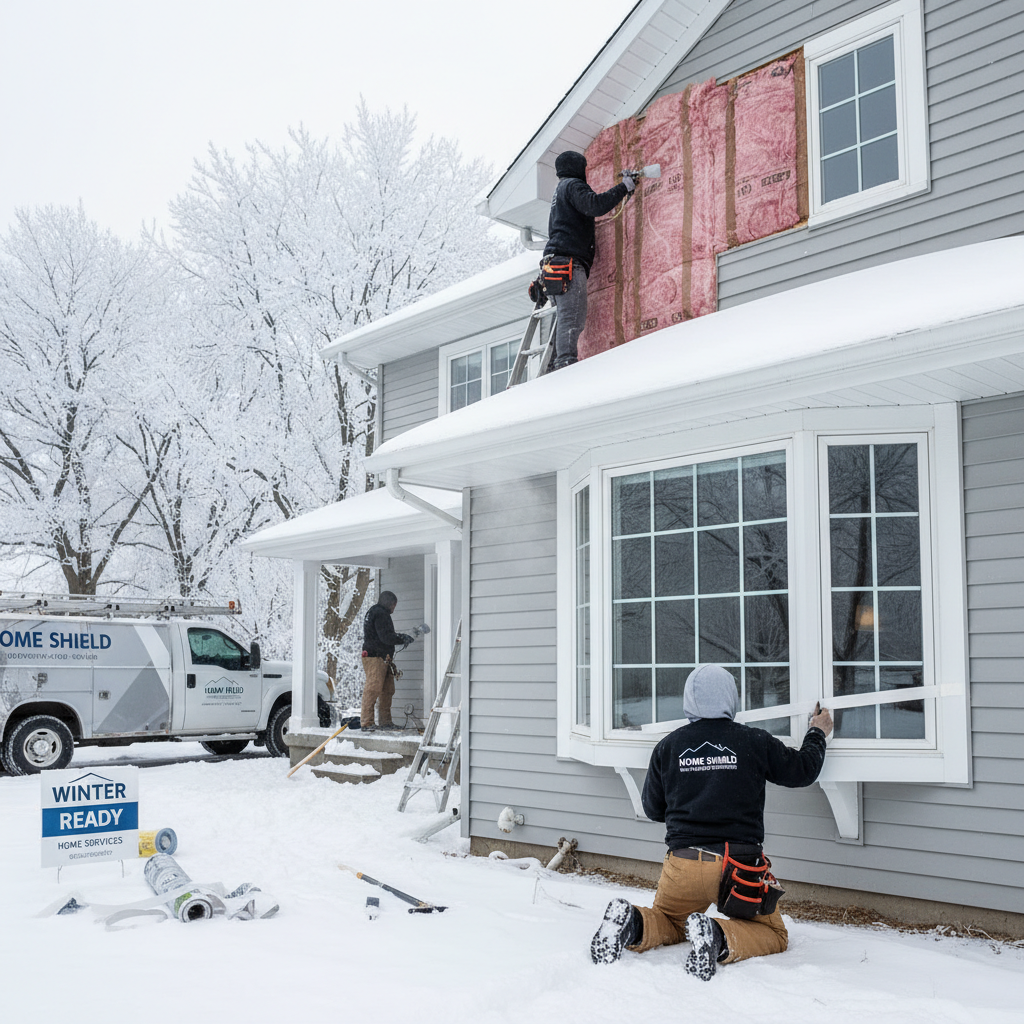
In this climate, attic insulation matters, but air sealing under the insulation matters even more. I see plenty of attics with decent fiberglass batts that still leak heat because the plumbing stack, bath fan housing, recessed lights, and wire penetrations were never sealed. Around metal flues or chimney chases, don't use regular spray foam; use sheet metal as a fire barrier and a fire-rated sealant where appropriate. Once the leaks are sealed, most Hudson Valley homes perform better with attic insulation in the R-38 to R-49 range, and sometimes higher depending on the assembly. Make sure soffit baffles stay open so you keep a 1 to 2 inch ventilation channel at the eaves instead of choking off airflow.
Don't skip the basement and windows
Basements and crawl-adjacent areas are where cold sneaks in low and travels up through the house. At the rim joist, I like 2-inch polyisocyanurate cut to fit between joists and sealed around the edges with canned foam. On older drafty windows that aren't ready for replacement, add fresh lock hardware, check the meeting rail, and use a 3M Indoor Window Insulator Kit on the worst offenders. It's not glamorous, but it works. Keep indoor humidity around 30 to 35 percent in winter too. Once you push humidity higher than that during cold snaps, window condensation starts showing up, and then homeowners think the window failed when the real issue is warm moist air meeting cold glass.
On a windy day, check outlets and switch plates on exterior walls with the back of your hand. If they're cold, pull the plate and add foam outlet gaskets after confirming the box is secure and dry.
Stuffing fiberglass into an active gap without air sealing first doesn't stop drafts. Fiberglass slows heat loss, but air will still move right through it.
Protect Roof, Gutters, Pipes, and Exterior Water Lines
Keep water moving before it turns to ice
Most winter damage starts with water that didn't drain where it should have. Clean gutters after the last heavy leaf drop, then run a hose to make sure each downspout actually clears. A properly pitched gutter should fall roughly 1/4 inch for every 10 feet toward the outlet. Re-seal leaking seams with a gutter sealant like Geocel 2320 and tighten loose spikes or hangers before snow load hits. At grade, downspouts should discharge at least 6 feet away from the foundation, and 10 feet is even better on homes with basement seepage history.
Understand what really causes ice dams
A lot of people blame snow, but snow is only the fuel. Heat escaping through the roof melts the underside of the snowpack, water runs down to the colder eave, and then it refreezes into a dam. That trapped water backs up under shingles and shows up on ceilings and walls. After heavy wet snowfall, especially anything over about 6 inches, use a roof rake from the ground to remove the first 3 to 4 feet of snow above the eaves. Don't hack at ice with a shovel or axe. For trouble spots, fill a nylon stocking with calcium chloride and lay it perpendicular over the dam to create a drainage channel. Never use rock salt on a roof; it chews up metal, landscaping, and sometimes the shingles themselves.
Winterize outdoor faucets and vulnerable pipes
Disconnect every garden hose. Then shut the interior valve feeding the hose bib, open the exterior spigot, and let it drain fully. If your house has frost-free sillcocks, still remove the hose or the faucet can't drain the way it's designed to. For exposed water lines in garages, crawlspaces, or basement ceilings near exterior walls, use closed-cell pipe insulation with at least a 1/2-inch wall thickness. Armacell and Frost King both make decent products for this. On very cold nights, keep cabinet doors open under sinks on exterior walls so room heat can reach the pipes. I only recommend dripping faucets when temperatures are headed into the low teens and you know the line has a freeze history.
Check grading, foundation cracks, and exterior openings
Winter prep isn't just roof-up; it's ground-up too. Make sure soil slopes away from the house at about 1 inch per foot for the first 6 feet. That helps keep meltwater from pooling at the foundation and freezing against it. Small foundation cracks under 1/4 inch can often be sealed with a polyurethane product like Sikaflex, but wider or shifting cracks deserve a pro evaluation. Also check dryer vents, crawl doors, bulkhead doors, and basement windows. A loose bulkhead door gasket or a broken basement sash can let in both water and bitter air fast.
Have a simple cold-weather emergency plan
Every homeowner should know where the main water shutoff is and be able to reach it without digging behind storage. Label it. Keep a roof rake, a few bags of ice melt for walkways, and a flashlight with fresh batteries in an easy spot. If you have a sump pump, test it before the ground freezes and consider a battery backup if your basement has a history of taking on spring meltwater. Winter problems move fast around here. The homeowners who do best aren't the ones who panic less; they're the ones who prepared before the first storm.
When you test downspouts, watch where the water ends up 10 minutes later. I've seen plenty of extensions dump water right back toward the foundation once the yard starts to settle.
Homeowners often install heat cable on a roof without fixing attic air leaks first. That treats the symptom, not the cause, and it keeps costing you every winter.
Common Mistakes to Avoid
The biggest mistake I see is waiting for a visible problem before doing anything. By the time you notice a ceiling stain from an ice dam or a split copper pipe in the basement, the real issue has already been building for weeks. Winter prep works best when you handle the boring stuff first: clean drainage, seal air leaks, insulate the right areas, and service the heating system before the weather gets ugly.
Another common mistake is using the wrong materials because they were cheap or happened to be on the shelf. Standard painter's caulk won't hold up on exterior joints that expand and contract. Open-cell foam pipe wrap in a damp crawlspace falls apart. Rock salt tossed onto concrete stoops and masonry steps can speed surface damage, especially during freeze-thaw cycles. For roofs, it gets worse. I've seen gutters bent, shingles torn, and flashing punctured by homeowners trying to chip away ice with a metal tool.
People also create new problems by sealing the house without thinking about ventilation and moisture. Covering attic vents, blocking soffit intake with insulation, or running a humidifier too high in winter leads to condensation, mold, and frosty roof sheathing. In most Hudson Valley homes, winter indoor humidity should stay around 30 to 35 percent, sometimes a touch lower during bitter cold. When windows are sweating every morning, that's your sign to back the humidity down and look for hidden air leaks.
One more expensive mistake is setting the thermostat too low when leaving town. I get why folks want to save fuel, but dropping the house into the low 40s can freeze vulnerable lines behind kitchen cabinets, in bonus rooms over garages, and in older additions with weak insulation. Keep the house at 55 degrees minimum, have someone check it during long trips, and don't forget the simple stuff like changing furnace filters and testing smoke and carbon monoxide detectors. Winter prep isn't one project. It's a chain, and the chain is only as strong as the item you skipped.
Schedule a fall walkthrough with a handyman or home maintenance contractor and make one list that covers roof drainage, weatherstripping, attic bypasses, plumbing protection, and masonry touch-ups. Bundling the work cuts labor waste and missed issues.
Take care of attic air sealing and gutter drainage before spending money on replacement windows. In a lot of older homes, those two items deliver more comfort per dollar than a major window project.
Cost Breakdown: What to Expect
Typical labor rates in Rockland and Orange County
For planning purposes, a handyman or small contractor in Rockland County usually runs about $95 to $125 per hour, while Orange County is often a little lower at roughly $85 to $115 per hour depending on travel, demand, and scope. Licensed plumbers commonly charge $150 to $225 per hour with a service-call minimum, and roofing or gutter crews often price small repair visits with a $275 to $450 minimum even before materials. HVAC tune-ups for a furnace or boiler usually land in the $175 to $325 range locally.
What small DIY winter prep jobs usually cost
A homeowner can handle a fair bit of winter prep without spending a fortune. Weatherstripping one or two exterior doors usually costs $25 to $90 in materials. Caulk, backer rod, and a couple cans of window-and-door foam might run $60 to $180 depending on how many leaks you're chasing. Foam pipe insulation is usually $2 to $5 per 6-foot length. A window insulation film kit runs about $15 to $35 per window set, and a decent aluminum roof rake is typically $60 to $120. These are solid DIY tasks if you're comfortable on the ground and know your limits.
What professional winter prep services cost
Professional gutter cleaning on a typical single-story home often falls between $175 and $350, while two-story homes or houses with complex rooflines commonly run $250 to $500. Attic air sealing is often the highest-value upgrade and usually ranges from $500 to $1,500 for focused sealing work, with attic insulation top-offs often priced around $1.75 to $3.50 per square foot depending on access and material. Pipe freeze protection work, including insulating exposed lines and correcting a few vulnerable areas, often lands between $250 and $900. Replacing a frost-free hose bib generally runs $350 to $650 each when done by a plumber.
Emergency and repair costs climb fast in winter
This is where skipping prep gets expensive. Steam removal of an ice dam can cost $400 to $900 for a limited area and more for a long roof edge. Small interior leak repairs from ice-dam water can start around $300 to $800 for stain blocking and drywall patching, then climb if insulation, trim, or flooring is involved. A frozen pipe repair might be a few hundred dollars if caught early, but once the pipe bursts and floods a finished basement, the number changes in a hurry. Emergency weekend or after-hours calls also tend to come with premiums of 1.5 times standard rates or flat surcharges in the $200 to $400 range.
Where your money does the most good
For most homes around here, the best return usually comes from four things in this order: attic air sealing, drainage and gutter correction, pipe protection, and targeted weatherstripping. Replacement windows, roof heat cable, and cosmetic trim work have their place, but they usually shouldn't be the first dollars spent unless there's already a known failure. Book work in October or early November if you can. Once the first deep freeze hits, schedules tighten up and the same job often costs more simply because everybody wants it done at once.
Bundle gutter cleaning, minor caulking, hose bib winterizing, and pipe insulation into one service visit. Paying one trip charge is almost always cheaper than scheduling four separate calls.
Spend a little every fall on inspection and touch-up work. Preventing one frozen pipe or one ice-dam leak usually covers several years of routine seasonal maintenance.
📍 How This Applies to Homes in Rockland & Orange County
Winter home prep in Hudson Valley NY has its own personality, and anybody who's worked on houses here long enough knows it. We don't just deal with cold. We deal with temperature swings. One week in January can go from a hard freeze to a sloppy thaw and back again, and that freeze-thaw cycle is rough on roofing, masonry, concrete walks, and foundation cracks. Then spring moisture shows up and finds every weak spot winter opened up, and summer humidity reminds you which basement or crawlspace never really got dried out in the first place.
A lot of the homes I see in Nanuet, Spring Valley, Suffern, Nyack, and New City were built before 1970, and that matters. Older capes, ranches, split-levels, and colonials often have under-insulated attics, drafty rim joists, original or early replacement windows, and hose bib plumbing run through exterior walls with very little protection. In those homes, winter prep isn't optional. It's what keeps a minor weakness from turning into a leak, a freeze, or a comfort problem that has the boiler running nonstop.
Over in Orange County, homes in Middletown and Newburgh see many of the same issues, but with more variation in lot grading, exposure, and house layout. I've worked on places where one side of the home gets hammered by wind while the back holds snow and ice for days longer. That changes how gutters perform, how roofs melt, and where pipes are most likely to freeze. Harsh winters here expose bad drainage fast, and then the spring thaw adds pressure around foundations and basement walls.
That's why the local approach has to be practical. In the Hudson Valley climate, you prep for winter with one eye on ice and the other on what happens after the thaw. Seal the house without trapping moisture. Move roof water and surface water away before it freezes. Pay extra attention to pre-1970s homes because they usually need air sealing as much as insulation. Do that, and your house in Rockland or Orange County handles winter better, dries out better in spring, and holds up better when summer humidity rolls in.
Frequently Asked Questions
Ready to Get Started?
Get Your Free Estimate Today
Serving Rockland County & Orange County, NY. Professional results, guaranteed.
Request a Free Estimate →