Most homeowners notice wall problems at the worst possible moment: the painter's tape is down, the color sample looked great, and then the late-afternoon sun hits the wall and every patch, seam, dent, and old roller mark jumps right out. I've seen it happen in New City colonials, Nyack Victorians, and ranch homes in Middletown where the walls looked fine until fresh paint made every flaw louder.
Here's the part that surprises people: in my experience, at least 80 percent of paint failures and ugly finishes come from prep problems, not the paint itself. Not cheap paint. Not the color. Prep. Hudson Valley homes take a beating from winter heat cycling, summer humidity, and years of little repairs done in a hurry, so the wall underneath the paint usually needs more attention than folks expect.
After more than 20 years working in Rockland County and Orange County, I've learned that good wall prep isn't fancy, but it is methodical. You clean what you can't see, fix what light reveals, seal what wants to bleed through, and only then do you paint. Do it right once, and the finish looks sharper, lasts longer, and doesn't call attention to every old scar in the wall.
Inspect, Protect, and Clean the Walls
Clear the room and protect the space
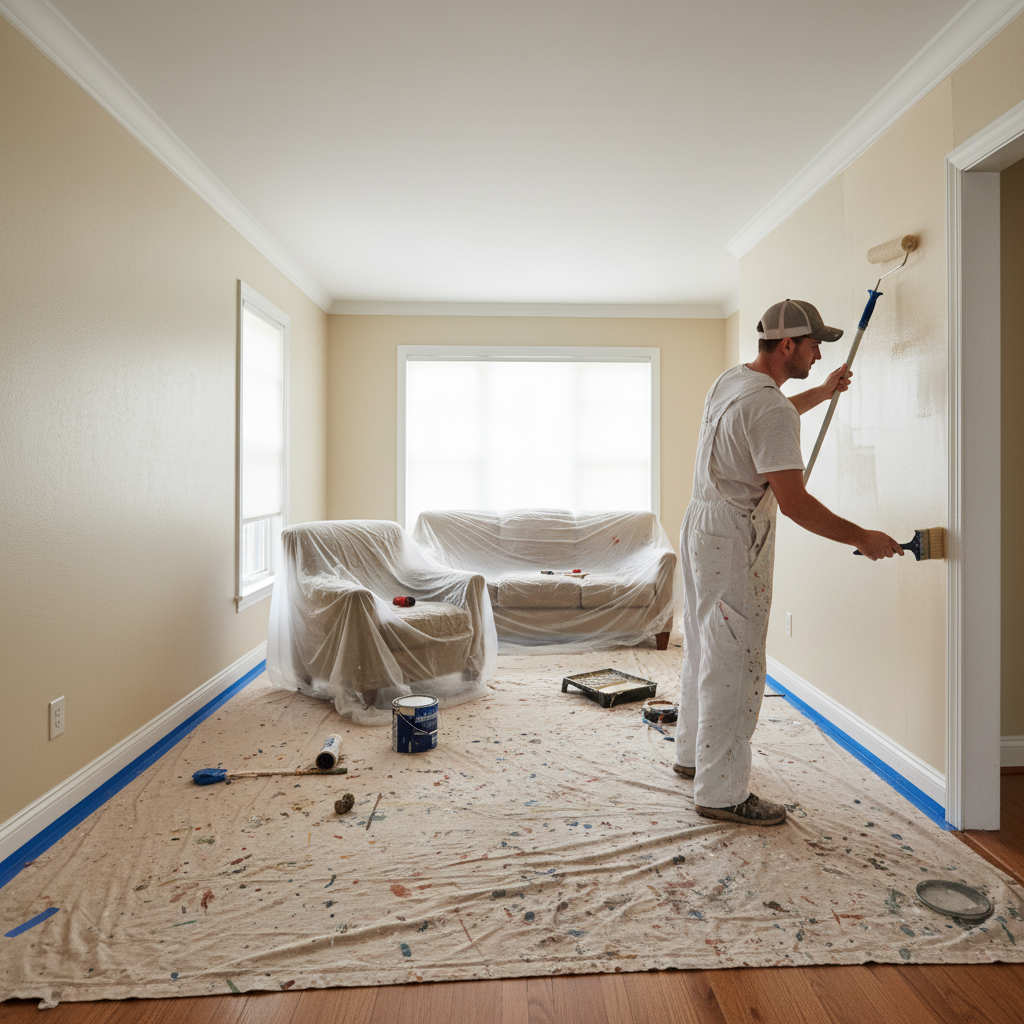
Before I even look at a crack or open a can of primer, I want the room set up properly. Move furniture at least 4 to 6 feet off the walls if you can, and cover the floors with canvas drop cloths, not thin plastic that slides around under your feet. Pull off switch plates, outlet covers, curtain hardware, and any nails or anchors that aren't staying. A lot of homeowners try to prep around those little obstacles, and that's how you wind up with ridges, missed spots, and ugly cut lines.
Wash the walls, even when they look clean
Walls collect more than dust. Hallways pick up body oils, kitchens get a fine film of grease, bathrooms catch hairspray and moisture residue, and kids' rooms somehow end up with everything from fingerprints to sticker glue. I usually wash painted walls with a TSP substitute or Krud Kutter Original Cleaner Degreaser, following the label, then rinse with clean water so no residue is left behind. On glossy walls, especially older semi-gloss, a liquid deglosser can help, but I still prefer a light sanding afterward because I trust a mechanical bond more than a shortcut.
Use raking light to find what normal light hides
One of the oldest contractor tricks is simple: kill the overhead light and shine a bright LED work light or flashlight along the wall at a low angle. That raking light will show you nail pops, tape joints, raised patches, roller edges, and little drywall waves you won't notice head-on. I mark defects with a pencil, not a marker, because marker can bleed through some paints and primers. Hairline cracks are one thing; anything wider than about 1/16 inch gets flagged for a more serious repair.
Check for water damage, peeling paint, and drywall paper tears
Prep isn't just about making walls smooth. It's about finding the reason they're not smooth. Brown stains under a window in Suffern or bubbling paint on an outside wall in Newburgh usually means moisture got in somewhere. Peeling paint has to be scraped back to a sound edge, chalky surfaces need stabilizing, and torn drywall paper should be sealed with a product like Zinsser Gardz before patching, or it'll fuzz up and keep giving you trouble. In pre-1978 homes, especially in older parts of Nyack and Spring Valley, test for lead before sanding or scraping anything questionable.
Let the walls dry before moving on
After washing, don't rush the next step. A wall can feel dry to the touch and still hold enough moisture to mess with patching compound or primer. Under normal indoor conditions, I like to give washed walls several hours to dry, and longer in humid weather. Good wall preparation for painting Hudson Valley homes always starts with a clean, dry, stable surface, because every step after that depends on it.
Use a bright handheld LED light held 6 to 12 inches from the wall to reveal dents and ridges before you patch. It's the fastest way to catch flaws that fresh paint would highlight later.
Homeowners often wipe walls with a damp rag and call them clean. That removes loose dust, but it doesn't cut grease, soap film, smoke residue, or old cleaner buildup that can cause paint to fisheye or peel.
Patch, Sand, and Caulk for a Flat Finish
Match the repair material to the damage
Small nail holes and tiny dings can be filled with a lightweight spackle, but deeper damage needs something stronger. For dents, gouges, and old anchor holes deeper than 1/8 inch, I like a setting-type joint compound such as USG Durabond 45 or Easy Sand 90 because it cures harder and shrinks less than premixed mud. For recurring cracks, I open the crack slightly with a 5-in-1 tool, embed fiberglass mesh tape if needed, and build it back in thin layers instead of trying to bury it all at once.
Feather wider than the patch itself
This is where a lot of DIY jobs go sideways. The patch may only be 2 inches wide, but the repair needs to be feathered out 6 to 10 inches so you don't create a hump. I usually keep a 4-inch knife for tight repairs and a 6-inch or 10-inch taping knife for feathering edges. On walls with lots of old texture differences or previous sloppy patchwork, a skim coat over the whole trouble area often gives a better result than spot-fixing twenty little problems one by one.
Sand in stages, not all at once
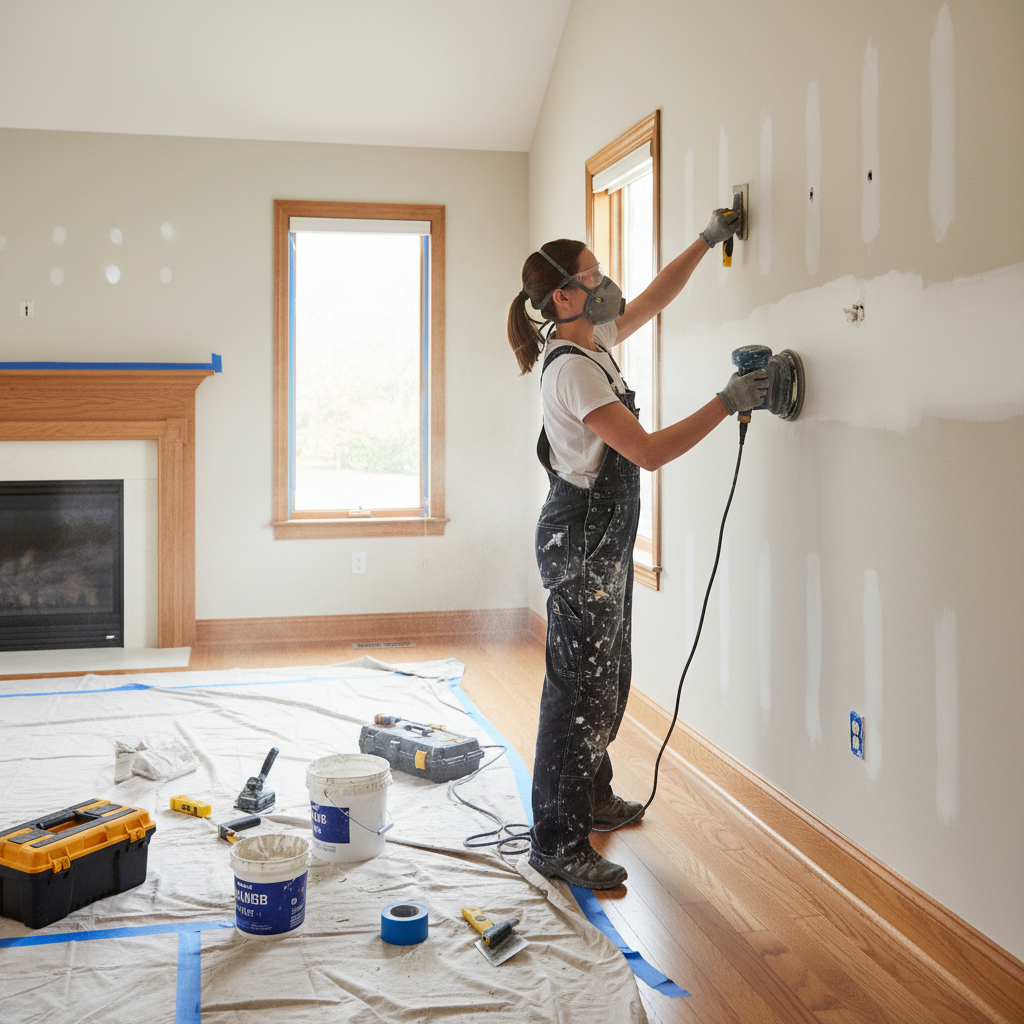
After the compound dries, I start with 120- or 150-grit sandpaper to knock down ridges and blend the repair. Then I switch to 180- or 220-grit for finish sanding so the patch feels smooth without polishing it slick. A pole sander helps on broad wall areas, but I still hand-sand around corners, outlets, and trim because that's where machine sanding can get clumsy fast. Once sanding is done, vacuum the walls and wipe them with a dry microfiber cloth so dust doesn't sit under primer.
Caulk the right gaps and skip the wrong ones
Caulk is for gaps, not for bad drywall work. I use a paintable acrylic latex or elastomeric acrylic like Big Stretch for trim-to-wall joints and small cracks up to about 1/4 inch that aren't moving aggressively. I cut the nozzle small, run a thin bead, and tool it smooth with a damp finger or caulk tool. What I don't do is stuff caulk into large holes, failing corners, or active stress cracks, because it may look fine for a month and then split right back open.
Finish with a touch-and-light test
Before primer goes on, I run my hand over the wall and hit it again with raking light. Your fingertips will catch a ridge before your eyes do. Any repair you can feel now will usually be visible after paint, especially under eggshell or satin sheens. The goal isn't perfection worthy of a museum wall, but it should look flat, consistent, and intentional when the room gets real daylight.
For a patch larger than a softball, sand the edges outward in a circle instead of back and forth only across the center. It blends the repair better and helps avoid a visible patch halo.
A lot of people use premixed spackle for every repair because it's easy to find. On deeper holes and recurring cracks, it shrinks, softens, or flashes badly under paint compared to a proper setting compound.
Prime the Right Way Before Paint
Primer isn't optional on repaired walls
Fresh joint compound, spackle, raw drywall paper, and old stained areas all absorb paint differently. Skip primer, and you'll often see flashing, which is that dull, patchy look where repairs telegraph through the finish coat. For standard repaired areas, a quality acrylic primer like Zinsser Bulls Eye 1-2-3 or Benjamin Moore Fresh Start works well. On new drywall, a dedicated PVA primer is fine, but on previously painted walls with patches, I want something with better sealing power.
Use the right primer for the problem
Water stains, smoke staining, marker bleed, and tannin bleed need more than a basic latex primer. That's where products like Zinsser BIN shellac primer or Cover Stain oil-based primer earn their keep. Torn drywall paper should be sealed with Gardz before any compound goes over it. Glossy old enamel in trim-adjacent areas may need a bonding primer if sanding alone doesn't dull it enough. Picking the wrong primer is one of the easiest ways to waste money because the finish paint winds up doing a job it wasn't made to do.
Spot-prime versus full-wall prime
Homeowners ask me this all the time. If you've got two or three tiny repairs on an otherwise sound wall, spot-priming may be enough. But if the wall has multiple patches, broad skim-coated areas, heavy color change, smoke residue, or uneven porosity, prime the full wall. Full-wall priming evens out suction and sheen, and it gives you a more predictable finish. In rooms with strong sunlight, like front living rooms in Nanuet or Nyack, that extra step usually pays off.
Apply primer like a finish coat
Don't slap it on and hope paint fixes it. Cut in neatly, then roll with a 3/8-inch microfiber or woven roller cover for smooth walls, keeping a wet edge so you don't leave lap marks. I like temperatures between 50 and 85 degrees and indoor humidity below about 70 percent when possible. Most primers need at least a few hours before recoating, but I always go by the label and by the feel of the wall. When in doubt, give it more time.
Inspect once more before the finish paint
Primer is honest. It has a way of showing the little defects you missed. Once it dries, I do one last walk-around with side lighting and touch up any imperfections with a quick fill and sand. It's a small pause that saves the finished job. When wall preparation for painting Hudson Valley homes is done right, the topcoat goes on smoother, covers better, and keeps that fresh look a lot longer.
When you're priming over lots of patchwork, tint the primer slightly toward the finish color. It helps coverage while still letting you see where you've painted.
Spot-priming half the wall with leftover ceiling primer is a common shortcut. It often leaves sheen differences and weak sealing on repairs, especially under darker or richer wall colors.
Common Mistakes to Avoid
The biggest mistake I see is painting over dirty or dusty walls because they look good from across the room. Dust from sanding acts like a bond breaker, and grease keeps primer from grabbing the surface evenly. The result is usually poor adhesion, flashing over repairs, or little rough specks trapped under the finish.
Another common problem is using the wrong filler for the wrong repair. Lightweight spackle has its place, but it isn't the answer for deep dents, popped tape joints, stress cracks, or torn drywall paper. I've also seen homeowners use caulk where they should've used joint compound, or joint compound where they really needed a stain-blocking primer first.
Sanding mistakes are right behind that. People either barely sand at all, leaving ridges and knife marks, or they sand too aggressively and scuff right through the surrounding paint, fuzz the drywall face paper, or dish out the patch. The right approach is controlled sanding with the proper grit, followed by a careful dust removal step. Skipping dust cleanup is like washing your truck and then driving it through a gravel lot.
The last big mistake is rushing dry time. Patches that are still damp, caulk that hasn't cured, and primer that feels cool or tacky can all compromise the topcoat. Around here, especially in spring and summer when Hudson Valley humidity hangs around, wall prep takes longer than the label might suggest. A patient prep day is a lot cheaper than repainting a room because the finish looked blotchy two weeks later.
For homes built before 1978, especially where old layers are thick or chipping, have the surface tested for lead and use an EPA RRP-certified contractor for sanding or disturbance.
Spend money on primer and prep materials before you spend it on premium finish paint. A midrange paint over proper prep almost always looks better than an expensive paint over a poorly prepared wall.
Cost Breakdown: What to Expect
For a typical DIY wall prep job in one average 10-by-12 or 12-by-12 room, most homeowners spend between $120 and $350 on materials if they already own some tools. Figure roughly $10 to $20 for cleaner, $15 to $40 for patching compounds, $8 to $20 per tube for quality caulk, $10 to $30 for sanding supplies, $25 to $60 for a gallon of primer, and another $30 to $120 if you need trays, knives, a decent pole sander, or drop cloths. If you run into stain blocking, torn drywall paper, or larger repairs, that number climbs fast.
For professional work, prep is usually priced either by labor time or by the scope of repairs. In my experience, handyman and small-contractor rates in Rockland County often run about $75 to $110 per hour, while Orange County tends to land around $65 to $95 per hour depending on the town, access, and how specialized the repair is. Some painting contractors price prep and prime by square foot instead, with basic wall prep often around $1.25 to $2.50 per square foot, and heavier repair or skim coating closer to $2.50 to $5.00 per square foot.
On a real-world room basis, light prep in a bedroom with a few nail holes and minor sanding might run $350 to $650 before finish painting. Moderate prep with crack repair, several patches, spot priming, and caulking can land in the $650 to $1,200 range. A room with water damage, torn drywall, multiple seam repairs, or broad skim coating can hit $1,200 to $2,500 or more. That's especially true in older homes in Nyack, Newburgh, or parts of Spring Valley where walls may have layers of old repairs hiding under the current paint.
A few things raise the price quickly: high ceilings, stairwells, wallpaper adhesive residue, smoke staining, plaster repair, and lead-safe containment in pre-1978 homes. Lead-safe work adds labor because setup, cleanup, and dust control have to be done correctly. It costs more upfront, but it's not a corner worth cutting.
The cheapest version of this job is usually doing the simple prep yourself and hiring out the final paint, but only if you're honest about your skill level. A clean, well-sanded, properly primed wall saves labor on the painting side. A lumpy patch job doesn't. Good prep costs money, but bad prep costs it twice.
Bundle wall prep with a full-room painting project instead of hiring one visit for prep and another for paint. Most contractors can price the combined job more efficiently.
Keep indoor humidity stable with bath fans, kitchen ventilation, and a dehumidifier in damp seasons. It helps prevent recurring seam cracks, peeling, and mildew-related prep work later.
📍 How This Applies to Homes in Rockland & Orange County
Wall prep in the Hudson Valley isn't quite the same as wall prep in a brand-new house down south. Around Rockland County and Orange County, our homes go through harsh winters, dry furnace heat, spring moisture, and summer humidity, and the walls move with those seasons. Freeze-thaw cycles around exterior walls and window corners can open hairline cracks that weren't there in October. Then spring rolls in, and any moisture weakness starts showing itself as stains, peeling, or soft drywall tape joints.
In towns like Nanuet, New City, Spring Valley, and Suffern, I see a lot of homes where one wall has been patched three or four times over the years, but never really flattened and sealed properly. In Nyack and parts of Newburgh, the older housing stock can mean plaster walls, old paint buildup, and repairs layered over repairs. In Middletown, newer drywall is more common, but even there, seasonal settling and humidity swings can cause popped fasteners and seam lines that need more than a quick dab of spackle.
Pre-1970s homes need extra caution. Some have original plaster, some have old gypsum board, and plenty have a history of wallpaper, paneling, or lead-based coatings somewhere in the stack. That's why wall preparation for painting Hudson Valley homes often starts with identifying what's actually on the wall before deciding how to repair it. What works on a 1990s drywall bedroom in New City may be the wrong move for a 1920s wall in Nyack.
The local climate matters more than people think. Spring moisture can slow dry times, and summer humidity can make patches and primer take longer to cure than the can suggests. In winter, over-dried houses sometimes reveal shrinkage cracks around trim and ceiling lines that need flexible caulk and proper feathering. A prep routine that accounts for Hudson Valley weather gives you a better-looking finish and fewer callbacks when the seasons change again.
Frequently Asked Questions
Ready to Get Started?
Get Your Free Estimate Today
Serving Rockland County & Orange County, NY. Professional results, guaranteed.
Request a Free Estimate →