Saturday afternoon rolls around, the new 65-inch TV is out of the box, the old media console is half dragged across the room, and somebody's already saying, just throw it on the wall, how hard can it be? Then the stud finder starts beeping like crazy, the mount instructions look like they were translated three times, and suddenly that simple project turns into a pretty expensive gamble. I've been in plenty of homes where a homeowner did almost everything right, but one missed stud or one wrong anchor was all it took to crack plaster, loosen brick, or leave a very nervous family staring at a screen that didn't feel solid.
Around Rockland and Orange County, this job gets trickier than people expect because our houses aren't all built the same. In one day I might go from a newer drywall-and-stud wall in New City to a plaster-over-lath wall in Nyack, then finish on a brick fireplace in Newburgh. A wall that looks simple from the front can hide old chimney masonry, uneven studs, metal corner bead, patched drywall, or wiring that was added long after the house was built. That's why TV mounting isn't really about hanging a bracket. It's about knowing what's behind the wall and matching the hardware to it.
One local pattern I've seen over and over is that bigger TVs are going into older homes. Most sets I mount these days are 55 to 75 inches, and that extra size changes everything: bracket choice, bolt size, viewing height, and the amount of stress on the wall when someone pulls a full-motion arm out and swings it. Done right, a wall-mounted TV looks clean, frees up floor space, and stays rock solid for years. Done wrong, it can damage the wall, strain the TV panel, or worse, come down when no one's expecting it.
Choose the Right Wall, Mount, and Viewing Height
The safest TV install starts before a single hole gets drilled. First, check two things on the back of the TV: the weight and the VESA pattern. The weight tells you what the mount has to carry, and the VESA pattern tells you whether the bracket arms will line up with the factory mounting holes. Common VESA sizes are 200 x 200, 400 x 400, and 600 x 400. A good fixed or tilt mount from Sanus or Echogear will list both the maximum TV size and the maximum weight, but I always tell homeowners to focus on weight and VESA first, not the pretty picture on the box.
Pick the right mount style
A fixed mount keeps the TV close to the wall and usually gives you the least trouble. A tilt mount is great when the screen is a little high, like in a bedroom or over a dresser, because you can angle the picture down 5 to 15 degrees. A full-motion mount is the most flexible, but it's also the one that puts the most leverage on the wall. When you pull a 65-inch TV 16 to 22 inches off the wall on an articulating arm, the load isn't just hanging straight down anymore. That's where weak anchors, old plaster, and sloppy stud layout get exposed fast.
Find the structure behind the finish
In standard framing, wall studs are usually 16 inches on center, though 24-inch spacing does show up, especially in some additions and bonus rooms. I use a stud finder like the Franklin Sensors M210 for a wide read, then confirm with a strong magnet and, if needed, a tiny test hole in an area the bracket will cover. Never trust a single stud finder pass, especially on plaster walls. Old Rockland and Orange County homes love to fool you with lath strips, extra backing, patched openings, and chimney framing that makes the tool light up in all the wrong places.
Set the TV at a comfortable height
For most living rooms, the center of the screen lands best around 42 to 48 inches from the finished floor. On a 65-inch TV, that usually puts the bottom edge somewhere around 24 to 30 inches off the floor, depending on the bezel and stand-off. Bedrooms often go higher, and fireplace installs are their own animal. A simple rule I use on site is this: sit where you normally watch, look straight ahead, and keep the center of the screen as close to eye level as the room allows. That's what prevents neck strain and that too-high sports-bar look people regret a week later.
Before I approve a wall location, I also check outlet placement, glare from windows, and whether the TV will block a return vent, thermostat, or built-in trim. A clean install isn't just centered on the wall. It's centered on how the room actually works.
Cut a cardboard template the same size as your TV and tape it to the wall before drilling. It's the fastest way to catch bad height, window glare, or a mount location that lands right over a light switch.
Homeowners often buy a full-motion mount before checking stud spacing and outlet location. Then they find out the arm lands off-center or the bracket plate covers the receptacle.
How to Mount a TV on Drywall and Stud Walls
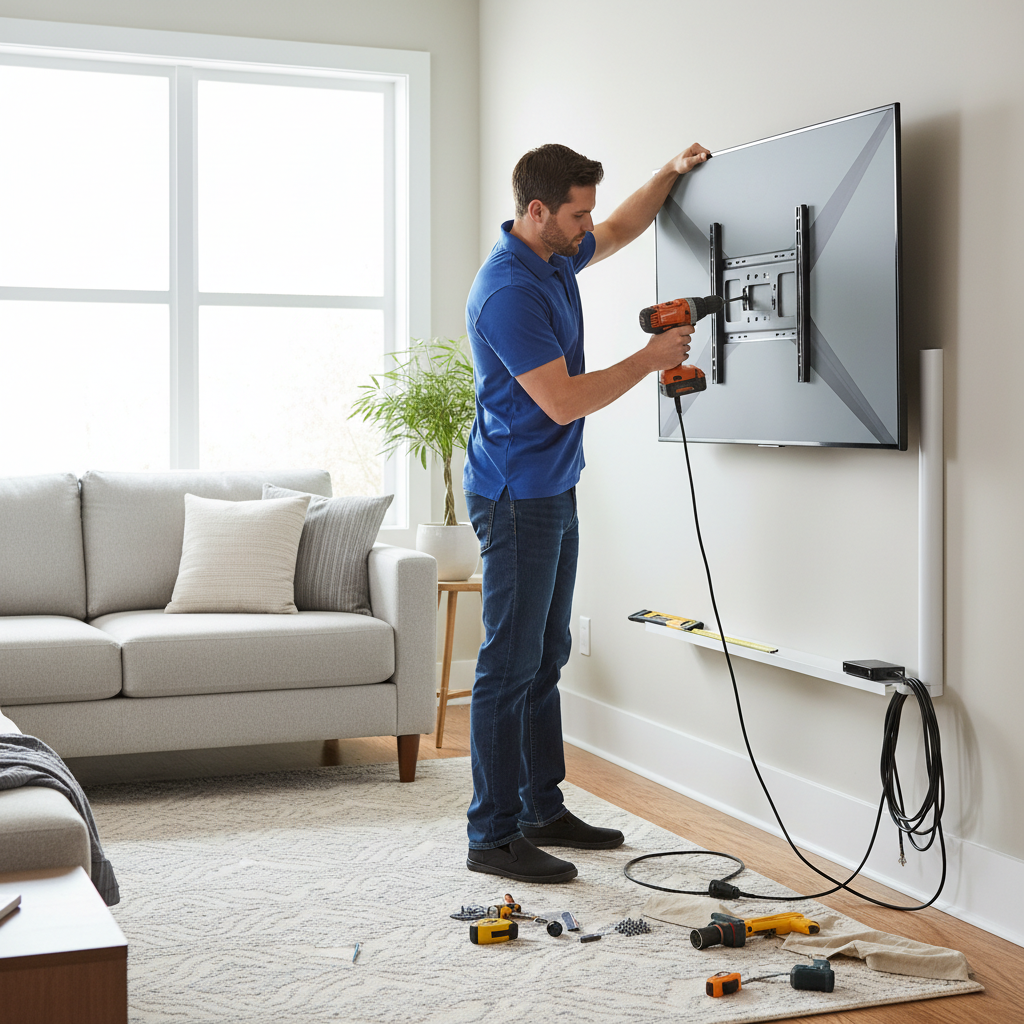
On a basic drywall wall with wood studs, the job is straightforward when the layout is done right. I start by marking the TV centerline on the wall, then I mark the exact center of each stud the bracket will hit. Most TVs 55 inches and up should be mounted into two studs whenever the mount design allows it. Once the wall plate is held in place, I level it, mark the hole pattern, and double-check that the plate will leave enough room for the TV power cord, HDMI heads, and any recessed box behind the screen.
Drill proper pilot holes and use the right lag bolts
For a typical wood-stud mount, I use 5/16-inch lag bolts with washers, usually 2 1/2 to 3 inches long on standard drywall. Pilot holes matter. Too small and you can split the stud or snap hardware. Too large and the lag loses bite. For most 5/16-inch lags into framing lumber, a 7/32-inch pilot is a good working size. I drive the bolts snug and secure, but I don't crank them so hard that I bend the wall plate. Once that plate is on, it should feel like it's part of the house.
Old plaster changes the game
A lot of pre-1970s homes around here have plaster over wood lath, and that extra thickness means standard hardware can come up short. I've seen walls where the plaster build-up is close to 3/4 inch before you even reach the stud. In those cases, I may step up to a 3-inch or 3 1/2-inch lag, depending on the bracket and the condition of the framing. I also drill slower and cleaner because old plaster likes to spider-crack when rushed. Painter's tape over the mark, a sharp bit, and steady pressure make a big difference.
Don't cheat the power and cable work
One of the most common unsafe shortcuts is dropping the TV power cord inside the wall. Regular TV cords and extension cords are not meant to be buried in a wall cavity. The clean and code-conscious way is an in-wall power kit like the Sanus or Legrand Wiremold system, or a properly installed new receptacle by an electrician. For low-voltage cables like HDMI, coax, and Ethernet, I use a brush plate or low-voltage trim ring so the wires can pass neatly without getting pinched.
Once the TV is hung, I test the lock tabs, check for level again under load, and gently pull forward on the set to make sure everything is seated. That's the part many DIY installs skip, and it's where you catch a loose arm, a bracket that didn't fully engage, or a bolt that bottomed out before it tightened.
On older plaster walls, run a small finish nail or a thin drill bit through the first test hole to confirm you're actually in the center of the stud before committing to the bracket holes.
Drywall anchors, even heavy-duty toggle styles, are not a safe primary support for a large full-motion TV mount. They may hold for a while, then fail once the arm is extended again and again.
How to Mount a TV on Brick, Concrete, and Fireplace Walls
Masonry walls are where experience really matters, because brick isn't always what it looks like from the living room side. Solid brick, concrete block, poured concrete, and brick veneer all require different decisions. Brick veneer especially causes trouble. It may look sturdy, but it's often just a thin facing material with an air gap behind it, and that is not the same as anchoring into structural masonry. Before I mount anything on brick, I confirm whether it's solid masonry, hollow block, or veneer, and I inspect the condition of the mortar and the brick faces themselves.
Use masonry anchors that match the wall
For solid concrete or sound brick, I typically use a hammer drill and anchors rated for the load, not whatever came loose in the box. On heavier installs, that may mean 3/8-inch concrete wedge anchors with proper embedment. On lighter fixed mounts into quality masonry, Tapcon concrete screws can work well when sized correctly. The drill holes need to be straight, cleaned of dust, and set at the right depth. I vacuum or blow out the holes before setting hardware because masonry dust left in the hole can reduce holding power.
Fireplace walls need more than a bracket
Over-fireplace mounting is one of the most requested jobs and one of the most over-simplified. You have to check heat, height, and the wall build-up over the chimney. I've opened plenty of fireplace walls and found furred-out framing over old brick, random blocking, or a stone veneer that looked solid but wasn't a good anchor point. Before I mount above a working fireplace, I like to run the fireplace and use an infrared thermometer to check the wall temperature where the TV will sit. If that wall is getting hotter than the TV manufacturer recommends, the location needs to change or the install needs a different plan.
Pull-down mounts can solve a bad viewing angle
When the fireplace is the only realistic wall, a pull-down mount like the MantelMount MM540 can make a huge difference. It lets the TV sit higher when not in use, then drop to a more comfortable viewing height. That's especially helpful when the original mount location would put the center of the screen well above 60 inches from the floor. I also leave clearance for soundbars, mantel trim, and cable movement so the system doesn't bind when the mount moves.
On any masonry job, I finish by checking for wobble and looking at the wall itself. If brick is spalling, mortar is soft, or a block wall sounds hollow and crumbly, the answer may be reinforcement or a different location, not bigger anchors. Hardware only works as well as the material holding it.
When mounting on a fireplace wall, test heat at the exact TV location after the fireplace has been running for at least 30 minutes. The wall temperature tells you more than guessing from the room temperature.
A lot of homeowners assume all brick is structural. Brick veneer or loose stone facing can crack or pull away when a heavy TV and full-motion arm start putting leverage on it.
Cables, Power, and Finishing Details
A TV can be mounted securely and still look unfinished if the cable work is sloppy. Clean-up is what separates a decent install from one that looks built in. My goal is to hide what should be hidden, keep what needs service accessible, and avoid anything that creates a code issue later. Usually that means placing a recessed power box behind the screen, a low-voltage opening below or beside it, and making sure the bracket still has room to move without crushing connectors.
Plan cable paths before the bracket goes up
I like to know exactly where the streaming box, cable box, game console, and soundbar are going before I mount the TV. HDMI heads aren't tiny, and some mounts sit so close to the wall that a stiff cable can push the TV crooked or keep it from locking in. For most clean installs, I use Certified Ultra High Speed HDMI 2.1 cables in the 6-foot to 10-foot range when the equipment is nearby. Once the run gets longer than about 15 feet, active or fiber HDMI starts making more sense for signal reliability.
Add the right accessories now, not later
If the homeowner wants a soundbar, I usually mount it at the same visit using a bracket like the Sanus SASB1 or a mount-specific soundbar attachment. Leaving 2 to 3 inches of breathing room below the TV keeps things looking balanced and prevents the soundbar from blocking sensors or the bottom edge of the screen. This is also the time to think about a recessed media box, a raceway for visible sections, or an IR repeater if cable boxes are going inside a cabinet.
Protect the electronics
A wall-mounted TV still needs surge protection and decent airflow. I don't like jamming a power strip in a tight cavity or packing adapters behind the screen where they can overheat or get crushed by the mount. Use a surge-protected receptacle or a quality surge device at the source, label the cables, and leave a service loop so the TV can tilt or pull out for future work. That extra few inches of slack saves a lot of aggravation when you upgrade a console or swap a streaming device.
The finishing details also include patching old holes, touching up marks, and centering the install around furniture instead of just the wall. In real homes, the couch and the traffic path matter as much as the tape measure.
Use a recessed power kit and a recessed media box together. That combination gives the plug and HDMI ends enough depth so the TV can sit flatter against the wall.
People often buy the shortest possible HDMI cable to keep things neat. Then the first time the TV needs to tilt forward or come off the wall, the connector gets stressed or pulled loose.
Common Mistakes to Avoid
The biggest mistake I see is treating every wall like standard drywall over fresh framing. That assumption is what leads people to use the wrong anchors, miss the stud center, or drill into weak plaster keys and think they're solid. On a modern fixed mount with a smaller TV, you might get lucky for a while. On a 65-inch or 75-inch set with a full-motion arm, luck runs out fast. The mount needs structural support, not just resistance when you tug on it once.
Another common problem is wrong hardware at the TV itself. The bolts that attach the bracket arms to the back of the TV have to be the correct diameter, thread pitch, and length. Most TVs use M6 or M8 machine screws, and the wrong length can bottom out before tightening or, worse, push into the panel housing. That's why I always test the bolts by hand first and use the spacers the manufacturer provides when the back of the TV is curved or recessed.
Height is the next regret. A TV centered too high over a fireplace or mounted to line up with the top of a window may look good standing up, but it usually feels terrible from the couch. I also see homeowners forget about glare, especially in rooms with big rear sliders or west-facing windows. You want the picture visible at 3 p.m. on a summer day, not just at night. Sometimes the better wall is the one that seemed less obvious at first.
Then there are the hidden-condition mistakes: loose brick, damp chimney walls, crumbly plaster, old electrical lines, and weak patchwork from previous remodels. Around here, especially in older homes, I don't assume the wall is sound until I prove it. A careful installer checks the material, confirms the framing, and adapts the hardware to the actual wall instead of forcing the wall to fit the bracket.
Before mounting, confirm four things every time: wall type, stud or masonry condition, TV weight with mount style, and legal power routing. That quick checklist prevents most failures.
Reuse a good-quality existing mount only if you can verify the model, weight rating, and all original hardware. Guessing with leftover bolts usually costs more when the install has to be redone.
Cost Breakdown: What to Expect
DIY TV mounting can be affordable on paper, but the real cost depends on the wall and how finished you want the job to look. A decent fixed mount usually runs about 40 to 80 dollars, a tilt mount about 60 to 120 dollars, and a quality full-motion mount often lands between 120 and 250 dollars. Add a stud finder, level, drill bits, masonry bits if needed, cable management parts, and an in-wall power kit, and many homeowners are into the project for 150 to 400 dollars before they even count their time. On a masonry or fireplace wall, the tool cost alone can tip the scale toward hiring it out.
For professional work in Rockland County, basic handyman labor commonly falls in the 95 to 145 dollar per hour range, with specialty mounting work sometimes priced by the job. In Orange County, I usually see a slightly lower range, around 85 to 135 dollars per hour depending on travel, wall type, and finish work. A straightforward install on drywall into wood studs with a customer-supplied mount often runs about 175 to 300 dollars. That usually covers layout, secure mounting, basic cable concealment, and final leveling.
More difficult installs cost more for good reason. A plaster wall in an older Nyack or Newburgh home, a brick fireplace, or a setup that needs a pull-down mount, soundbar integration, and hidden wiring can land between 325 and 650 dollars. If an electrician needs to add a new receptacle or relocate power properly, that can add another 250 to 500 dollars depending on access. Mounting multiple TVs at the same visit often brings the per-TV price down because the setup and travel are already covered.
The cheapest quote isn't always the cheapest job. Ask what hardware is included, whether cable concealment is surface raceway or in-wall, whether patching is included, and whether the installer is prepared for plaster, masonry, or fireplace conditions. A secure, level install that doesn't need to be redone is usually the better deal than saving 75 dollars upfront and paying twice once the wall starts cracking or the TV sits crooked.
Buy the TV and mount together when possible. Retailers often bundle a better mount for less than you'd pay later, and you can still have a local pro install it correctly.
Keep the original TV legs, hardware bag, and mount manual in a labeled box. When it's time to upgrade or move, having the correct parts avoids damaged threads and unnecessary replacement costs.
📍 How This Applies to Homes in Rockland & Orange County
TV mounting in the Hudson Valley isn't one-size-fits-all because our homes aren't one-size-fits-all. In newer neighborhoods around New City, Nanuet, and parts of Middletown, a lot of installs are pretty clean drywall-over-stud jobs. But once you get into older houses in Nyack, Suffern, Spring Valley, and Newburgh, you run into plaster walls, brick chimney chases, uneven framing, and years of patchwork from old renovations. Pre-1970s homes especially can surprise you with thick plaster, off-center studs, and fireplaces that were modified more than once.
Our climate matters more than people think. Harsh winters and freeze-thaw cycles can take a toll on masonry, especially around chimney breasts and exterior-facing brick walls. I've seen mortar joints that looked fine from across the room but crumbled once I started probing for anchor locations. Spring moisture can also show up around foundation-adjacent walls or older chimney structures, and summer humidity can soften neglected drywall, swell trim, and expose old paint or plaster issues that don't hold hardware the way a fresh wall would.
That's why I inspect fireplace walls extra carefully in towns like Newburgh and Nyack, where older housing stock and masonry features are common. In places like Nanuet, Spring Valley, and New City, I still check every wall, but the surprises tend to be hidden utilities, builder-grade blocking, or prior cable installs. In Middletown and Suffern, I've seen everything from straightforward ranch layouts to older colonials where nothing is exactly centered or level, so the mount layout has to be adjusted to make the finished job look right.
For Hudson Valley homeowners, the best advice is simple: don't assume the wall is telling the truth from the surface. Between age, weather, moisture, and all the remodeling our local homes have gone through, a safe TV mount starts with identifying the actual wall structure first. That extra step is what keeps a nice clean install from becoming wall repair, masonry repair, or a broken screen later.
Frequently Asked Questions
Ready to Get Started?
Get Your Free Estimate Today
Serving Rockland County & Orange County, NY. Professional results, guaranteed.
Request a Free Estimate →