Childproofing Home Orange County NY: A Contractor’s Room-by-Room Safety Guide
From stairs and cabinets to windows, baths, and backyards, here’s how to make your home safer for little kids without making it feel like a fortress.
The cereal box hits the floor, the dog barks, and in the two seconds your back is turned, a toddler is already halfway up the stairs with one hand on a loose baluster and the other reaching for a blind cord. I’ve seen that movie more times than I can count in homes from New City to Middletown. Most parents don’t miss the obvious stuff. It’s the everyday features in a regular house, the lamp cord behind the sofa, the cleaning pods under the sink, the dresser that seems stable until a kid uses the drawers like a ladder, that cause the real close calls.
Nationally, thousands of children are treated in emergency rooms every day for injuries that happen at home, and around here the layout of a lot of houses doesn’t help. In Rockland and Orange County, plenty of homes were built before modern safety standards became common. That means steeper basement stairs, older double-hung windows, wider stair rail spacing, heavier furniture, and outlets in all the wrong places for curious little hands.
When homeowners call me about childproofing home Orange County NY projects, I tell them the same thing: this isn’t about wrapping the whole place in foam. It’s about slowing a child down, blocking access to the highest-risk hazards, and fixing the weak points that adults stop noticing after years of living there. Done right, childproofing feels invisible to grown-ups and a whole lot harder for kids to defeat.
Where to Start: Entryways, Living Rooms, and Stairs
Start at kid height
The best first step is a slow walk through the house at about two feet off the floor. That sounds silly until you do it. From that angle, you’ll spot dangling charger cords, low table corners, floor vents, pet bowls, decorative baskets, and unstable accent tables right away. I usually tell homeowners to start with the routes a child takes every day: front entry, family room, hallways, and the stairs. Those are the high-traffic zones where accidents happen fast.
Anchor what can tip
In living rooms, the biggest issue is tip-over risk. TVs, bookcases, dressers, storage cubes, and narrow console tables all need to be anchored into wall studs, not just drywall. I use anti-tip kits like Safety 1st or Hangman straps, but the hardware only works if it’s installed right. On wood studs, a good setup is a stud finder, pilot hole, and a #10 x 2 1/2-inch screw with a washer. On masonry walls, you’ll want proper Tapcon screws or sleeve anchors. A lot of furniture comes with flimsy hardware in the box. I usually replace it.
Don’t trust pressure gates at the top of stairs
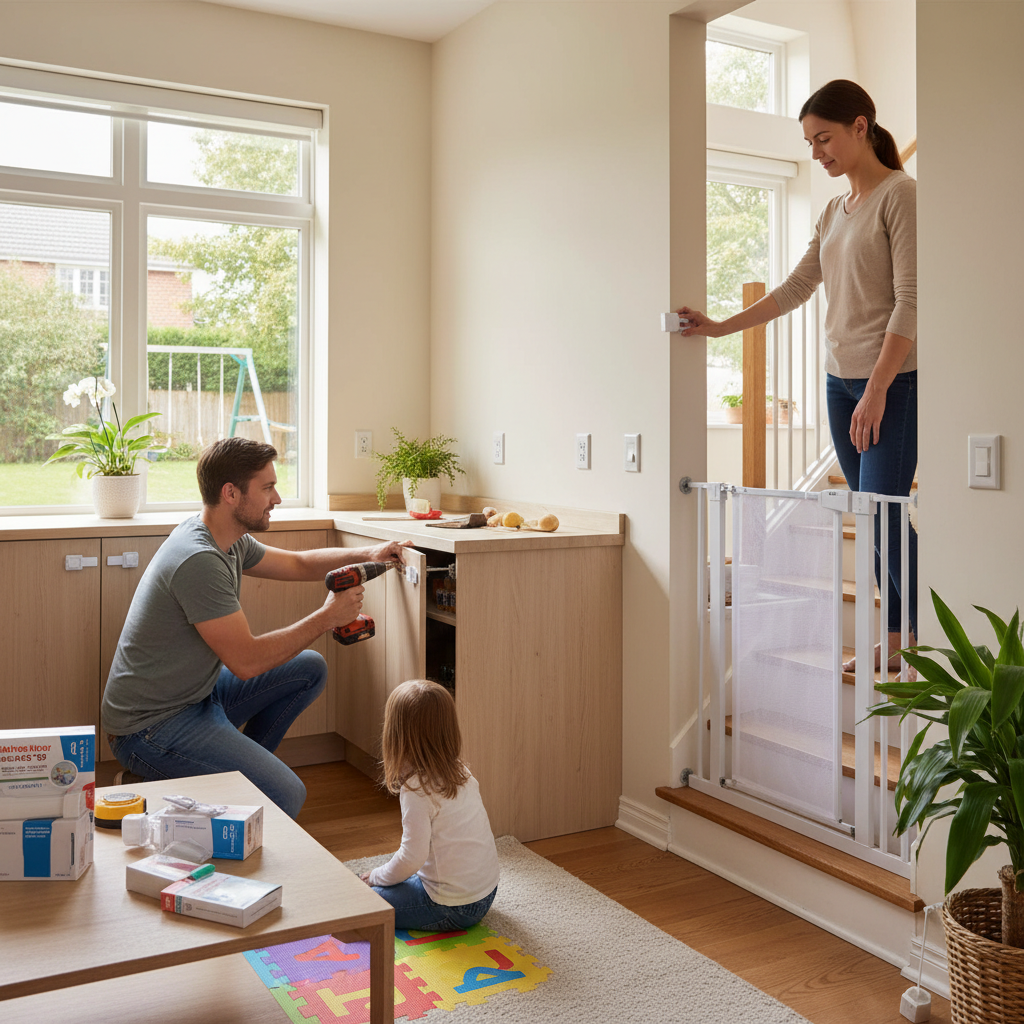
For stairs, the rule is simple: hardware-mounted gates at the top, pressure-mounted gates at the bottom only if the product is rated for it. I install brands like Cardinal Gates Stairway Special or KidCo Safeway because they mount solidly and hold up to daily use. The gate should be at least 30 inches high, mounted level, and positioned so there’s no gap a child can squeeze through. At the top of the stairs, avoid anything with a bottom trip bar. That’s a fall hazard for adults carrying a baby or laundry basket.
Fix cords, outlets, and pinch points
Outlet covers are fine for basic protection, but I prefer tamper-resistant receptacles in the rooms kids use most. They’re more reliable than loose plastic caps that wind up under the couch. Blind cords should be shortened or switched to cordless shades, and any cord cleat should be mounted well above reach, ideally 64 inches or higher. Add finger-pinch guards on doors that swing shut hard, especially near playrooms and bathrooms. Those little details don’t seem urgent until a child finds them first.
Make the path safer, not just the room
Entry rugs should have a non-slip backing or be secured with rug tape. Shoe benches and coat trees should be stable enough that a toddler can grab them without bringing the whole thing down. On older homes with railings, I also check baluster spacing. Anything wider than 4 inches is worth addressing with a temporary guard panel or a more permanent railing update. Childproofing works best when you think in terms of pathways, not just individual gadgets.
When you anchor furniture, open every drawer fully before you tighten the strap. That lets you confirm the unit stays stable when a child uses the drawers like steps.
Homeowners often use pressure-mounted gates at the top of stairs because they’re faster to install. That’s one of the most dangerous shortcuts I see.
Kitchen, Bathroom, and Laundry Room Safety
The kitchen is where speed matters
Kitchens are full of hot surfaces, sharp tools, glass, magnets, chemicals, and climbing opportunities. Start with lower cabinets that hold cleaners, dishwasher pods, and trash bags. I’ve had good luck with magnetic locks like Tot Lok or Safety 1st magnetic latches because they’re harder for kids to defeat and less visible than basic adhesive catches. For drawers with knives or peelers, mechanical latches screwed into the cabinet box usually last longer than peel-and-stick versions, especially in humid kitchens.
Deal with the stove and counters first
The stove area deserves special attention. Turn pot handles inward, use the back burners when you can, and install stove knob covers if your range allows them. For freestanding ranges, I also check the anti-tip bracket. A surprising number are missing or never engaged, and that becomes a major hazard when a child leans on an open oven door. Small appliances like air fryers, kettles, and slow cookers should live at least 12 inches back from the counter edge with cords tucked up and away.
Bathrooms need anti-scald protection
In bathrooms, hot water is usually the first thing I address. Set the water heater to 120 degrees Fahrenheit or install anti-scald devices where needed. Tubs and tile floors should have non-slip mats, and toilet lid locks make sense for younger toddlers. Medicine cabinets, razors, and nail scissors should be stored high, not just behind a cabinet door. I also recommend GFCI protection on all bathroom receptacles and tamper-resistant outlets if you’re already updating them.
Laundry rooms hide some nasty hazards
Laundry rooms are easy to overlook, but detergent pods, bleach, dryer sheets, and loose buttons or coins all wind up at kid level. Front-load washers are especially tempting to curious little ones, so keep the laundry room closed off with a latch or gate if possible. Make sure the dryer vent is clean and properly connected, and check that the gas shutoff is accessible if you have a gas dryer. I’ve seen more than one family use the laundry room as overflow storage, which turns it into a cluttered hazard zone fast.
Create adult routines that support the hardware
The best childproofing in the world won’t help if the adults in the house stop using it. Keep a designated high shelf or locking pantry bin for medications, vitamins, pet meds, and cleaning sprays. Install hooks inside upper pantry doors for cabinet-lock magnetic keys so they don’t go missing. In busy homes, the systems that work are the ones that are easy to reset every day without anybody having to think too hard.
Test your range for an anti-tip bracket by carefully pulling the open oven door forward a few inches. The back leg should catch and stop the unit from tipping.
A lot of parents lock the cabinet under the sink but leave the dishwasher detergent or vitamin gummies in an easy-open drawer right next to it.
Bedrooms, Basement, Garage, and Backyard
Bedrooms need more than outlet covers
In nurseries and kids’ bedrooms, crib safety comes first. Keep the crib away from windows, curtain cords, lamps, shelves, and monitors with hanging wires. The mattress should sit tight with no more than two fingers of space around the edge, and once a child starts climbing, mattress height needs to drop. Dressers, changing tables, and bookcases all get anchored. I also tell homeowners to skip heavy framed mirrors or floating shelves directly over a crib or toddler bed.
Windows are a bigger issue in older homes
A lot of homes in this area still have older double-hung wood windows that don’t stay where you leave them. For families with young kids, I like window stops or opening-control devices that limit the opening to about 4 inches while still allowing emergency egress where required. In second-story rooms, window guards may be the better answer, but they need to be the right type and installed correctly. Just dropping the top sash a little bit isn’t enough if the lower sash can still slide open easily.
Basements and garages are tool rooms, not playrooms
Basements, utility rooms, and garages usually need the hardest line. Lock up paints, solvents, lawn chemicals, sharp tools, batteries, and power equipment. Wall-mount shovels and rakes so the metal ends aren’t at face height. I like simple keyed locking cabinets for chemicals and a separate bin for screws, blades, and small hardware that becomes a choking hazard. On oil burner or boiler systems, keep access clear and make sure kids can’t reach hot pipes, valves, or drain cocks.
Backyard safety depends on barriers
Outside, gates and latches matter more than warning kids. Deck stairs should have secure rails, no loose balusters, and gates that self-close if the layout calls for it. Any pool or spa area should be fenced with a barrier at least 4 feet high and a self-closing, self-latching gate with the latch mounted high, often around 54 inches. Grills, fire pits, and propane tanks should sit in a zone kids don’t pass through to reach toys or the yard. I’ve moved plenty of backyard setups simply because the route from the sliding door to the swing set went right past the hot grill.
Don’t forget the oddball hazards
Every house has one or two weird trouble spots: a chest freezer in the basement, an old cedar chest with a heavy lid, a pellet stove, a workshop corner, or a sloped bulkhead door outside. Those are the spots a standard babyproofing kit won’t solve. That’s where custom fixes come in, like hinge supports, lockable latches, plexiglass shields, or a half-wall gate built to fit an awkward opening. The goal isn’t buying more gadgets. It’s removing the specific temptation or hazard your house already has.
On older windows, combine sash stops with a simple sash lock tune-up. A lot of window accidents happen because the lock is loose and the sash slides easier than parents expect.
Families often childproof the nursery and ignore the basement or garage, even though those spaces usually contain the most dangerous chemicals and tools in the house.
Common Mistakes to Avoid
The first big mistake is relying on adhesive-only products everywhere. Some adhesive latches and corner guards are fine for light-duty use, but in kitchens, bathrooms, and older homes with temperature swings, they let go. I see this all the time in summer when humidity kicks up. Anything protecting against a major hazard, like furniture tip-over, stair falls, or access to cleaners, should be mechanically secured whenever possible.
The second mistake is childproofing for the kid you have today instead of the kid you’ll have in three months. Babies roll, then crawl, then pull up, then suddenly climb. A coffee table that feels harmless to a six-month-old becomes a launch point for an 18-month-old. That’s why I recommend homeowners re-check the house every season, especially around birthdays and developmental jumps.
Another common issue is creating safety gear that adults stop using because it’s annoying. Gates that are hard to latch, cabinet locks that need two hands, and storage systems that make everyday routines harder usually get bypassed. When that happens, the house is technically childproofed but not actually safer. The best setups are the ones that are simple, repeatable, and tough enough to survive real family life.
Last one: ignoring code and installation details. I’ve seen window guards installed in ways that blocked emergency escape, gates mounted into weak trim instead of framing, and outlet strips overloaded behind nursery furniture. Childproofing shouldn’t create a new hazard while fixing the old one. When you’re not sure, that’s the point where a handyman, carpenter, electrician, or plumber can save you a lot of grief.
Buy fewer products and install the important ones properly. A well-mounted gate, anchored dresser, and locked chemical cabinet do more good than a shopping cart full of gimmicks.
Before you buy new gear, use painter’s tape to mark every real hazard in the house. That keeps you from spending money on gadgets for spots that don’t actually need them.
Cost Breakdown: What to Expect
For a basic DIY childproofing pass, most homeowners spend between 200 and 600 dollars on products. That usually covers outlet upgrades or covers, 2 to 4 cabinet lock sets, 1 or 2 gates, furniture anchors, corner guards, cord cleats, and a few latches. A more complete DIY setup for a two-story home with a basement can easily run 600 to 1,200 dollars once you add quality gates, window devices, anti-scald pieces, and garage storage hardware.
Professional installation costs depend on the age of the house, the number of floors, and how custom the work gets. In Rockland County, handyman labor commonly runs about 95 to 145 dollars per hour, and in Orange County you’ll often see 85 to 130 dollars per hour for similar work. Licensed electricians typically fall in the 125 to 185 dollar per hour range, while plumbers are often around 140 to 220 dollars per hour depending on the service call, town, and whether parts are involved.
Here’s what that means in real numbers. A professionally installed top-of-stairs gate usually lands around 175 to 350 dollars including the gate and mounting. Anchoring 3 to 5 pieces of furniture may run 225 to 500 dollars depending on wall type and access. Cabinet and drawer lock installation in one kitchen often falls between 250 and 650 dollars. Window stops or guards can range from 40 to 125 dollars per window installed, while a full bathroom safety update with anti-slip add-ons, latches, and anti-scald adjustments can run 250 to 900 dollars.
For a whole-home childproofing package in this area, I’d tell most homeowners to budget roughly 900 to 2,500 dollars for a modest house and 2,500 to 5,000 dollars for a larger or older home with custom gates, window work, railing corrections, or garage storage upgrades. Houses with unusual stair openings, masonry walls, older trim, or pre-1970s windows usually cost more because the install takes longer and off-the-shelf products don’t always fit.
The good news is that you don’t have to do it all at once. I usually rank projects in this order: stairs and tip-over hazards first, poison and burn hazards second, windows and exterior barriers third, then convenience items after that. That lets families spread out the cost without leaving the biggest risks untouched.
Bundle the work. Having one pro install all gates, anchors, and cabinet locks in a single visit is usually cheaper than calling for three separate small jobs.
Check gate hardware, anchor straps, and cabinet lock screws every six months. A five-minute tightening now can prevent a replacement later.
📍 How This Applies to Homes in Rockland & Orange County
Childproofing in Rockland County and Orange County isn’t quite the same as doing it in a brand-new subdivision down south. Around the Hudson Valley, we deal with older pre-1970s homes, split levels, colonials with steep basement stairs, and a lot of original windows and trim that were never designed with toddlers in mind. In places like Nanuet, Spring Valley, Suffern, Nyack, and New City, I’m often working in houses where the layout is solid but the details need updating, wider stair baluster spacing, slick wood stairs, low outlets, and heavy old furniture that absolutely needs anchoring.
The Hudson Valley climate also plays a part. Harsh winters and freeze-thaw cycles can shift trim, loosen fasteners, and make older doors or gates fit differently from one season to the next. A latch that worked fine in October might bind in January or stop catching cleanly by March. Spring moisture can swell wood cabinets and window sashes, while summer humidity can weaken adhesive products and make some cheaper locks fail earlier than expected. That’s one reason I lean toward screwed-in hardware for the important safety items.
In Orange County towns like Middletown and Newburgh, I see plenty of homes with finished basements, mudrooms, and garage entries that turn into storage overflow. Those areas become a childproofing priority fast because families wind up storing paint, pool chemicals, pet food, tools, and sports gear all in one place. Add in bulkhead doors, boiler rooms, sump pumps, and older laundry hookups, and there are just more hazards than people think about during a quick babyproofing run to the store.
Local homes also tend to get lived in hard, especially with kids tracking in snow, salt, mud, and wet shoes half the year. That wear and tear matters. Loose deck gates, wobbly porch rails, slippery tile near entryways, and windows that stick or slam shut are all common service calls around here. For Hudson Valley families, the best childproofing plan is one built for four seasons, older construction, and real daily use, not just a list of gadgets pulled off a shelf.
Frequently Asked Questions
Ready to Get Started?
Get Your Free Estimate Today
Serving Rockland County & Orange County, NY. Professional results, guaranteed.
Request a Free Estimate →