The first sign is usually a brown ring that wasn't there last week, or a ceiling over the shower that suddenly looks a little soft and swollen after a cold snap. I've walked into plenty of homes in Orange County and Rockland where the homeowner told me, "It looked minor at first," and then pointed to a section of ceiling hanging down like a wet cardboard box. By the time drywall starts sagging, the leak itself has often been going on longer than anyone realized.
Around the Hudson Valley, ceiling damage has a way of sneaking up on people. In my own schedule, well over half of the ceiling repairs I get called for started as either a slow plumbing drip, bad attic ventilation, or a roof leak around flashing that only showed up during wind-driven rain or snow melt. That's especially common in older homes where patchwork repairs have been done over the years and nobody ever really fixed the source.
The good news is most ceiling problems can be repaired cleanly when you catch them early and use the right materials. The bad news is a lot of homeowners waste time and money by painting over stains, patching wet drywall, or screwing new board into weak framing. I'll walk you through how I approach ceiling repair Orange County NY jobs in the real world, what products hold up best, what mistakes to avoid, and when it's smarter to replace a full section instead of trying to save it.
Spot the Cause Before You Patch
Start with the source, not the stain
A ceiling stain is a symptom, not the problem. In homes around Middletown, Newburgh, Nanuet, and New City, the usual suspects are roof leaks around pipe boots and flashing, overflowing tubs, second-floor toilet wax rings, cracked shower grout, and attic condensation from poor ventilation. Before I cut anything open, I ask when the stain shows up: only after rain, only after showers, only in winter, or all the time. That timeline tells you a lot.
Check for active moisture and hidden damage
Use a moisture meter if you've got one. A pin meter like the General Tools MMD4E or a pinless model like the Klein ET140 can help you tell whether the drywall is still wet or if the leak happened weeks ago. Drywall that reads damp, feels soft, or crumbles when pressed with a putty knife needs to come out. If the ceiling is bulging with trapped water, shut off power to nearby fixtures first, place a bucket underneath, and make one controlled drain hole with a screwdriver. I've seen a gallon or two of water come out of what looked like a small bubble.
Figure out what you're working on
Not every ceiling is standard 1/2-inch drywall. Many newer ceilings use 5/8-inch drywall for better sag resistance, and a lot of pre-1970s homes in Rockland and Orange still have plaster over wood lath or rock lath. Drywall usually gives you cleaner cut lines and easier patching. Plaster often needs a different plan, especially if keys have broken loose and the ceiling is separating from the lath. In older houses, I always tap around the damage and check whether the loose area extends past the visible stain.
Know when a patch will work and when replacement makes more sense
A small stain under 6 inches wide with solid, dry drywall can sometimes be sealed, skimmed, and painted. But once drywall paper is delaminating, gypsum core is soft, mold spotting is present, or the ceiling is sagging more than about 1/2 inch across a 4-foot span, I lean toward cutting back to sound material. On larger repairs, I cut to the center of the joists whenever possible so the new board has solid fastening. A neat rectangular cut almost always finishes better than chasing odd shapes.
Don't ignore the cavity above the ceiling
Before closing anything up, look at insulation, framing, and venting above the damaged section. Wet fiberglass loses performance fast, and compressed insulation around a leak can hold moisture longer than you think. In bathrooms, I often find the fan dumping moist air into the attic instead of outside. In roof-related jobs, I look for dark sheathing, rusty fasteners, and frost lines that tell the story of repeated winter condensation.
Cut your test opening near the edge of the damaged area first, not dead center. It lets you inspect the cavity with a flashlight or borescope before you commit to a larger repair.
A lot of homeowners prime and paint a stain before confirming the leak is solved. That almost always means doing the same job twice.
How to Repair a Water-Damaged or Sagging Ceiling
Remove all damaged material cleanly
Once the leak is fixed and the area is dry, lay down plastic, set up a dust barrier, and cut the damaged ceiling back to solid material. I use a utility knife to score the paint line first, then a drywall saw or oscillating multi-tool to make clean cuts. For drywall ceilings, it's best to cut a square or rectangle and land the edges on framing or added backing. If the hole falls between joists, install 1x3 or 2x4 wood backing so every edge of the new patch is supported.
Use the right board and fastening pattern
For most ceiling patches, I use 5/8-inch mold-resistant drywall such as Gold Bond XP or CertainTeed M2Tech, even if the original ceiling is 1/2 inch, as long as I can match the finished plane. On exact-thickness matches, use whatever is already there. Cut the patch about 1/8 inch shy so it drops in without forcing. Fasten with 1-5/8-inch coarse-thread bugle-head drywall screws into wood framing, keeping screws roughly every 8 inches on ceiling framing. On bigger patches, a bead of construction adhesive on the wood backing helps reduce movement, but screws still do the real holding.
Tape and mud it like a ceiling, not a wall
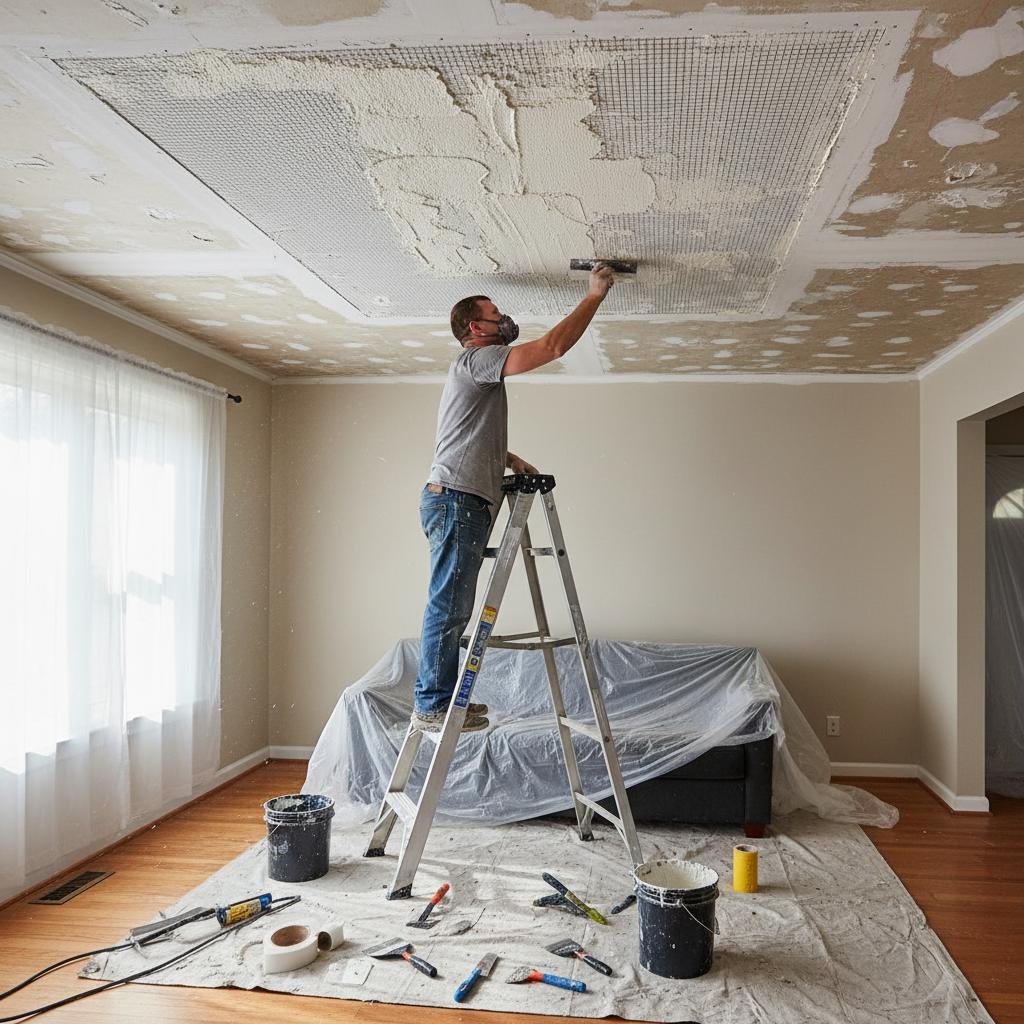
Ceilings show every hump once daylight hits them from a side window, so flat finishing matters. I prefill gaps with a setting-type compound like USG Easy Sand 45 or Sheetrock Durabond 45, then tape the seams. For butt joints, I prefer paper tape embedded in compound because it stays flatter than mesh in most ceiling applications. After that, I apply two to three wider coats with a 10-inch and then 12-inch knife, feathering each pass farther out. On a visible center-of-room repair, I'll often skim 12 to 16 inches beyond the patch so the eye doesn't catch a ridge.
Seal stains before final paint
Even after damaged drywall is replaced, any surrounding stained area should be spot-primed with a solvent-based or shellac-based stain blocker. Kilz Original and Zinsser BIN are two products I trust when there's an old water mark that wants to bleed through. After primer, I use a flat ceiling paint like Benjamin Moore Waterborne Ceiling Paint or Sherwin-Williams ProMar Ceiling Paint. To avoid flashing, it's usually smarter to paint the whole ceiling plane from wall to wall, not just the patched spot.
When sagging means full replacement is the better call
Sometimes the smartest fix isn't a patch. If a ceiling has multiple soft sections, widespread screw pops, sagging between trusses, or repeated water events, a full tear-out and rehang is often faster and cleaner in the long run. In older plaster ceilings, I may stabilize small loose areas with plaster washers, but once large sections have let go, patching becomes a gamble. I'd rather tell a homeowner the truth up front than sell them a repair I don't think will last.
Use setting compound for your first coat on repairs, especially around water-damaged edges. It hardens chemically, shrinks less, and cuts down on callbacks from hairline cracks.
Lightweight spackle is fine for nail holes, but it won't hold up well on a ceiling patch seam. That's where real tape and joint compound matter.
Common Mistakes to Avoid
Patching before the area is fully dry
This is the biggest one. A homeowner sees a stain, cuts a patch, closes it up, and then two weeks later the joint tape bubbles because the insulation above is still wet or the leak wasn't actually fixed. I like to see the cavity dry, the framing dry, and the moisture readings stable before I hang new board. Depending on the leak, fans and a dehumidifier may need to run for 24 to 72 hours.
Cutting too small and fastening into nothing
Another common mistake is trying to save every inch of damaged drywall. Soft edges don't get stronger because you mud over them. I see a lot of DIY patches screwed into the loose edge of old drywall with no wood backing behind it, and those seams crack fast. Every patch edge should land on a joist, a furring strip, or solid backing screwed tight in place.
Using the wrong primer, wrong tape, or wrong expectations
Latex paint alone won't reliably block old water stains. Cheap mesh tape on every seam, especially over a butt joint, can leave a hump that shows forever under ceiling light. And one more thing: texture matching is harder than people think. Popcorn, stomp, crows-foot, and old roller texture all need practice to blend. On homes with older painted ceilings, I usually tell people upfront that the repair can be structurally invisible but may still need full-ceiling paint to disappear visually.
Ignoring the reason the ceiling failed in the first place
A surprising number of sagging ceilings aren't from one dramatic leak. They're from years of humidity, under-fastened drywall, roof framing movement, or bathroom fans that never vented outdoors. In upstairs bathrooms, I always check fan size and ducting. In attics, I look for blocked soffit vents, frost, and insulation gaps. Fixing the ceiling without fixing the moisture cycle is how you end up paying for the same repair twice.
Take photos before opening the ceiling and again after the cavity is exposed. It helps with insurance documentation, future plumbing work, and showing exactly what was repaired.
When a textured ceiling needs repair, consider smoothing the whole ceiling in a small room instead of paying extra to chase a perfect texture match that may still stand out.
Cost Breakdown: What to Expect
Small repairs versus full-section replacement
For a simple stain treatment with light skim coating and paint, homeowners might spend about $75 to $250 in materials doing it themselves, assuming the drywall is still solid. A small cut-and-patch repair, say a 1-foot by 1-foot to 2-foot by 2-foot section, usually runs roughly $350 to $900 when hired out, depending on access, number of trips, and whether matching texture is involved. Once the damaged area spreads across several joist bays, costs climb quickly because setup, drying time, demo, disposal, and finishing all increase.
Typical labor rates in Rockland and Orange County
In Rockland County and Orange County, skilled handyman and drywall repair rates commonly land around $85 to $140 per hour, while a larger drywall or remodeling company may price by crew rate rather than straight hourly. For ceiling work, pros often charge a premium over wall repairs because overhead work is slower and finishing has to be cleaner. On a mid-sized ceiling repair with two visits for mudding and sanding, labor is usually the biggest chunk of the bill.
Real-world price ranges homeowners should expect
A moderate repair involving leak investigation, removal of a 4-foot by 4-foot to 8-foot by 8-foot section, new 5/8-inch drywall, tape, finish, stain-blocking primer, and ceiling paint often falls in the $1,200 to $3,500 range. Full ceiling replacement in a bedroom or living room can run roughly $2,500 to $6,500 or more depending on room size, ceiling height, insulation replacement, texture removal, trim protection, and whether light fixtures or old plaster are involved. Plaster ceilings cost more, especially when demo and debris handling get heavier.
Extra costs that surprise people
The source repair is separate from the ceiling repair in many cases. A roofer, plumber, or HVAC tech may need to handle the original issue first. Add-on costs can include insulation replacement, mold remediation, repainting walls for color match, moving furniture, or renting drying equipment. Insurance may help for sudden covered water events, but long-term neglected leaks usually become an out-of-pocket job. That's why I tell homeowners to budget for the whole chain of work, not just the pretty finish at the end.
Bundle the source repair and ceiling repair with one contractor coordinating trades when possible. It often cuts down on repeat trips, duplicate setup charges, and finger-pointing between companies.
Check attic insulation, bathroom fan ducting, and roof flashing once a year, especially after winter. Catching a small moisture issue early is a whole lot cheaper than replacing a ceiling.
📍 How This Applies to Homes in Rockland & Orange County
Ceiling repairs hit differently in the Hudson Valley than they do in milder climates. Between harsh winters, freeze-thaw cycles, spring moisture, and summer humidity, our homes take a beating from above and below. In Orange County and Rockland, I've seen plenty of ceilings damaged not by one major storm, but by repeated small events: snow melt backing up at the eaves, condensation in under-vented attics, and bathroom moisture collecting over time in upstairs ceilings.
A lot of homes in towns like Nanuet, Spring Valley, Suffern, Nyack, and New City were built decades ago, and many still have older drywall, plaster, or patched-over ceilings from previous leaks. In pre-1970s homes, it's common to find mixed materials in the same house, like plaster in one room and drywall in the next. That changes how the repair should be approached. A patch that works fine in a newer ranch may not be the right fix in an older colonial with sagging plaster keys and uneven framing.
Over in Middletown and Newburgh, I often run into attic-related ceiling problems after long winters and wet springs. Ice dams, roof ventilation issues, and freeze-thaw movement around flashing can leave stains that don't show up until weeks later. Then summer rolls in, humidity climbs, and that previously damp ceiling starts to sag or grow mildew around the edges. That's why local timing matters. A repair done in January without solving the ventilation issue may fail again by July.
For homeowners in this area, the smartest ceiling repair Orange County NY approach is usually a full diagnosis first, then a repair built for our climate. That means checking ventilation, replacing wet insulation, using the right board thickness, and not rushing the finishing process just because the stain is ugly. In the Hudson Valley, a ceiling repair that lasts has to account for moisture swings, older housing stock, and the reality that one leak can have three different causes depending on the season.
Frequently Asked Questions
Ready to Get Started?
Get Your Free Estimate Today
Serving Rockland County & Orange County, NY. Professional results, guaranteed.
Request a Free Estimate →