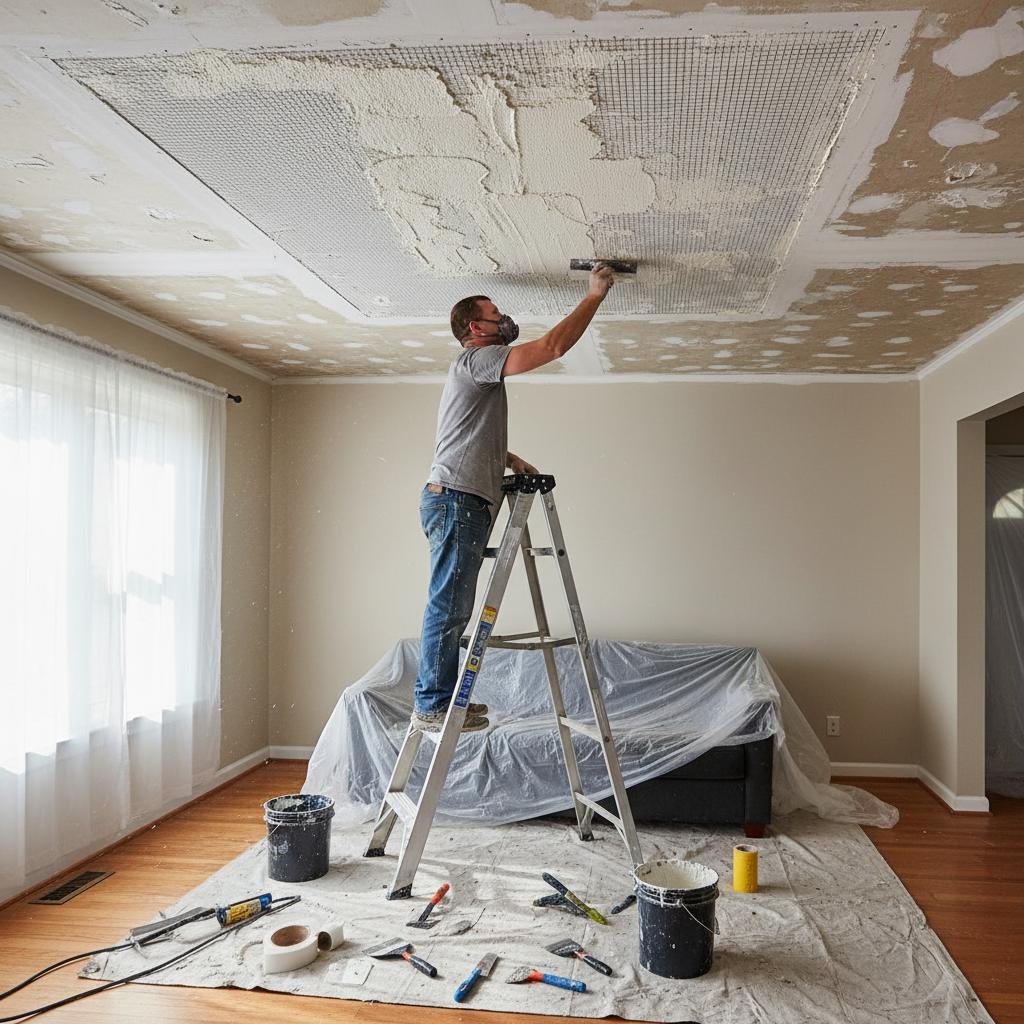
Most homeowners don't notice the crack until the late afternoon sun hits the wall just right. Then all of a sudden that thin line over the doorway looks twice as long as it did last winter, and the little doorknob hole in the hallway somehow feels like the only thing you can see. I've had plenty of calls from Nanuet to Newburgh that started exactly that way: someone was getting ready to paint, move furniture, or list the house, and one ugly wall flaw turned into a whole drywall repair weekend.
Around Rockland and Orange County, I'd say at least 7 out of 10 drywall problems I look at aren't major structural issues at all. They're old seam tape letting go, seasonal movement, loose corner bead, moisture from a past leak, or a patch that was rushed years ago and finally failed. That's actually good news for homeowners, because most cracks and holes can be repaired cleanly with the right materials, the right drying time, and a little patience.
The trick is knowing which repairs are cosmetic and which ones are warning signs. That's where a lot of DIY jobs go sideways. In this guide, I'll walk you through the same process I use for drywall repair Rockland County NY homeowners ask me about all the time, including what causes damage, what tools actually matter, how to patch walls so the repair stays put, and what it usually costs around here.
What Causes Drywall Cracks and Holes
Hairline cracks aren't all the same
A straight hairline crack running along a drywall seam is usually a tape or movement issue, not a disaster. In most homes, anything around 1/32 in. to 1/16 in. wide that follows a seam, door frame, or ceiling line is often tied to normal settling or seasonal expansion and contraction. A jagged crack wider than 1/8 in., especially one that keeps reopening after repair, deserves a closer look. When I see that kind of movement, I start checking doors, windows, trim gaps, and the framing below before I ever open a bucket of mud.
Nail pops, screw pops, and loose board movement
Those little round bumps or dimples in the wall usually happen when drywall fasteners lose their grip. In older houses, the framing dries out and shifts a bit over time, and the drywall starts to move independently from the studs. In newer repairs, I sometimes find the board wasn't fastened tight enough in the first place, or the installer used too few screws. Standard wall board is usually 1/2-in. drywall over studs spaced 16 in. on center, and when that fastening pattern gets skipped, the wall tells on you sooner or later.
Moisture damage changes the whole repair plan
A soft spot, brown stain, bubbling paint, or crumbly paper face usually means moisture got there first. That's common around bathrooms, second-floor windows, roof lines, and basement stairwells. Before I repair anything stained or soft, I check it with a moisture meter. On interior drywall, I want to see dry conditions before patching, generally under about 12 percent. If you patch over active moisture, the repair might look fine for a month, then blister, sag, or grow mildew underneath.
Holes tell a story too
Small holes usually come from anchors, picture hangers, and door handles. Bigger ones come from furniture corners, kids, plumbing access, or somebody losing their footing carrying a box down the stairs. What matters most is the size and the condition of the surrounding drywall. A clean 2-in. hole in solid drywall is an easy patch. A 4-in. hole surrounded by crushed or loose gypsum needs a wider cutout so the new patch has solid edges to tie into.
What I check before starting any repair
Before I touch the wall, I press around the damage with my thumb, shine a raking light across the surface, and run a 12-in. taping knife over the area to see how far the hump or dip goes. I've walked into plenty of homes where the visible crack was only part of the problem. Sometimes the real issue is a loose corner bead, an old leak, or a bad patch buried under thick paint. Five minutes of inspection saves you from doing the same repair twice.
Use a bright flashlight held low across the wall before you start. It shows ridges, loose tape, and shallow dents that overhead room lighting hides.
Homeowners often mud directly over a crack without cutting out loose material first. That almost guarantees the crack will print right back through the paint.
Tools and Materials You'll Need
Pick the right compound for the job
For most crack repairs, I use setting-type joint compound for the first coat, then finish with a lightweight topping or all-purpose compound. Products like USG Sheetrock Easy Sand 45 or 90 are great because they set hard, shrink less, and lock tape in well. For finish coats, I like Plus 3 or a lightweight topping compound because it feathers easier and sands cleaner. Regular spackle has its place for tiny dings, but it shouldn't be your go-to for bigger seams or deeper patches.
Tape matters more than people think
For seams and recurring cracks, paper tape is still the most reliable option when it's embedded properly in mud. Mesh tape is convenient, but on stress cracks it can fail if you don't use it with setting compound. For small flat wall holes, a self-adhesive patch can work, but once you get past about 4 in. to 6 in., I prefer cutting in a real drywall patch. When I need backing, I use 1x2 cleats or scrap wood strips screwed behind the opening with 1 1/4-in. coarse-thread drywall screws.
Keep the basic hand tools simple and sharp
A solid drywall setup doesn't need to be fancy, but it does need to be clean. My everyday kit includes a utility knife with fresh blades, a 6-in. knife for filling, a 10-in. knife for second coats, a 12-in. knife for feathering, a mud pan, a sanding sponge, 120-grit and 150-grit paper, a drywall saw, a drill-driver, and a shop vacuum. I also keep a straightedge, a spray bottle, and a damp sponge handy. Clean knives leave cleaner work. Dried chunks in the mud pan create drag lines you'll fight later.
Don't forget primer and paint prep
A lot of patch jobs look bad not because the drywall repair failed, but because the finish wasn't handled right. Fresh mud and patched paper absorb paint differently than the surrounding wall, so I always prime repairs before painting. A PVA drywall primer or a quality stain-blocking primer, depending on the situation, evens things out. On walls with a noticeable sheen, like eggshell or satin, skipping primer can leave a flashing effect where the patch is visible from certain angles.
A few extras make the job cleaner
For texture blending, I sometimes use Homax orange peel spray on newer walls, but only after a test on scrap cardboard. For dust control, a vacuum sander or a damp sanding sponge helps a lot, especially in occupied homes. And for tiny dents and pinholes before painting, a lightweight product like 3M Patch Plus Primer can save time. The trick is not buying more products, it's knowing which one solves the exact problem in front of you.
Mix setting compound in small batches you can use in 15 to 20 minutes. Once it starts to kick, don't add water and try to revive it.
One of the biggest DIY mistakes is using lightweight spackle for every repair. It dries fast, but it isn't strong enough for taped seams, loose cracks, or deeper patches.
How to Repair Hairline Cracks and Nail Pops
Step 1: Open the crack and remove anything loose
This part feels backward to a lot of homeowners, but a crack usually has to be opened slightly before it can be repaired properly. I run a sharp utility knife along the crack and create a shallow V-groove, usually around 1/8 in. wide, just enough to remove weak paint, loose mud, and broken tape edges. Then I vacuum the dust and wipe the area clean. You're not making the problem bigger. You're creating a solid channel for the compound to bond to.
Step 2: Stop the movement before you tape
If the drywall feels loose, or the crack runs along a seam that flexes when you press it, I add screws before mudding. Put 1 1/4-in. drywall screws into the studs about 1 in. to 2 in. above and below the crack every 8 in. to 12 in. as needed. Don't sink them so deep that they tear the paper. The goal is snug and solid. For nail pops, I set the popped fastener slightly below the surface, then add one screw above and one below it into the stud to keep the board from moving.
Step 3: Tape it like you mean it
For recurring cracks, I bed paper tape into a thin coat of setting compound, press it tight with a 6-in. knife, and scrape off the excess so the tape sits flat. Once that sets, I apply a second coat about 8 in. wide, feathering the edges. After that dries, I come back with a third coat spread 10 in. to 12 in. wide so the repair disappears into the wall. Wider is usually better than thicker. Thick mud shrinks, cracks, and takes forever to sand.
Step 4: Handle nail pops separately but thoroughly
With nail pops, don't just smear mud over the bump. First, tighten the board with screws. Then remove any loose paint or crushed paper around the pop and fill the depression with setting compound. After it sets, skim it again with lightweight compound and feather it out a few inches. On ceilings, I feather wider because overhead light loves to show every hump.
Step 5: Sand, prime, and check under side light
Once the final coat is dry, I sand lightly with 150-grit, sometimes finishing with 220-grit if it's a smooth wall. Then I hold a light across the repair to catch edges before priming. I always spot-prime patched areas before paint. In homes with older flat paint, one wall-wide repaint often blends better than touching up only the patch. That's one of those little contractor truths nobody likes until they see the finish.
Feather each coat wider than the last. A repair that's 12 in. wide and flat will disappear better than a repair that's 4 in. wide and built up.
People rush the second coat before the first coat sets or dries properly. That drags the tape, creates bubbles, and turns a simple crack repair into a mess.
How to Patch Small and Large Holes
Small holes and dents under 1/2 in.
Tiny nail holes, anchor holes, and minor dents are the easy ones. I scrape off any loose paint, fill with lightweight spackle or joint compound, let it dry, and sand flush. For deeper anchor holes, I like to fill in two passes instead of trying to pack the whole depth at once. Two thin coats dry harder and shrink less than one overloaded blob.
Holes from 1/2 in. to about 6 in.
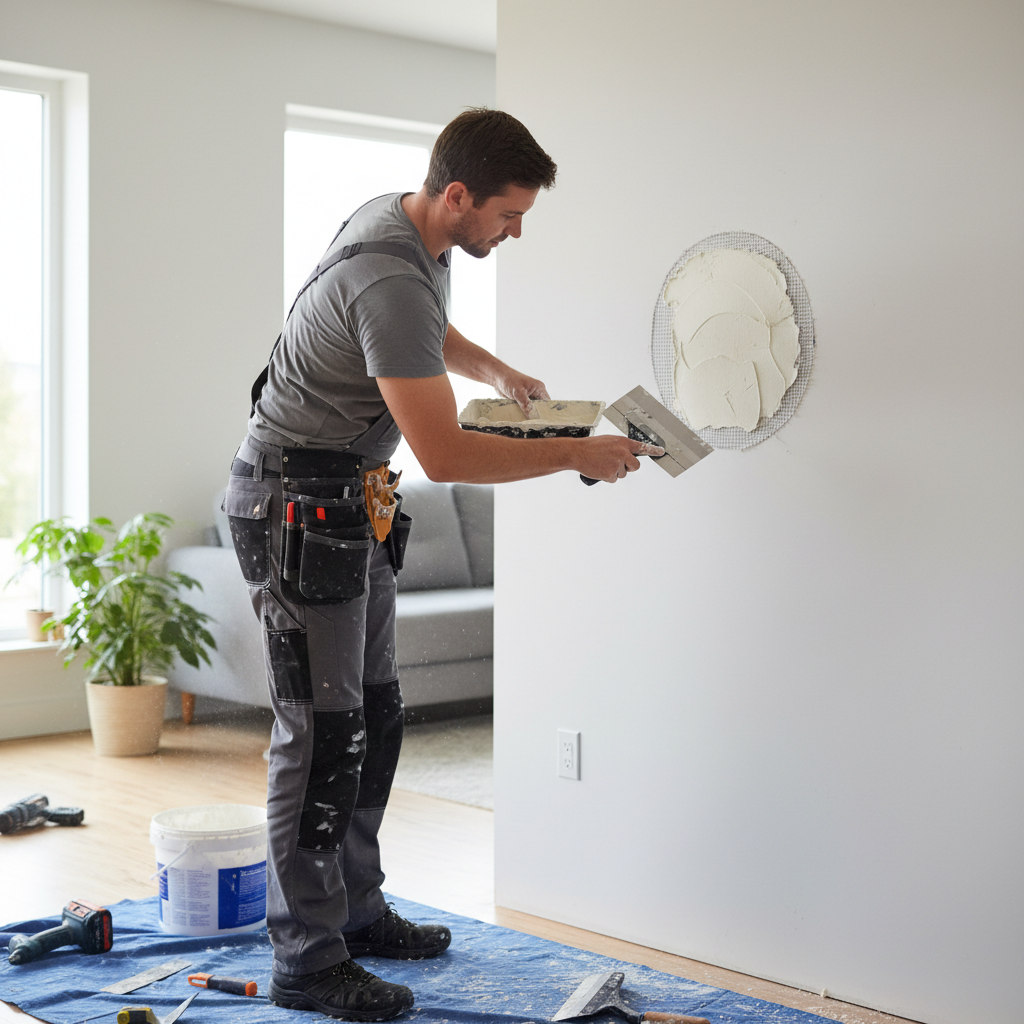
This is where product choice matters. A small mesh patch can work, especially for a clean hole around 1 in. to 4 in., but I still prefer a drywall patch when I want the wall to stay flatter. A California patch works well for many openings in this range: cut a piece of 1/2-in. drywall a little larger than the hole, snap away the gypsum around the edges, and leave a paper border to act as built-in tape. Bed it in compound, flatten it carefully, then apply two or three finish coats, feathering wider each time.
Holes larger than 6 in. need a real cut-in patch
For bigger openings, I square the damaged area with a utility knife or drywall saw so the new piece fits cleanly. Then I screw 1x2 backing strips behind the existing drywall, usually with two screws per side, and fasten a new 1/2-in. drywall patch to the backing. After that, I tape the seams with paper tape or FibaFuse, apply a first coat of setting compound, then come back with wider finish coats. On a clean wall, that repair can disappear completely once it's primed and painted.
Corner damage and edge blowouts take extra patience
Outside corners get beat up all the time from vacuums, furniture, and kids running through the house. If the metal or vinyl corner bead is bent, don't try to bury it in mud. Cut out the bad section and replace it. I fasten new bead, coat it tight, and feather both sides evenly with a 10-in. or 12-in. knife. Uneven corner repairs are easy to spot, especially in hallways with strong natural light.
Texture and sheen are the final test
Even a technically solid patch can stand out if the texture or paint sheen doesn't match. On smooth walls, the finish has to be dead flat. On orange peel or knockdown, I test texture on cardboard first and build lightly. Then I prime the patch and paint far enough beyond the repair to blend it. When homeowners tell me a patch is visible, most of the time it's not the patch itself, it's the paint or texture transition around it.
For openings larger than a doorknob, cut the damaged area into a square or rectangle. Straight lines are easier to patch cleanly than jagged shapes.
A lot of homeowners use a peel-and-stick mesh patch on every hole, then pile on too much mud to hide the hump. That's why the repair flashes through the paint.
Common Mistakes to Avoid
Patching over a problem instead of fixing the cause
This is the big one. If a crack is reopening because the drywall is loose, or a stain is there because a roof or plumbing leak is still active, fresh mud won't solve anything. I've seen homeowners patch the same bathroom ceiling three times when the real culprit was condensation above the shower and no proper exhaust fan. Fix the movement or moisture first, then repair the drywall.
Using too much compound and not enough patience
Joint compound is meant to be applied in thin, controlled coats. When people try to fill a crack or cover a patch with one heavy pass, it shrinks, droops, and leaves a hump that takes forever to sand. The better approach is three lighter coats, each one wider and flatter than the last. Think feathered, not buried.
Skipping tape where tape is required
Mud alone doesn't reinforce a seam. For cracks at joints, repaired cutouts, and recurring stress lines, tape is what gives the repair strength. Paper tape, embedded correctly, is still the standard for a reason. I only skip tape on the smallest cosmetic pinholes and shallow dents. Everywhere else, tape is cheap insurance.
Sanding too aggressively or painting too soon
I've seen good repairs ruined by over-sanding the face paper or trying to paint over compound that still has moisture in it. Once the paper face gets fuzzy, you create another layer of repair work. And when you paint too soon, flashing and roller marks show up fast. Let the repair dry fully, sand lightly, wipe the dust, prime, and then paint. That's the sequence.
Forgetting that paint match is part of the repair
A perfect patch can still look bad with the wrong finish. Even when the color is correct, a different sheen will catch the light and outline the repair. In many living rooms, hallways, and stairwells, repainting the whole wall from corner to corner gives a much better result than trying to dab paint on a 12-in. patch area.
When a crack is wider than 1/8 in., keeps reopening, or appears with sloped floors or sticking doors, have the structure looked at before you spend money on repeated cosmetic repair.
Save leftover paint in a sealed, labeled container with the room name and sheen. Matching the original wall later is a lot cheaper than repainting an entire room because the finish can't be identified.
Cost Breakdown: What to Expect
DIY material costs for basic drywall repair
For a simple crack or a handful of nail pops, most homeowners spend around $25 to $60 on materials if they already own a putty knife and a sander. That usually covers joint compound, tape, sandpaper, and primer. For a larger hole repair with a drywall patch, backing strips, screws, a new knife, and paint materials, you're more realistically in the $75 to $150 range. If you need to buy everything from scratch, including knives, pan, drill bits, sanding tools, drop cloths, and paint supplies, the cost can climb to $150 to $300 fast.
Typical professional pricing in Rockland and Orange County
For small jobs, most pros have a minimum service call. Around Rockland County, that often lands in the $150 to $250 range for a quick visit, even for minor patching. In Orange County, you may see minimums closer to $125 to $225 depending on travel and scope. A straightforward crack repair or a couple of nail pops might run $200 to $350. A medium wall hole repair with two or three visits for patching, sanding, priming, and paint-ready finish is often $300 to $700. Ceiling repairs, water-damaged drywall, or multiple problem areas can run $450 to $1,200 or more.
Local labor rates and what drives them
In Rockland County, handyman and drywall repair labor commonly falls around $85 to $140 per hour, while specialized finish work can price even higher when the result needs to be paint-perfect. In Orange County, typical labor is often a bit lower, around $75 to $125 per hour, though larger towns and higher-end neighborhoods can still come in above that. The biggest pricing factors are access, ceiling height, matching texture, number of return visits, protection of finished spaces, and whether painting is included. Drywall looks simple, but the labor is really in the finish.
Why small repairs sometimes feel expensive
Homeowners are often surprised that a small patch doesn't cost $50. The reason is the trip, setup, dust control, dry time, and the fact that good drywall repair usually takes more than one visit unless setting compounds are used strategically. A pro isn't charging only for 20 minutes with a knife. They're charging for the process, the finish quality, and not leaving you with a visible patch after the paint dries.
When it's worth hiring the job out
If the damage is on a ceiling, around a stairwell, tied to a leak, or in a room with critical side lighting, hiring a pro usually makes sense. Same goes for textured walls and larger patches that need to disappear completely before painting. DIY is fine for nail holes, minor dents, and a clean small hole on a flat wall. But when you start chasing recurring cracks or doing finish work in a front hallway, experience really does show.
Bundle drywall repair with other punch-list items like caulking, trim touch-ups, or paint prep. One service call for several small jobs is usually more cost-effective than booking separate visits.
Keep indoor humidity consistent, especially in winter and summer, to reduce seasonal drywall movement. A humidifier in heating season and good bathroom ventilation can prevent repeat cracking.
📍 How This Applies to Homes in Rockland & Orange County
Drywall repair in the Hudson Valley has its own personality, and homeowners around here know it. Between harsh winters, freeze-thaw cycles, spring moisture, and summer humidity, houses in Rockland and Orange County are always expanding, contracting, drying out, or taking on a little moisture. That's why I see so many seam cracks open up in late winter and early spring. A wall can look fine in October, then by February a faint line shows up over a doorway or across a ceiling joint.
Older pre-1970s homes add another layer to it. In places like Nyack, New City, Suffern, and parts of Newburgh, it's common to find a mix of older plaster repairs, newer drywall patches, and framing that's moved a little over the decades. In those houses, you can't treat every crack like a simple cosmetic issue. Sometimes you're tying a new drywall repair into old surfaces that aren't perfectly flat, or you're dealing with wood movement that has been happening since the house was built. That's why proper prep, screw placement, and tape choice matter so much.
I also see moisture-related drywall problems every spring in basements, mudrooms, and upstairs ceilings after snow melt and heavy rain. In towns like Nanuet, Spring Valley, and Middletown, that can mean old stain bleed-through, swollen corner bead, or softened gypsum near windows and roof edges. Then in summer, humidity hits and weak old patches start telegraphing through the paint. A repair that wasn't primed right or wasn't fully dry before painting will show itself fast once that sticky July weather rolls in.
For drywall repair Rockland County NY and Orange County homeowners can count on, the goal isn't just making the wall look good today. It's making a repair that holds up through another winter heating season, another wet spring, and another humid summer. Around here, that means addressing movement, checking for moisture, and finishing wide enough that the patch doesn't flash every time the afternoon sun hits the wall.
Frequently Asked Questions
Ready to Get Started?
Get Your Free Estimate Today
Serving Rockland County & Orange County, NY. Professional results, guaranteed.
Request a Free Estimate →