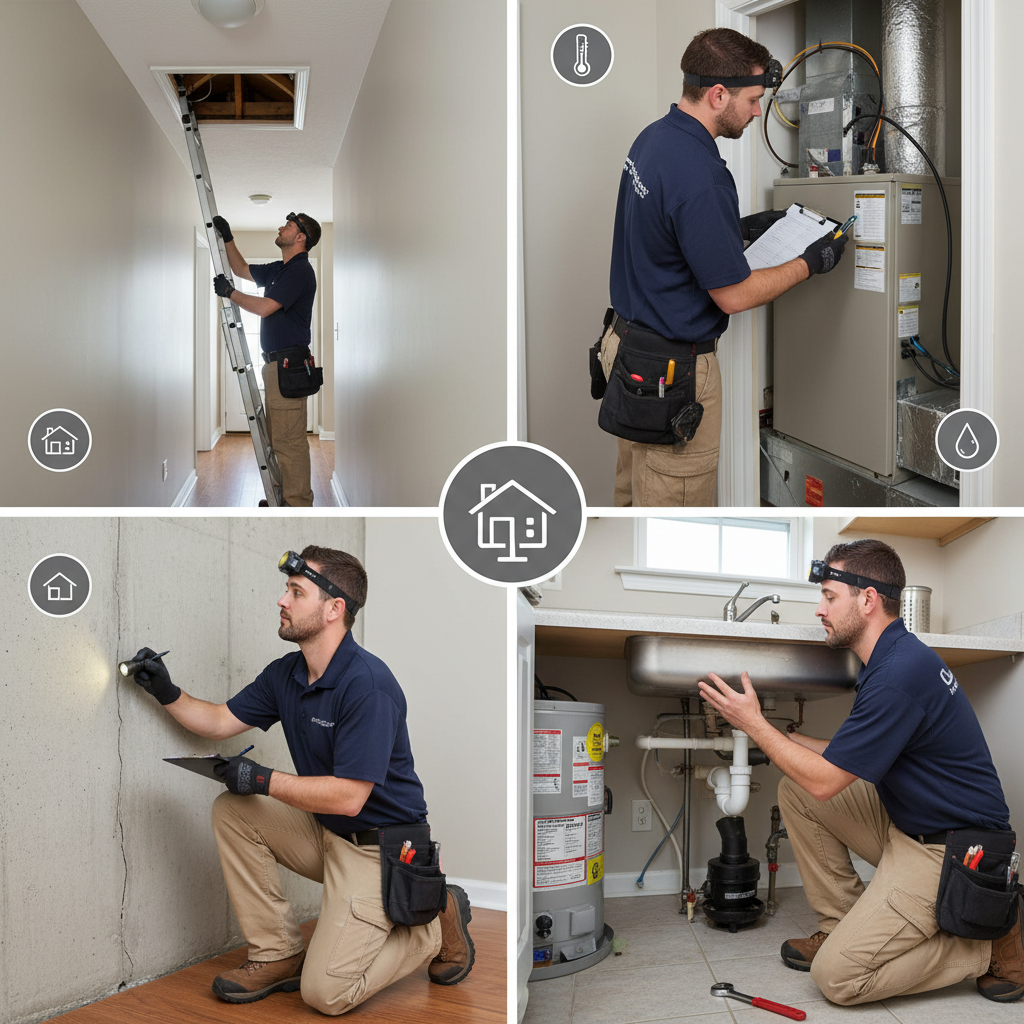
By the time the ceiling stain showed up over the kitchen in New City, the leak had already traveled from a cracked pipe boot near the ridge, soaked the roof sheathing, and stained two rooms before the homeowner even knew there was a problem. That’s how house issues usually go around here. They stay quiet through winter, get worse during the spring thaw, and then all of a sudden you’re spending real money on something that could’ve been caught with a flashlight, a ladder, and one careful walk-around.
After more than 20 years working in Rockland County and Orange County, I can tell you most expensive home repairs don’t start as emergencies. They start as clogged gutters, hairline mortar cracks, loose caulk, one bad shingle, a slow toilet leak, or a deck bolt that’s backing out. More than half the spring service calls I get are for problems homeowners say seemed minor a few months earlier. In the Hudson Valley, freeze-thaw cycles, wet springs, summer humidity, and older housing stock speed everything up.
That’s why I put together this annual home inspection checklist Hudson Valley homeowners can actually use. It’s not a generic list written from an office somewhere. It’s the same kind of yearly check I’d want my own family to do on a house in Nyack, Nanuet, Middletown, or Newburgh. Go through these 50 items once a year, take notes, snap photos, and you’ll catch most trouble before it turns into a bigger job.
Exterior and Structure
The outside of the house tells you a lot before you ever step indoors. I always start with a slow lap around the property after a decent rain, because water leaves clues. Bring a notepad, your phone for photos, a 4-foot level, and a flathead screwdriver for probing suspect wood. You’re not trying to diagnose every possible issue on day one. You’re looking for changes from last year and anything that invites water, movement, or rot.
Foundation and drainage checks
1. Walk the foundation and note any crack wider than 1/8 inch, especially stair-step cracks in block or masonry. 2. Look for spalling brick, loose mortar joints, or parging that’s flaking off. 3. Check grading; you want the soil to drop about 6 inches over the first 10 feet away from the house. 4. Make sure downspouts discharge at least 6 to 10 feet from the foundation using solid extensions, not those short splash blocks that end right at the wall. 5. Look for standing water in low spots 24 hours after rain. 6. Test the sump pump by pouring in a 5-gallon bucket of water and making sure the float activates cleanly. 7. Inspect hose bibs for drips, loose mounting, and missing vacuum breakers.
Siding, trim, windows, and doors
8. Probe lower trim boards, window sills, and garage door jambs for soft wood. 9. Check siding for gaps, warped panels, missing fasteners, or cracks at butt joints. 10. Inspect caulk joints around windows and doors; any gap over 1/4 inch should be cleaned out and re-caulked with a quality exterior sealant like OSI Quad Max or Big Stretch. 11. Look for peeling paint, bubbling paint, or black staining that points to trapped moisture. 12. Check window glazing, failed insulated glass seals, and torn screens. 13. Open and close exterior doors; if they drag, don’t latch, or show daylight, check hinges, weatherstripping, and threshold adjustment.
Decks, walks, and site safety
14. Look under the deck for proper ledger flashing where the deck meets the house. 15. Grab the railings and shake them; movement more than about 1/8 inch at the post connection needs attention. 16. Check stair treads, risers, and any loose carriage bolts or lag screws. 17. Walk the driveway and walkways for trip hazards; a height difference of 1/2 inch or more is worth marking for repair. 18. Inspect retaining walls for leaning, missing drainage, or washed-out soil behind them. 19. Trim tree limbs so they stay at least 6 to 10 feet off the roof and away from siding. 20. Check exterior vent terminations, especially the dryer vent, for lint buildup, crushed flaps, or bird nests.
A lot of homeowners skip the simple measurements and go by feel. Don’t. Put the level on the walk, measure the crack, poke the trim, and take the photo. That record matters. A hairline crack that stays the same for five years is one thing. A crack that doubles from one spring to the next is another. The outside inspection is where you catch the money leaks early.
Take your yearly inspection photos from the same four corners of the house and the same spots in the basement. Side-by-side pictures make small movement, staining, and rot a lot easier to spot.
Homeowners often caulk over dirty or wet joints. The new caulk fails fast. Scrape loose material, clean the joint, let it dry fully, then seal it.
Roof, Gutters, and Attic
Roof problems usually show up indoors long after the damage starts. Around here, ice, wind, wet leaves, and summer heat all work on the roof year-round. You don’t need to walk a steep roof to inspect it. In fact, most homeowners shouldn’t. Use binoculars from the ground, check from a ladder at the eaves if it’s safe, and inspect the attic from below.
Roof surface and flashing checks
21. Look for missing, curled, cracked, or blistered shingles. 22. Check for exposed nail heads and popped nails near ridge caps and flashing. 23. Inspect plumbing vent boots; the rubber collar is a common failure point after 8 to 15 years. 24. Look at chimney counterflashing and step flashing for gaps or lifted edges. 25. Check valleys for excessive granule loss, debris buildup, or worn shingles. 26. Look for moss and algae, especially on shaded north-facing slopes. 27. Inspect soffits and fascia for soft spots, peeling paint, or animal entry points. 28. Make sure the ridge vent isn’t blocked by debris or old roofing cement.
Gutters, downspouts, and chimney checks
29. Run water through the gutters and make sure they pitch toward the downspouts instead of holding puddles. 30. Check gutter fasteners, spikes, or hidden hangers for looseness. 31. Inspect seams and end caps for leaks; a small drip can stain fascia and rot sheathing over time. 32. Confirm downspouts aren’t clogged at the elbows and lower bends. 33. Look at the chimney crown for cracks wider than hairline, because that’s where freeze-thaw damage starts. 34. Check the chimney cap or spark arrestor screen for rust, loose mounting, or missing sections.
Attic insulation and moisture checks
35. Measure insulation depth. In many homes, I still find 5 or 6 inches of old fiberglass where 12 to 16 inches would do a much better job. 36. Look for air leaks around recessed lights, attic hatches, bath fan housings, and top plates; sealing these with fire-rated foam or proper covers often helps more than just adding insulation. 37. Make sure bathroom fans vent outside, not into the attic. 38. Inspect the underside of the roof sheathing for dark stains, active drips, or daylight coming through. 39. Look for moldy sheathing, rusty nail tips, or winter frost marks that point to poor ventilation. 40. Check for nests, droppings, chewed wiring, or torn insulation from mice, squirrels, or bats.
When I’m in an attic, I also pay attention to smell and feel. A musty attic usually means moisture has been sitting there. A hot, stagnant attic in July may mean bad airflow. Little fixes matter here: resealing an attic hatch with foam tape, replacing a cracked pipe boot, or adding proper baffles at the eaves can prevent the kind of damage that shows up months later as a stained ceiling or moldy insulation.
A cheap pair of binoculars and a moisture meter can save you from risky roof climbing. I like a simple pin meter for checking suspicious attic sheathing and window trim.
People clean gutters but forget the downspout extensions. Water dumped right at the foundation can create basement moisture even when the gutters look spotless.
Major Systems and Safety
Inside the house is where comfort, safety, and hidden leaks live. This part of the annual inspection checklist is less about curb appeal and more about preventing damage you won’t notice until you get a big utility bill or a section of drywall lets go. Keep a flashlight, a GFCI tester, a new HVAC filter, and a simple water pressure gauge that screws onto a hose bib.
Plumbing checks
41. Inspect the water heater for rust, seepage at the fittings, corrosion around the draft hood on gas units, and drips from the temperature and pressure relief valve discharge pipe. 42. Turn the shutoff valves under sinks and behind toilets; if they’re frozen, replace them before an emergency forces the issue. 43. Check under every sink, around toilet bases, and behind the washing machine for active leaks, staining, or swollen cabinet floors. 44. Test water pressure; ideal residential pressure is usually about 50 to 75 psi, and anything pushing near 80 psi should be addressed with a pressure reducing valve if needed.
Electrical and HVAC checks
45. Test every GFCI at kitchens, bathrooms, garage, basement, and exterior receptacles, and check AFCI protection where applicable. A plug-in tester like the Klein Tools RT250 makes this easy. 46. Open the panel door and look for rust, scorch marks, double-tapped breakers where they don’t belong, and missing circuit labels. Leave the dead front cover alone unless you know exactly what you’re doing. 47. Replace or inspect the HVAC filter, check the condensate drain for blockage, make sure supply and return grilles are clear, and listen for unusual blower or inducer noise at startup.
Interior condition and life-safety checks
48. Test smoke alarms and carbon monoxide alarms, and replace any unit older than 10 years. 49. Check the basement or crawlspace for efflorescence, wet insulation, musty odors, and humidity above 60 percent; a simple hygrometer tells the story fast. 50. Walk every room and look for new ceiling stains, widening drywall cracks, sticking doors, sloping floors, and windows that suddenly don’t operate smoothly, because those changes can point to moisture or movement.
This is also the time to write down model numbers, filter sizes, and installation dates. Homeowners save themselves a lot of aggravation when they know the furnace takes a 16x25x1 filter, the water heater is 11 years old, and the smoke alarms were replaced three summers ago. Good records turn maintenance from guesswork into a system.
Label shutoff valves with a paint pen while you test them. In a leak, nobody wants to crawl under a sink trying to figure out which valve actually works.
A fresh coat of paint hides stains for a while, but it never fixes the leak. Always solve the moisture source before patching drywall or repainting.
Common Mistakes to Avoid
The biggest mistake I see is treating a home inspection like a quick walk-around instead of a documented maintenance check. People glance at the roof from the driveway, kick the tires on the furnace, and call it done. Then six months later they’re surprised by a leak that had already left attic stains, or by deck framing that had been soft for years. Slow down and write things down.
Another common mistake is focusing only on what’s visible at eye level. The real trouble spots are usually where materials meet: chimney flashing, deck ledger connections, the bottom corners of trim boards, the backside of gutters, the sill plate in the basement, or the wax ring area under a toilet that rocks slightly. Moisture loves hidden edges. So do insects.
I also see homeowners use the wrong repair materials. Interior painter’s caulk outside, silicone smeared over dirty brick, roofing tar packed into flashing gaps, and bargain flexible duct tape on HVAC joints are all temporary at best. Use exterior-grade products that match the job. For example, polyurethane or hybrid sealants like Sikaflex or OSI Quad Max hold up far better outdoors than cheap latex caulk, and proper aluminum tape is what belongs on many HVAC seams, not cloth duct tape.
Last one: knowing when not to DIY. Testing detectors, clearing debris, swapping filters, resealing small trim joints, and checking slope with a level are reasonable homeowner tasks. Walking a wet roof, opening an electrical panel beyond the door, servicing a gas appliance, or jacking a settling deck post are not beginner jobs. Saving a few bucks isn’t worth a fall, a fire, or making the repair bigger.
Keep a simple home log with date, photos, what you found, and what you fixed. That record helps with planning, resale, and deciding whether a crack or stain is actually getting worse.
Bundle small repairs into one visit. Having a contractor handle caulking, a loose handrail, two bad GFCIs, and a gutter issue in one trip usually costs less than four separate service calls.
Cost Breakdown: What to Expect
A basic DIY annual inspection is affordable if you already own a few tools. Figure about 20 to 40 dollars for a GFCI tester, 15 to 25 dollars for a water pressure gauge, 15 to 30 dollars for a hygrometer, 30 to 60 dollars for a moisture meter, and 25 to 60 dollars for quality sealant, weatherstripping, and touch-up materials. Add in a solid ladder only if you need one, and that’s where costs jump. For many homeowners, the inspection itself is cheap; the value is in catching issues while they’re still small.
For professional help in Rockland and Orange County, handyman rates commonly run about 95 to 140 dollars per hour depending on access, scope, and whether materials are included. Licensed plumbers, electricians, and HVAC techs are usually higher, often 140 to 195 dollars per hour, with service call minimums. A thorough maintenance walk-through by a seasoned contractor might run 250 to 500 dollars, while a more formal inspection with detailed reporting can go higher.
Typical repair ranges after an annual inspection can vary a lot. Re-caulking exterior windows and doors may run 250 to 700 dollars depending on how many openings the house has. Gutter cleaning is often 150 to 350 dollars on a typical one- to two-story home, while minor gutter repairs can add 100 to 300 dollars. Replacing a couple of bad GFCIs might cost 175 to 350 dollars. Swapping shutoff valves under sinks can run 150 to 300 dollars each if they’re seized or corroded. Minor roof repairs such as replacing a boot flashing or a few shingles often land around 350 to 900 dollars, while attic air sealing and adding insulation can range from roughly 1,200 to 3,500 dollars depending on size and access.
Where homeowners really save money is early detection. A 20-dollar tube of exterior sealant and one hour of labor is a lot better than replacing rotten trim, wet insulation, and stained drywall later. The same goes for downspout extensions, filter changes, and catching a slow toilet leak before the subfloor softens. Maintenance feels optional right up until the repair bill shows up.
Spend first on water management. Clean gutters, fix downspout discharge, seal obvious gaps, and address small leaks before putting money into cosmetic upgrades.
Replace HVAC filters on schedule and flush or inspect condensate drains annually. That tiny maintenance item prevents a surprising number of water damage calls.
📍 How This Applies to Homes in Rockland & Orange County
Homes in the Hudson Valley take a beating in ways folks outside the area don’t always understand. We get harsh winters, freeze-thaw cycles that open masonry cracks a little more every season, spring moisture that finds every weak spot, and summer humidity that can turn a damp basement into a musty one fast. That’s why an annual inspection here isn’t overkill. It’s basic homeownership.
In Rockland County towns like Nanuet, Spring Valley, Suffern, Nyack, and New City, I work on a lot of older homes with aging trim, original masonry, and additions built in different decades with different standards. Many pre-1970s homes have had windows changed, roofs layered, decks added, and drainage altered over time. Those transitions are where I find trouble: old flashing tied into newer siding, uneven grading after landscaping, and basement moisture that gets worse once a yard settles.
Orange County has its own patterns. In Middletown and Newburgh, I see plenty of homes where long gutter runs, heavier leaf buildup, and broad roof exposures create recurring drainage issues. Rural properties can have added concerns with wells, septic systems, crawlspaces, and tree limbs hanging over the roofline. Spring thaw can flood low spots around foundations, and summer humidity can make crawlspace moisture problems show up as cupped floors and musty odors upstairs.
What matters most locally is timing. I like one inspection in early spring after the last hard freezes, and a shorter follow-up in fall before real cold sets in. That way you catch winter damage, handle sealing and drainage while the weather’s workable, and go into the next season with gutters clear, detectors tested, and the house buttoned up the way it should be.
Frequently Asked Questions
Ready to Get Started?
Get Your Free Estimate Today
Serving Rockland County & Orange County, NY. Professional results, guaranteed.
Request a Free Estimate →