Six-thirty on a January morning in Rockland County usually tells the truth about a house. The front walk is slick, the mudroom light is too dim, and that one uneven step from the garage into the kitchen suddenly feels a lot taller than it did ten years ago. I've had more than one homeowner in New City or Middletown tell me the same thing after a close call: nothing seemed unsafe until one little stumble made the whole place feel different overnight.
The numbers back that up. About one in four adults over 65 has a fall each year, and around here I can tell you exactly where many of those scares happen: in old tile bathrooms, on basement stairs, at raised ranch entries, and at bedroom-to-bathroom routes that were never designed for weak knees, walkers, or midnight trips in the dark. A lot of homes in Rockland and Orange County were built for young families, not for aging joints, balance issues, or recovery after surgery.
That's why aging in place modifications Rockland County homeowners invest in don't have to be fancy, and they definitely don't have to make your home feel like a clinic. Done right, they're subtle, solid, and practical. The best ones blend into the house, solve real problems, and buy you years of safer living without giving up the neighborhood, the routine, or the home you've worked hard for.
Start With the Biggest Fall Risks
Most aging in place work starts with one simple walk-through. I don't begin with catalogs or product brochures. I start at the driveway, follow the path a homeowner uses every day, and look for the spots where people catch a toe, lose balance, or need to twist awkwardly. In a typical Rockland or Orange County house, that means entry thresholds, stairways, bathroom flooring, and the route from the bed to the bathroom at night.
Look at the floor first
Loose throw rugs, glossy ceramic tile, curled vinyl edges, and uneven hardwood transitions cause more trouble than people realize. For safer traction, I like a textured luxury vinyl plank such as COREtec Pro or Shaw Floorte with a wear layer that can handle walkers and rolling shower chairs. Where flooring changes from one room to another, keep the transition low and beveled. Anything over about a half-inch starts becoming a trip point, especially when somebody is shuffling instead of taking a full stride.
Clear widths and traffic flow matter
A lot of older homes have tight pinch points. For a walker, you want doorways that give you at least a 32-inch clear opening, which usually means a 34-inch or 36-inch door depending on the hinges and trim. Hallways should stay clutter-free and feel open enough to turn safely. I've widened plenty of bathroom and bedroom doors by reframing, but sometimes the fastest fix is replacing a standard hinge with an offset swing-clear hinge to gain extra usable width without tearing apart the whole wall.
Fix the small height changes before they become big problems
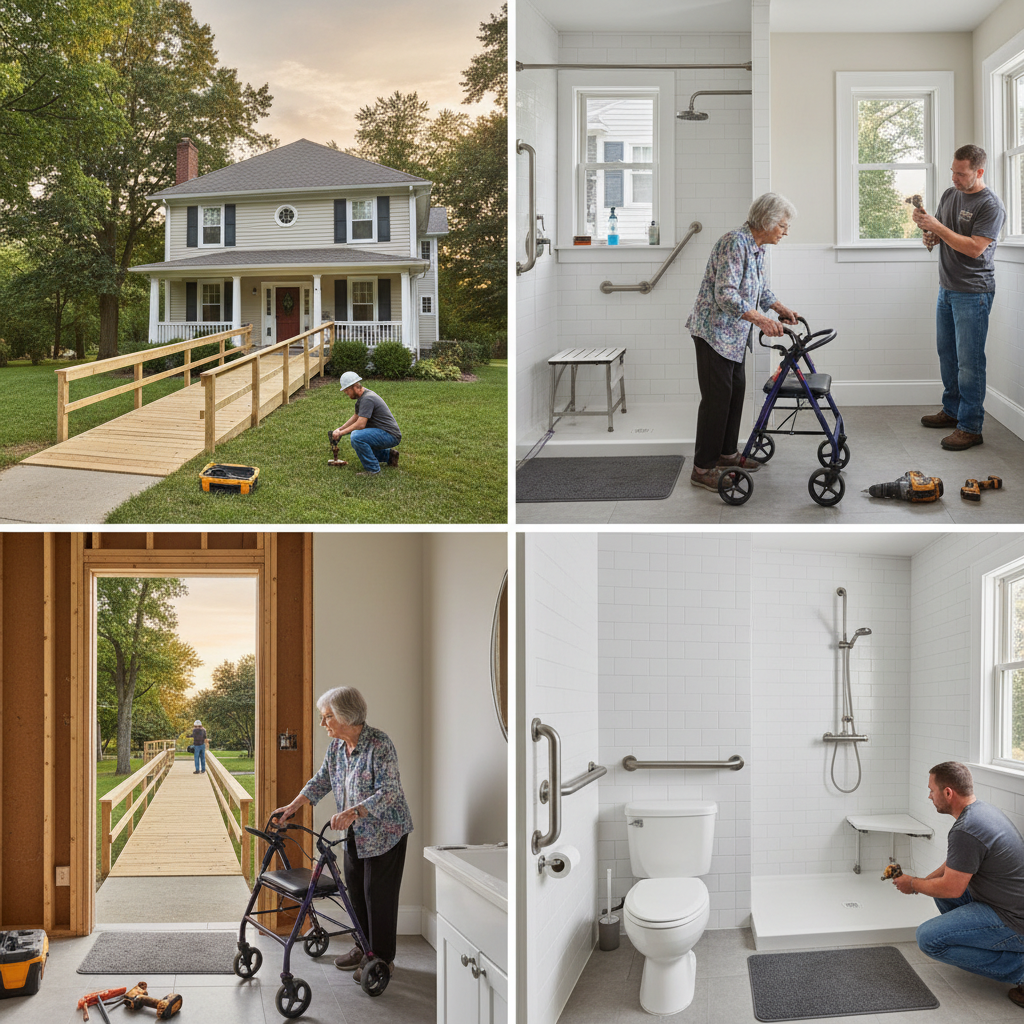
That single step down into a family room or the lip at a sliding door is the kind of thing homeowners get used to until they don't. A properly built threshold ramp with a gentle slope can make a big difference. For larger changes in elevation, a ramp should follow roughly a 1-to-12 slope whenever possible, and it needs a solid landing at the top and bottom. Inside the home, I also pay attention to stair nosings, loose railings, and any carpet that's worn thin at the edge.
Build the plan around real daily habits
One homeowner may need safer bathing. Another needs a better path from the garage because that's where they bring groceries in. Another just had a knee replacement and can't manage basement laundry anymore. The smartest aging in place plan isn't a generic checklist. It's a room-by-room map based on how you actually live, where you carry things, where you turn, and where you tend to grab for support when you get tired.
Walk your house at night with only the lights you normally use. That quick test will show you dark corners, bad switch locations, and floor transitions that are easy to miss during the day.
Homeowners often spend money on one visible upgrade, like a grab bar, while ignoring the real issue underfoot such as slippery flooring or a raised threshold.
Bathroom and Bedroom Upgrades That Matter Most
Bathrooms are where I see the biggest safety payoff from the right modifications. They combine water, hard surfaces, tight clearances, and fast movements like standing up, turning, and stepping over a tub wall. In many local homes, especially pre-1970 ranches and split-levels, the bathroom footprint is small, so every inch has to work harder.
Make the shower safer, not just prettier
A tub-to-shower conversion is one of the best upgrades when stepping over a 15-inch to 17-inch tub wall starts becoming risky. A curbless or low-threshold shower with a slip-resistant tile floor or textured shower pan makes entry much easier. I like using a full waterproofing system such as Schluter Kerdi or Wedi behind the tile, not just cement board and hope. Add a pressure-balanced or thermostatic valve like a Delta Monitor or Moen Posi-Temp, and set water temperature safely around 120 degrees so nobody gets surprised by a sudden blast of hot water.
Grab bars need proper backing
A real grab bar is not a towel bar that looks sturdy. I install 1.25-inch grab bars, usually 16-inch to 24-inch lengths near the toilet and 24-inch to 36-inch lengths in the shower, anchored into studs or solid blocking. When walls are open, I add 2x8 blocking exactly where future bars may be needed, even if the homeowner isn't ready to install every one of them yet. Brands like Moen Home Care and Delta do a good job making bars that don't scream medical equipment.
Toilet height, seating, and reach zones matter
A comfort-height toilet in the 17-inch to 19-inch range from floor to seat can make standing much easier. In the bedroom, I look at bed height too. Most folks do best when the mattress height lets both feet plant flat on the floor, often around 20 inches to 23 inches depending on the person. Nightstands should be stable, with a lamp or switch within easy reach, and the path to the bathroom should stay clear of benches, baskets, or pet beds.
Small bedroom changes can prevent big injuries
I also recommend rocker switches or bedside lamps tied to smart controls, motion-sensor night lights along baseboards, and closet rods that don't require stretching overhead. A simple bench in the bedroom for getting dressed, plus lever-style door handles instead of round knobs, can make everyday routines a whole lot easier on sore hands, hips, and shoulders. These aren't glamorous upgrades, but they work.
When remodeling a bathroom, add blocking on every wall around the shower and toilet area before the tile goes up. It's cheap insurance and saves a lot of headache later.
One of the biggest mistakes is installing grab bars with wall anchors into tile and drywall only. They may hold a little weight, but they won't reliably stop a fall.
Entry, Stair, and Lighting Improvements
The front door, garage entry, and stair runs are where a lot of Hudson Valley homes show their age. Raised ranches in places like Nanuet and Newburgh often have split entries. Older colonials in Nyack or Suffern may have narrow front steps and dark halls. The fix usually isn't one big project. It's several smart improvements that make getting in and around the house less tiring and a lot more predictable.
Safer stairs start with railings and consistency
Every stair should have a solid handrail, and ideally both sides if space allows. I aim for handrails mounted about 34 inches to 38 inches above the tread nosing, easy to grip, and returned into the wall so sleeves and bags don't catch. Stair risers should be consistent, typically around 7 inches to 7.75 inches, with treads deep enough to plant the whole foot. I also like adding contrasting anti-slip tread strips on basement stairs, where lighting is usually poor and people are carrying laundry.
Improve exterior access before winter reminds you
For exterior steps, concrete settling and freeze-thaw damage are common around here. A stoop that pitches the wrong way or has broken edges can become dangerous fast. Sometimes we can repair individual sections, and sometimes it makes more sense to rebuild with a wider landing and a better rail. If a ramp is needed, it has to be sturdy, drained correctly, and built with enough turning space. I don't like seeing makeshift plywood ramps because they get slick, they shift, and they rarely meet a safe slope.
Better lighting changes how a house feels at night
Lighting is one of the cheapest safety upgrades and one of the most overlooked. I recommend bright, even LED lighting around 2700K to 3000K for comfort, plus motion sensors in halls, laundry areas, and bathrooms. Products like Lutron Caseta dimmers and Leviton Decora occupancy switches work well because they make lighting automatic without a complicated system. Add illuminated rocker switches at both ends of a hallway and three-way switches at the top and bottom of stairs so nobody has to cross a dark space to find a light.
Don't forget hardware and everyday touch points
Lever handles on exterior and interior doors, a video doorbell, a sturdy bench in the mudroom, and hooks placed at reachable height all help more than people expect. I also like non-slip porch paint or adhesive traction strips on exterior landings, especially where snow gets tracked in. A safer home is usually the one that asks less of your body every time you come and go.
On basement stairs, paint the tread edges or add a contrasting nosing strip so each step reads clearly, even in low light or when vision isn't what it used to be.
A lot of homeowners replace fixtures but keep the old switch layout. Nice bright lights don't help much if the switch is still in the wrong place.
Common Mistakes to Avoid
The biggest mistake I see is waiting until after an injury, surgery, or hospital discharge to start planning. That's when people rush, buy whatever is in stock, and end up with temporary fixes that don't really fit the home. Aging in place works best when you make improvements early, while you have time to choose the right layout, materials, and budget.
Another common problem is focusing only on one room. Yes, bathrooms are critical, but the route to the bathroom matters just as much. I've seen homeowners spend on a beautiful low-threshold shower and then leave a loose rug outside the bathroom, a dim hallway, and a bedroom door that barely clears a walker. Safety has to connect from room to room.
I also see people choose the wrong materials because they think durable means safe. Polished tile, high-profile area rugs, heavy pocket doors that stick, and tiny mosaic floors with too many grout joints can all create maintenance or traction issues. In shower remodels, homeowners sometimes skip proper waterproofing behind the walls because they never see it. That's a mistake that turns into rot, mold, and a far more expensive repair down the line.
Finally, don't assume every accessibility product belongs in every house. Not everyone needs a wheelchair-accessible full bath right now. Some homeowners need better lighting, railings, and lever handles first. Others need a first-floor laundry setup or a chair-height toilet. The best approach is phased work: fix the highest-risk items first, add structural backing and wiring where future upgrades may go, and avoid spending money on features you won't use yet.
Have a contractor walk the house with the person who'll actually use the space every day. The right plan comes from real movement patterns, not from guesswork.
When opening walls for one project, add blocking, extra lighting boxes, and backing for future railings at the same time. The labor overlap can save you hundreds later.
Cost Breakdown: What to Expect
Costs for aging in place work vary a lot depending on whether you're doing simple safety upgrades or a full accessibility remodel. In Rockland County, general handyman labor often runs about 95 dollars to 140 dollars per hour, with licensed electricians commonly around 125 dollars to 195 dollars per hour and licensed plumbers around 150 dollars to 225 dollars per hour. In Orange County, rates are often a little lower, with handyman work around 85 dollars to 125 dollars per hour, electricians around 110 dollars to 180 dollars per hour, and plumbers around 130 dollars to 200 dollars per hour.
Lower-cost upgrades
Basic improvements are usually the best place to start. Expect roughly 25 dollars to 80 dollars per grab bar for materials, plus installation. Lever door handles may run 35 dollars to 90 dollars each. Motion-sensor night lights, brighter LED fixtures, and non-slip floor treatments are relatively affordable, often from a few hundred dollars up to around 1,500 dollars depending on quantity and wiring. DIY is reasonable for some lighting swaps, handheld shower heads, and removing trip hazards, but railings, electrical work, and anything involving tile or waterproofing should be done professionally.
Mid-range improvements
A solid stair rail upgrade, entry repair, doorway widening, or replacing flooring in a high-risk area usually falls into the mid-range category. Widening a doorway can run from about 450 dollars to 1,200 dollars for a simple interior change and more if electrical or plumbing is in the wall. Replacing slick flooring with quality slip-resistant luxury vinyl plank may run around 8 dollars to 16 dollars per square foot installed, depending on subfloor prep. A good tub safety update with bars, handheld shower, anti-scald valve, and a better toilet can often be done without a full gut renovation.
Larger remodels
A full tub-to-shower conversion with quality waterproofing, tile, grab bars, a built-in bench, and plumbing updates often runs from about 9,000 dollars to 18,000 dollars locally, with more for tight layouts, drain relocation, or premium finishes. A fully curbless shower may require more floor reframing and can push higher. Exterior ramps range widely too, from around 2,000 dollars for a short simple setup to 10,000 dollars or more for a longer custom ramp with turns, railings, and proper landings. In some towns, permits may be needed for structural, electrical, plumbing, or exterior access work, so it's smart to factor that in from the start.
The biggest money decision is usually this: patch now or plan once. Homeowners save the most when they combine related work. For example, if you're redoing the bathroom floor, that's the time to install blocking, update the valve, improve lighting, and set the toilet height right. Doing those pieces separately almost always costs more in the long run.
Bundle projects by trade. Having the electrician add bathroom lights, hall sensors, and stair switches in one visit is usually cheaper than three separate service calls.
Keep caulked joints, rail fasteners, and anti-slip strips checked once or twice a year. Small maintenance prevents water damage and loose hardware that can turn into expensive repairs.
📍 How This Applies to Homes in Rockland & Orange County
Aging in place work hits a little differently in the Hudson Valley because our housing stock and weather create their own set of problems. In Rockland County towns like Nanuet, Spring Valley, Suffern, Nyack, and New City, a lot of homes were built before 1970. That means narrower bathrooms, steeper basement stairs, higher tub walls, and entries that were never designed with walkers, canes, or reduced mobility in mind. In Orange County, especially around Middletown and Newburgh, raised ranches and older colonials often have split-level entries that become a real challenge after a fall, hip surgery, or just years of wear on knees and balance.
Then there's the climate. Harsh winters, freeze-thaw cycles, and black ice do a number on exterior steps, rail posts, sidewalks, and concrete stoops. I've replaced plenty of loose railings and repaired settled landings where water got in, froze, and kept opening the cracks a little wider every season. A safe aging in place plan here should always include the route from the car to the house, not just the rooms inside it.
Spring moisture and summer humidity matter too. Basement stairs get slick, mudrooms stay damp, and older bathrooms without good ventilation hold onto moisture longer than they should. In homes around Nyack or Newburgh with older framing and patchwork renovations, I pay close attention to soft subfloors, ventilation fans, mildew behind shower walls, and doors that swell in humid weather and don't latch cleanly. Those little seasonal issues become bigger safety issues when someone relies on a handrail, walker, or clear path to move around.
What works best in this area is a practical, phased approach. Start with weather-related hazards at entries and exterior steps, then tighten up interior flooring, lighting, and bathroom safety. In a New City ranch, that might mean a tub-to-shower conversion and better hall lighting. In a Middletown raised ranch, it may mean prioritizing rails, a landing, and moving laundry upstairs. Every town has its own housing quirks, but the goal is the same: make the house easier to live in through winter, spring moisture, and summer humidity without losing the character that made you want to stay there in the first place.
Frequently Asked Questions
Ready to Get Started?
Get Your Free Estimate Today
Serving Rockland County & Orange County, NY. Professional results, guaranteed.
Request a Free Estimate →